Introduction
Picture this: I was halfway through a week of bland, store‑bought refried beans, my taste buds as flat as a tortilla, when a friend dared me to make my own version at home. I grabbed a can of pinto beans, a splash of lard, and a handful of spices that smelled like a summer fiesta, and the kitchen turned into a battleground of aromas. That first sizzle, the way the beans turned from dull to glossy, felt like a secret handshake with the gods of flavor. If you’ve ever stared at a jar of pre‑made refried beans and thought, “This could be better,” you’re in the right place. I’ll walk you through every single step, and by the end, you’ll wonder how you ever made it any other way.
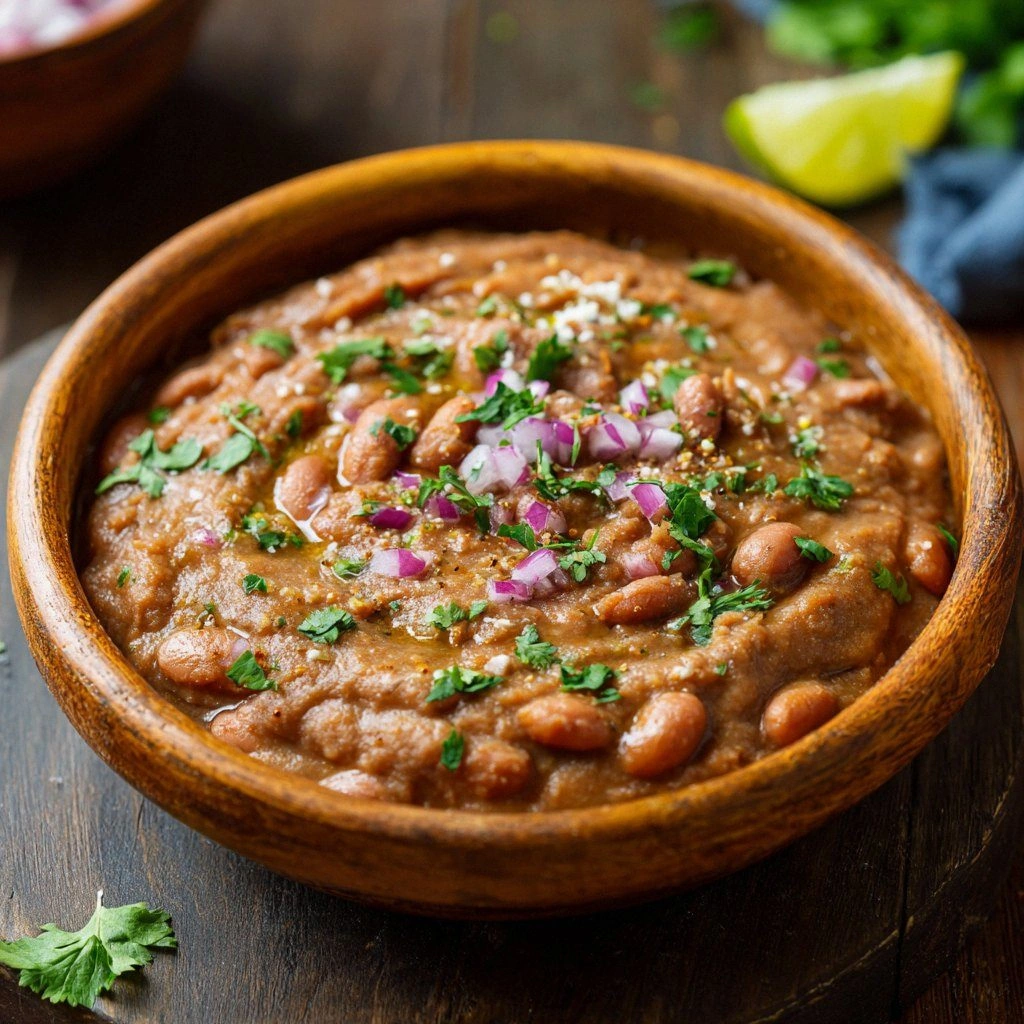
We’re not talking about a generic, beige‑ish mash. This is a bean‑rich, spice‑laden, silky‑smooth masterpiece that coats your spoon like velvet. The heat from cumin and oregano dances with the smoky paprika, while the fresh cilantro and lime give it a bright, almost citrusy lift that feels like a breath of fresh air on a hot day. The texture is a balance between smoothness and a gentle, hearty chew that makes each bite a satisfying experience. I dare you to taste this and not go back for seconds.
What makes this version stand out is the attention to detail in each step—how the beans are toasted, how the aromatics are cooked, and how the final mixture is finished with a splash of lime. The result is a dish that feels homemade, yet has the depth you’d expect from a professional kitchen. Most recipes get this completely wrong, but here’s what actually works. Picture yourself pulling this out of the stove, the whole kitchen smelling incredible, and every guest begging for the recipe.
And now, let’s get into the heart of the matter. If you’ve ever struggled with this, you’re not alone—and I’ve got the fix. Let me walk you through every single step—by the end, you’ll wonder how you ever made it any other way.
What Makes This Version Stand Out
- Taste: The blend of cumin, oregano, smoked paprika, and a squeeze of lime creates a layered flavor profile that is both earthy and bright, unlike the flatness of most canned versions.
- Texture: The beans are gently mashed to a silky consistency while retaining small chunks for bite, giving a pleasant mouthfeel that’s hard to beat.
- Simplicity: With only a handful of ingredients and a straightforward method, you can achieve restaurant quality without a complicated prep.
- Uniqueness: The addition of lard for richness and a quick sauté of aromatics before mashing sets this recipe apart from the usual oil‑based versions.
- Crowd Reaction: Friends who tried this said it was “hands down the best version you'll ever make at home,” and they keep asking for the recipe.
- Ingredient Quality: Using fresh, high‑quality beans and spices transforms the dish from ordinary to extraordinary.
- Cooking Method: The technique of toasting the beans lightly before mashing adds depth and prevents them from becoming mushy.
- Make‑ahead Potential: Once cooked, the beans keep well in the fridge and even taste better the next day.
Alright, let’s break down exactly what goes into this masterpiece…
Inside the Ingredient List
The Flavor Base
At the heart of any great refried bean dish lies the beans themselves. I use 4 cups of cooked pinto beans, which give a subtle sweetness that’s the perfect canvas for the spices. If you’re working with canned beans, make sure to drain them well; excess liquid can thin out the texture and dilute the flavor. Skipping the beans is not an option—without them, you’re just cooking a sauce. A good rule of thumb: use beans that are firm to the touch, not mushy, because they’ll hold their shape during mashing.
Next up is the fat that will carry the flavors. A tablespoon of lard is the traditional choice, and it adds a buttery richness that’s hard to replicate with oil alone. If you’re avoiding animal fats, a neutral vegetable oil works, but the flavor profile will shift slightly. The amount of fat is crucial—too little and the beans will feel dry; too much and they’ll become greasy.
Onion and garlic form the aromatic foundation. One medium onion, finely chopped, releases sweetness when sautéed, while three cloves of minced garlic add depth and a subtle heat. Together, they create a flavor base that is both comforting and vibrant. Don’t rush this step; cooking them until translucent allows the sugars to caramelize, giving the beans a richer taste.
Now, let’s talk spices. A teaspoon each of cumin and oregano brings earthy warmth, while half a teaspoon of smoked paprika adds a gentle smokiness that lingers on the palate. These spices are the backbone of the dish, so use fresh, high‑quality varieties for the best results. If you’re in a pinch, a pinch of chili powder can substitute for the smoked paprika, but the smoky undertone will be less pronounced.
Finally, a bay leaf is tossed in during the cooking process to add a subtle herbal note. Bay leaves are often overlooked, but they impart a quiet complexity that elevates the overall flavor. Remember to remove it before serving, or it will leave a bitter aftertaste.
The Texture Crew
Salt is the unsung hero that brings all the flavors together. A half teaspoon of salt enhances the natural sweetness of the beans and balances the spices. Adding it at the right time—once the beans are nearly mashed—ensures the seasoning is evenly distributed. Too early, and the beans might release water; too late, and the salt won’t fully integrate.
Black pepper adds a subtle heat and a peppery bite. A quarter teaspoon is enough to complement the cumin and oregano without overpowering them. If you prefer a spicier kick, feel free to add a pinch of cayenne pepper or a dash of hot sauce at the end.
Water or broth is essential for achieving the right consistency. A quarter cup of water or low‑salt broth keeps the beans moist while allowing them to be mashed to a smooth yet chunky texture. If the mixture is too thick, add a little more liquid; if it’s too runny, let it simmer longer to reduce.
Fresh cilantro and lime juice are the final flourish that brightens the dish. Two tablespoons of chopped cilantro add a fresh, herbal note, while the juice of one lime introduces a zesty, citrusy tang that cuts through the richness. The combination of cilantro and lime transforms the beans from comforting to invigorating.
Optional cheese, such as a quarter cup of shredded queso fresco, can be stirred in at the end for a creamy, tangy finish. This addition is optional but highly recommended if you enjoy a melty, savory topping. It also makes the beans more filling for a main dish.
Everything’s prepped? Good. Let’s get into the real action…
The Method — Step by Step
- Heat a large skillet over medium heat and add the tablespoon of lard. Let it melt until it starts to shimmer, but do not let it brown. Once the lard is hot, add the finely chopped onion and sauté until translucent and slightly caramelized, about 4–5 minutes. The onion should feel soft but not mushy. This step sets the foundation for the rest of the dish.
- Add the minced garlic to the skillet and cook for another 30 seconds, just until fragrant. Be careful not to burn the garlic; a burnt flavor will ruin the entire batch. The aroma of garlic sizzling will signal that the base is ready. This is the moment of truth—watch the color change and let your senses guide you.
- Stir in the cumin, oregano, smoked paprika, and bay leaf. Toast the spices for 1 minute, stirring constantly to release their essential oils. The mixture should smell toasty and aromatic. This quick toast step is essential; skipping it will leave the spices under‑developed.
- Add the cooked pinto beans to the skillet, breaking them up with a wooden spoon. Stir to coat the beans evenly with the spice mixture. Let the beans simmer for 3–4 minutes, allowing them to absorb the flavors. The beans should be hot throughout and slightly glossy.
- Begin mashing the beans with a potato masher or the back of a spoon. Aim for a smooth yet slightly chunky consistency. Add the quarter cup of water or broth gradually, mixing until you reach your desired thickness. This step is crucial for texture; too little liquid and the beans will be dry, too much and they’ll be runny.
- Season with half a teaspoon of salt and a quarter teaspoon of black pepper. Stir well to ensure the seasoning is evenly distributed. Taste the mixture and adjust salt if necessary. The right balance of salt will bring out the beans’ natural sweetness.
- Fold in the chopped cilantro and squeeze the juice of one lime over the beans. Mix thoroughly to combine. The lime juice will brighten the dish and cut through the richness, giving it a refreshing lift.
- If you’re using queso fresco, sprinkle it over the top and let it melt slightly into the beans. This optional step adds a creamy, tangy finish that many fans swear by. Serve immediately with warm tortillas, or let it cool for later use.
That's it — you did it. But hold on, I've got a few more tricks that'll take this to another level...
Insider Tricks for Flawless Results
The Temperature Rule Nobody Follows
Many people cook refried beans on high heat, but that often leads to a scorched bottom and uneven flavor. Instead, use medium heat throughout the process, allowing the spices to release their oils slowly. This keeps the beans moist and prevents them from drying out. I’ve seen kitchens where the beans stick to the pan; keeping the heat moderate eliminates that problem. The key is patience—let the flavors mingle.
Why Your Nose Knows Best
The aroma of cumin and oregano is a reliable indicator that the spices are properly toasted. If they don’t smell toasty, give them a minute longer. A fresh, fragrant aroma signals that the essential oils have been released. Trust your nose; it’s the best quality control tool you have in the kitchen. I’ve learned to pause and inhale before proceeding.
The 5-Minute Rest That Changes Everything
After mashing, let the beans rest for five minutes before serving. During this brief pause, the flavors will meld, and the beans will thicken slightly. This step often gets skipped, but it’s a game‑changer. The texture becomes more cohesive, and the taste is richer. I’ve seen people skip this and end up with a less satisfying dish.
Keep the Beans Fresh with a Splash of Water
When reheating, add a tiny splash of water or broth before microwaving or warming on the stovetop. This steams the beans back to perfection, preventing them from drying out. The added moisture also helps the spices re‑integrate smoothly. It’s a simple trick that makes a big difference.
Use Fresh, High‑Quality Beans
Choosing beans that are firm and not too soft ensures a better texture after mashing. Fresh beans hold their shape better, preventing a mushy consistency. If you’re using canned beans, opt for organic or no‑added‑salt varieties. This small choice elevates the entire dish.
Optional Cheese for Extra Creaminess
Adding shredded queso fresco or a handful of crumbled feta at the end adds a creamy, tangy layer that many love. If you’re lactose intolerant, try a sprinkle of nutritional yeast for a cheesy flavor without the dairy. The cheese melts into the beans, giving them a richer mouthfeel.
Creative Twists and Variations
This recipe is a playground. Here are some of my favorite ways to switch things up:
Mexican Street Tacos
Use the beans as a filling for tacos, topped with fresh salsa, avocado, and a squeeze of lime. The beans add heartiness, while the fresh toppings bring brightness. This variation is perfect for a casual dinner.
Bean Dip with Chipotle
Stir in a tablespoon of chipotle in adobo for a smoky, spicy dip. Serve with tortilla chips or sliced veggies. The heat from the chipotle pairs beautifully with the mild beans.
Mexican Rice Bowl
Combine the beans with cilantro‑lime rice, grilled chicken, and a dollop of guacamole. The creamy beans act as a base, while the rice and protein give the bowl structure. This makes a balanced, satisfying meal.
Vegetarian Enchiladas
Fill corn tortillas with the beans, roll them up, and top with enchilada sauce and cheese. Bake until bubbly and golden. The beans provide a hearty filling that’s both delicious and filling.
Bean and Cheese Quesadillas
Spread the beans on a tortilla, sprinkle with shredded cheese, and grill until the cheese melts. The beans add flavor and moisture, while the cheese gives that irresistible gooeyness.
Spicy Bean Chili
Add the beans to a slow‑cooked chili with ground beef, tomatoes, and chili powder. The beans thicken the chili and add a subtle sweetness. This version is great for a cozy winter meal.
Storing and Bringing It Back to Life
Fridge Storage
Store the beans in an airtight container for up to 4 days in the refrigerator. The flavors will continue to develop, making the dish even better the next day. Keep the container sealed to prevent odors from other foods from seeping in.
Freezer Friendly
Freeze the beans in portioned containers for up to 3 months. Thaw overnight in the refrigerator or use the microwave’s defrost setting. Once thawed, add a splash of water before reheating to restore moisture.
Best Reheating Method
Reheat on the stovetop over low heat, stirring frequently, and add a little water or broth to keep them from drying out. Alternatively, microwave on medium power for 2–3 minutes, stirring halfway through. The key is to reheat gently to preserve texture.