I still remember the Great Chili Disaster of 2019 like it happened yesterday. There I was, standing over my stove with a pot of what looked like beige wall-paper paste, wondering how something that started with such promise could end up tasting like wet cardboard. My dinner guests were arriving in an hour, my kitchen smelled like disappointment, and I was this close to ordering pizza and pretending the whole thing never happened. But here's the thing about kitchen disasters — they often lead to our greatest triumphs. That night, fueled by desperation and a half-eaten bag of tortilla chips, I started over from scratch and accidentally created what would become my signature white chicken chili. The room went silent when everyone took their first bite, and then came the chorus of "Oh my God, what is this sorcery?"
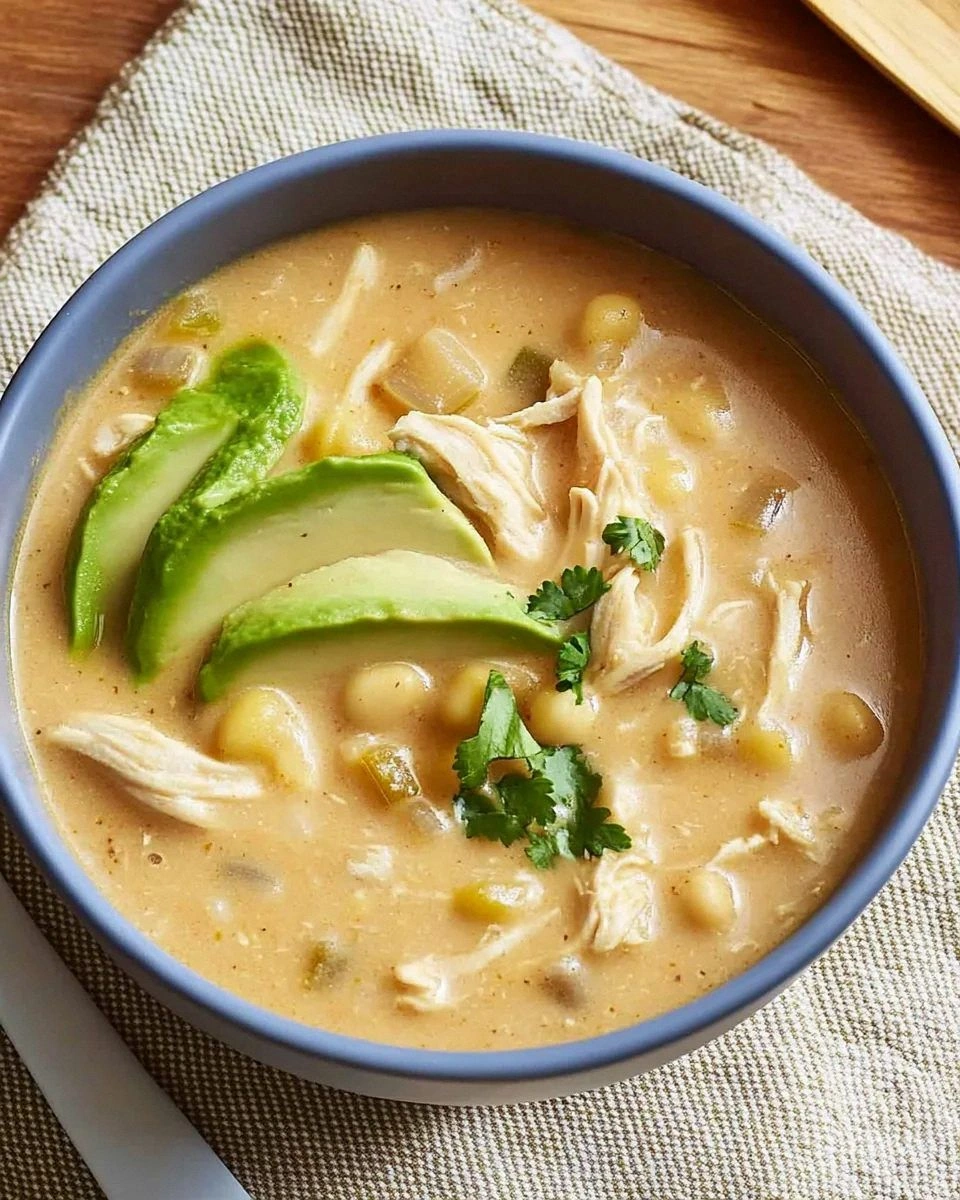
Picture this: tender chunks of chicken swimming in a silky, creamy broth that's been kissed by fire-roasted green chiles and whispered to by cumin and coriander. The aroma alone is enough to make your neighbors knock on your door asking if they can move in. This isn't your typical chili — it's lighter, brighter, and somehow manages to be both comforting and exciting at the same time. The broth is so luxuriously thick it coats your spoon like velvet, but it's not heavy or greasy like those traditional red chilis that sit in your stomach like a brick. Every spoonful delivers this perfect balance of creamy, spicy, and tangy that makes your taste buds do a happy dance.
What really sets this recipe apart is the technique that most people completely miss. While they're busy dumping everything in a pot and hoping for the best, we're going to layer flavors like we're building a symphony. We'll bloom our spices in oil until they smell like heaven, we'll create a roux that thickens the broth to perfection, and we'll finish with a squeeze of lime that makes the whole thing sing. Trust me, once you taste this version, you'll never go back to those bland, watery excuses for white chicken chili that pass for food on the internet.
Let me walk you through every single step — by the end, you'll wonder how you ever made it any other way.
What Makes This Version Stand Out
- Flavor Bomb: We start by toasting whole spices in oil until they pop and release their essential oils, creating a flavor base that makes supermarket chili packets taste like cardboard. This one simple step transforms ordinary ingredients into something extraordinary.
- Texture Perfection: Instead of watery broth, we create a velvety base using a combination of cream cheese and white beans that have been partially pureed. The result is a luxurious mouthfeel that coats every piece of chicken like a warm hug.
- Weeknight Warrior: Despite tasting like it simmered all day, this entire recipe comes together in under 45 minutes. I've timed it — you can walk in the door after work and have dinner on the table before anyone starts asking "When's it ready?"
- Leftover Legend: This chili actually tastes better the next day once all those flavors have had time to mingle and get to know each other. Make a double batch and you're set for lunches all week.
- Crowd Magnet: I've never met anyone who didn't go back for seconds, and I've served this to some seriously picky eaters. Even my friend who claims to hate beans inhaled two bowls and asked for the recipe.
- Pantry Friendly: Every ingredient is something you can find at a basic grocery store, no fancy specialty shops required. No hunting for obscure peppers or expensive cuts of meat.
- Customizable Comfort: Want it spicier? Add more jalapeños. Prefer it mild? Skip them entirely. Vegetarian? Swap the chicken for extra beans. This recipe bends to your will.
Alright, let's break down exactly what goes into this masterpiece...
Inside the Ingredient List
The Flavor Base
Great white chicken chili starts with building layers of flavor, and our foundation is built on aromatics that would make any chef proud. We're talking about onions that get cooked until they're translucent and sweet, releasing their natural sugars that will later caramelize and add depth to our broth. The garlic goes in next, and here's where most people mess up — they add it too early and it burns, turning bitter and ruining everything. We're going to wait until the onions are perfectly soft before adding minced garlic for just 30 seconds, enough to release its perfume without letting it brown.
Cumin is the workhorse spice that gives this chili its distinctive warmth and earthiness. I always use whole cumin seeds that I toast and grind myself because the difference is night and day. Those pre-ground bottles sitting in your spice rack for three years? They're basically sawdust. Fresh ground cumin smells like a warm summer day in New Mexico and tastes like the essence of comfort food. Coriander seeds add a citrusy note that brightens everything up, while oregano brings that herbal backbone that makes you think "This tastes like it simmered all day."
The Texture Crew
Here's where we get scientific about creating that perfect, creamy texture without it being heavy or gloppy. Great Northern beans are our secret weapon — they're mild, creamy, and blend beautifully into the broth. We'll reserve about a cup of these beans to puree into a smooth paste that thickens the chili naturally, no flour or cornstarch needed. This technique gives us body without that pasty, raw flour taste that ruins so many cream-based soups.
Cream cheese might seem like an odd addition to chili, but hear me out. When we add it at just the right temperature and whisk it in properly, it melts into silky smoothness and gives the broth this luxurious richness that heavy cream could never achieve. The key is using it at room temperature and adding it gradually, whisking constantly so it incorporates smoothly instead of forming those annoying little cream cheese lumps that refuse to disappear.
The Unexpected Star
Green chiles are the secret weapon that takes this from good to legendary. Not just any canned green chiles — we're talking about fire-roasted Hatch green chiles if you can find them, or at minimum, whole green chiles that you roast yourself under your broiler until the skins blister and blacken. That char adds a smoky depth that makes people ask "What is that flavor?" in the best possible way. If you absolutely must use canned, look for the ones labeled "fire-roasted" and you'll still get most of that magical flavor.
White pepper might seem like an odd choice in a white chili, but it's the invisible flavor enhancer that makes everything taste more like itself. Black pepper would muddy the color and add harsh notes, while white pepper brings gentle heat and complexity without being obvious about its presence.
The Final Flourish
Fresh lime juice added at the very end is what makes all the flavors pop and sing in harmony. It cuts through the richness of the cream cheese and brightens all those warm, earthy spices. Don't even think about using bottled lime juice — it's like comparing a fresh summer tomato to ketchup. The zest goes in too, because why waste all that aromatic oil trapped in the skin?
Fresh cilantro might be controversial, but in this dish, it's essential. The herbaceous, slightly citrusy notes tie everything together and make the chili taste fresh and vibrant rather than heavy and stodgy. If you're one of those people who think cilantro tastes like soap, you can substitute fresh parsley, but you'll be missing out on what makes this recipe special.
Everything's prepped? Good. Let's get into the real action...
The Method — Step by Step
- Heat a heavy-bottomed Dutch oven over medium heat and add two tablespoons of oil. When the oil shimmers like a mirage on a hot day, toss in your whole cumin and coriander seeds. Now here's where you need to pay attention — within 30 seconds, you'll hear them start to pop like tiny fireworks. That's your cue to swirl the pan constantly, letting the spices toast until they smell like you've walked into the best Mexican restaurant of your life. This step is non-negotiable; skip it and you'll have flat, boring chili that tastes like it came from a can.
- Add your diced onions with a generous pinch of salt and cook them slowly, stirring occasionally, until they turn translucent and start to take on golden edges. This takes about 8-10 minutes, and it's worth every second. The salt helps draw out moisture and concentrate the natural sweetness. If you rush this step, your entire chili will taste sharp and aggressive instead of smooth and mellow.
- Clear a space in the center of the pot and add your minced garlic, letting it sizzle for just 30 seconds until fragrant. Garlic burns faster than a vampire in sunlight, so have your next ingredients ready to go. You'll know it's ready when your kitchen smells like you're being hugged by a giant garlic clove.
- Add your chicken that's been cut into bite-sized pieces, along with a healthy dose of salt and pepper. Here's where most people mess up — they crowd the pot and end up steaming their chicken instead of browning it. Work in batches if you need to, letting each piece develop a golden crust that will add incredible depth to your final dish. That brown stuff stuck to the bottom? That's liquid gold, packed with umami that will dissolve into your broth.
- Sprinkle in your oregano, white pepper, and flour, stirring constantly for 2 minutes to cook out the raw flour taste. This roux is what will give your chili body and help it coat your spoon like liquid velvet. The flour should turn slightly golden but not brown — you're looking for a blonde roux that will thicken without adding a floury taste.
- Slowly pour in your chicken broth while whisking constantly to prevent lumps from forming. Add it in a steady stream, whisking like your life depends on it. Those brown bits on the bottom? They'll dissolve into the broth, adding layers of flavor that would take hours to develop otherwise.
- Add your white beans, reserving about a cup for later. Bring everything to a gentle simmer and let it bubble away for 15 minutes, stirring occasionally. The broth will start to thicken and take on a creamy consistency that makes you want to dive in face-first.
- While your chili simmers, take that reserved cup of beans and mash them into a smooth paste with a fork or blend them briefly. Stir this bean paste back into the pot — this is our secret weapon for creating that luxurious, creamy texture without adding heavy cream or flour slurries that taste like paste.
- Reduce the heat to low and add your room-temperature cream cheese in small cubes, whisking constantly until completely melted and incorporated. This is the moment of truth — add it too fast and you'll get cream cheese lumps that refuse to disappear. Take your time, whisk constantly, and watch as your broth transforms into silky smoothness.
- Add your green chiles, tasting as you go. Start with half and add more until it reaches your preferred level of heat and flavor. Let everything simmer together for another 5 minutes to let the flavors marry, then finish with fresh lime juice and cilantro. The lime juice will make everything pop and taste fresh and vibrant.
That's it — you did it. But hold on, I've got a few more tricks that'll take this to another level...
Insider Tricks for Flawless Results
The Temperature Rule Nobody Follows
Here's the thing about cream cheese — it's a diva that demands to be treated just right. When you add cold cream cheese to hot liquid, it seizes up faster than a teenager asked to clean their room. Always, always let it come to room temperature first. I usually cut it into cubes and let it sit out while I'm prepping everything else. If you're in a rush, you can microwave it for 10-15 seconds, but watch it like a hawk because it goes from firm to liquid in seconds.
Why Your Nose Knows Best
Your sense of smell is your best kitchen tool, especially when it comes to this recipe. When those spices are toasting, don't just set a timer and walk away. Stand there and inhale deeply. When the cumin smells nutty and warm instead of dusty, it's done. When the onions smell sweet and mellow instead of sharp and aggressive, they're ready. If your kitchen doesn't smell like you want to bottle the air and sell it as perfume, you haven't cooked them long enough.
The 5-Minute Rest That Changes Everything
I know you're going to want to dive right in, but here's where you need to practice patience. Once your chili is done, turn off the heat and let it rest for 5 minutes. This brief pause allows the flavors to settle and meld together. It's like letting a fine wine breathe — everything becomes more harmonious and balanced. Plus, it's the perfect time to set the table, slice some avocado, or warm up tortillas.
The Salt Strategy
Most people add all their salt at the beginning and wonder why their chili tastes flat. Salt is a flavor enhancer, not just a seasoning. Add some when you're cooking the onions to draw out moisture, add more when you add the chicken to help it brown, and finish with a final seasoning at the end. Taste and adjust — sometimes a tiny pinch more salt at the end is all it takes to make every other flavor pop.
The Lime Timing
Fresh lime juice should go in at the very end, right before serving. If you add it too early and then reheat the chili, the lime juice cooks off and leaves a bitter taste. I like to add half the lime juice while it's still on the stove, then pass lime wedges at the table so everyone can add more to taste. The brightness of fresh lime is what takes this from heavy comfort food to something you could eat every day.
Creative Twists and Variations
This recipe is a playground. Here are some of my favorite ways to switch things up:
The Seafood Spin-Off
Swap the chicken for shrimp or white fish like cod or halibut. Add the seafood in the last 5 minutes of cooking so it doesn't turn rubbery. The delicate seafood pairs beautifully with the creamy broth and adds a touch of elegance that makes this dinner party worthy.
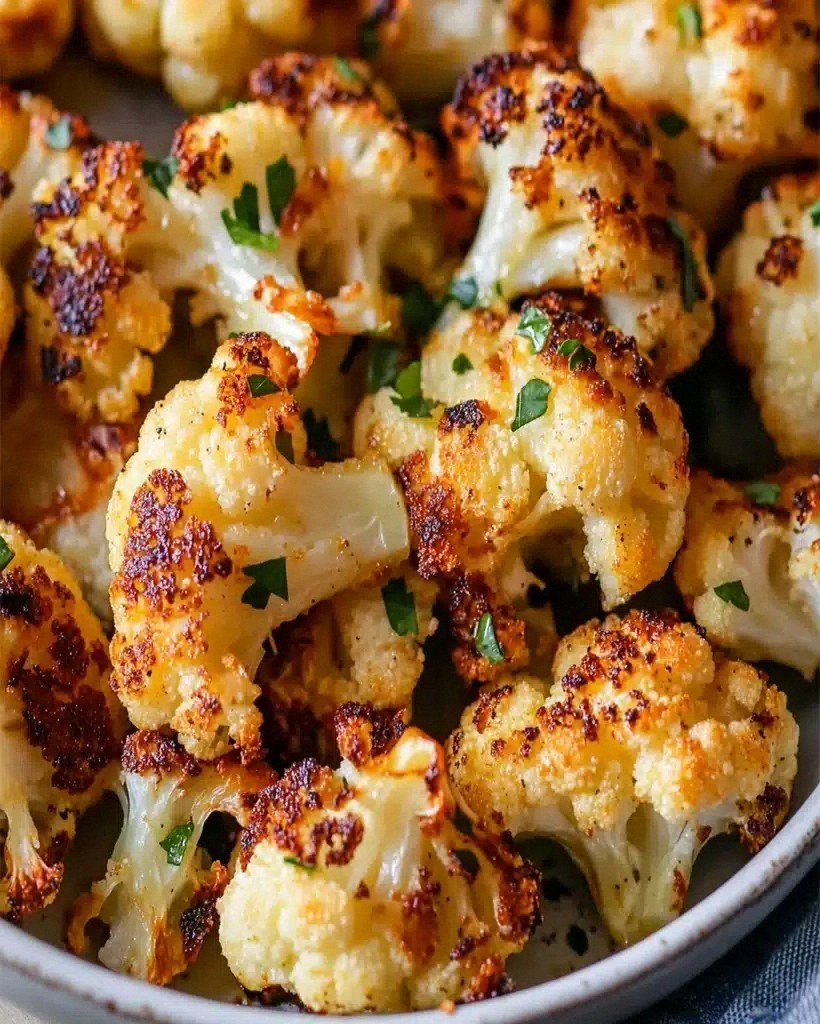
The Vegetarian Victory
Replace the chicken with roasted cauliflower florets and add an extra can of beans. The roasted cauliflower adds meaty texture and those caramelized edges that bring incredible depth. Use vegetable broth instead of chicken broth and you've got a vegetarian version that even meat lovers devour.
The Super-Heat Version
Add a minced habanero along with the jalapeños, or swap in serrano peppers for more heat. Keep the seeds in if you want to clear your sinuses. I like to serve this with cooling toppings like sour cream and avocado to balance the fire.
The Green Goddess
Add a handful of fresh spinach or kale in the last 2 minutes of cooking. The greens wilt into the broth and add nutrients without changing the flavor much. It's my sneaky way of getting extra vegetables into my kids.
The Smoky Sensation
Add a teaspoon of smoked paprika or chipotle powder when you're toasting your spices. This adds a subtle smokiness that makes the chili taste like it simmered over a campfire. It's especially good in winter when you want that cozy, fireside feeling.
The Tex-Mex Takeover
Add a cup of frozen corn and a can of diced tomatoes with green chiles (Rotel style). Top with crushed tortilla chips and serve with cornbread on the side. This version is heartier and more like a traditional chili, but still maintains that white chili identity.
Storing and Bringing It Back to Life
Fridge Storage
Let the chili cool completely before transferring to airtight containers. It'll keep for up to 4 days in the refrigerator, though in my house it never lasts more than 2 days before someone finishes it off. Store it in portion-sized containers so you can grab and reheat individual servings. The flavors actually improve after a day in the fridge as everything melds together.
Freezer Friendly
This chili freezes beautifully for up to 3 months. I like to freeze it in quart-sized freezer bags, laying them flat so they stack efficiently. Thaw overnight in the refrigerator or use the defrost setting on your microwave. Pro tip: freeze some in ice cube trays for quick flavor boosters — throw a cube into soup or rice for instant deliciousness.
Best Reheating Method
The key to reheating is gentle heat and a splash of broth or water. Reheat slowly over medium-low heat, stirring frequently, and add liquid a tablespoon at a time until it reaches your desired consistency. Never reheat in the microwave at full power — you'll end up with rubbery chicken and broken broth. If you're in a rush, microwave at 70% power in 30-second intervals, stirring between each burst.