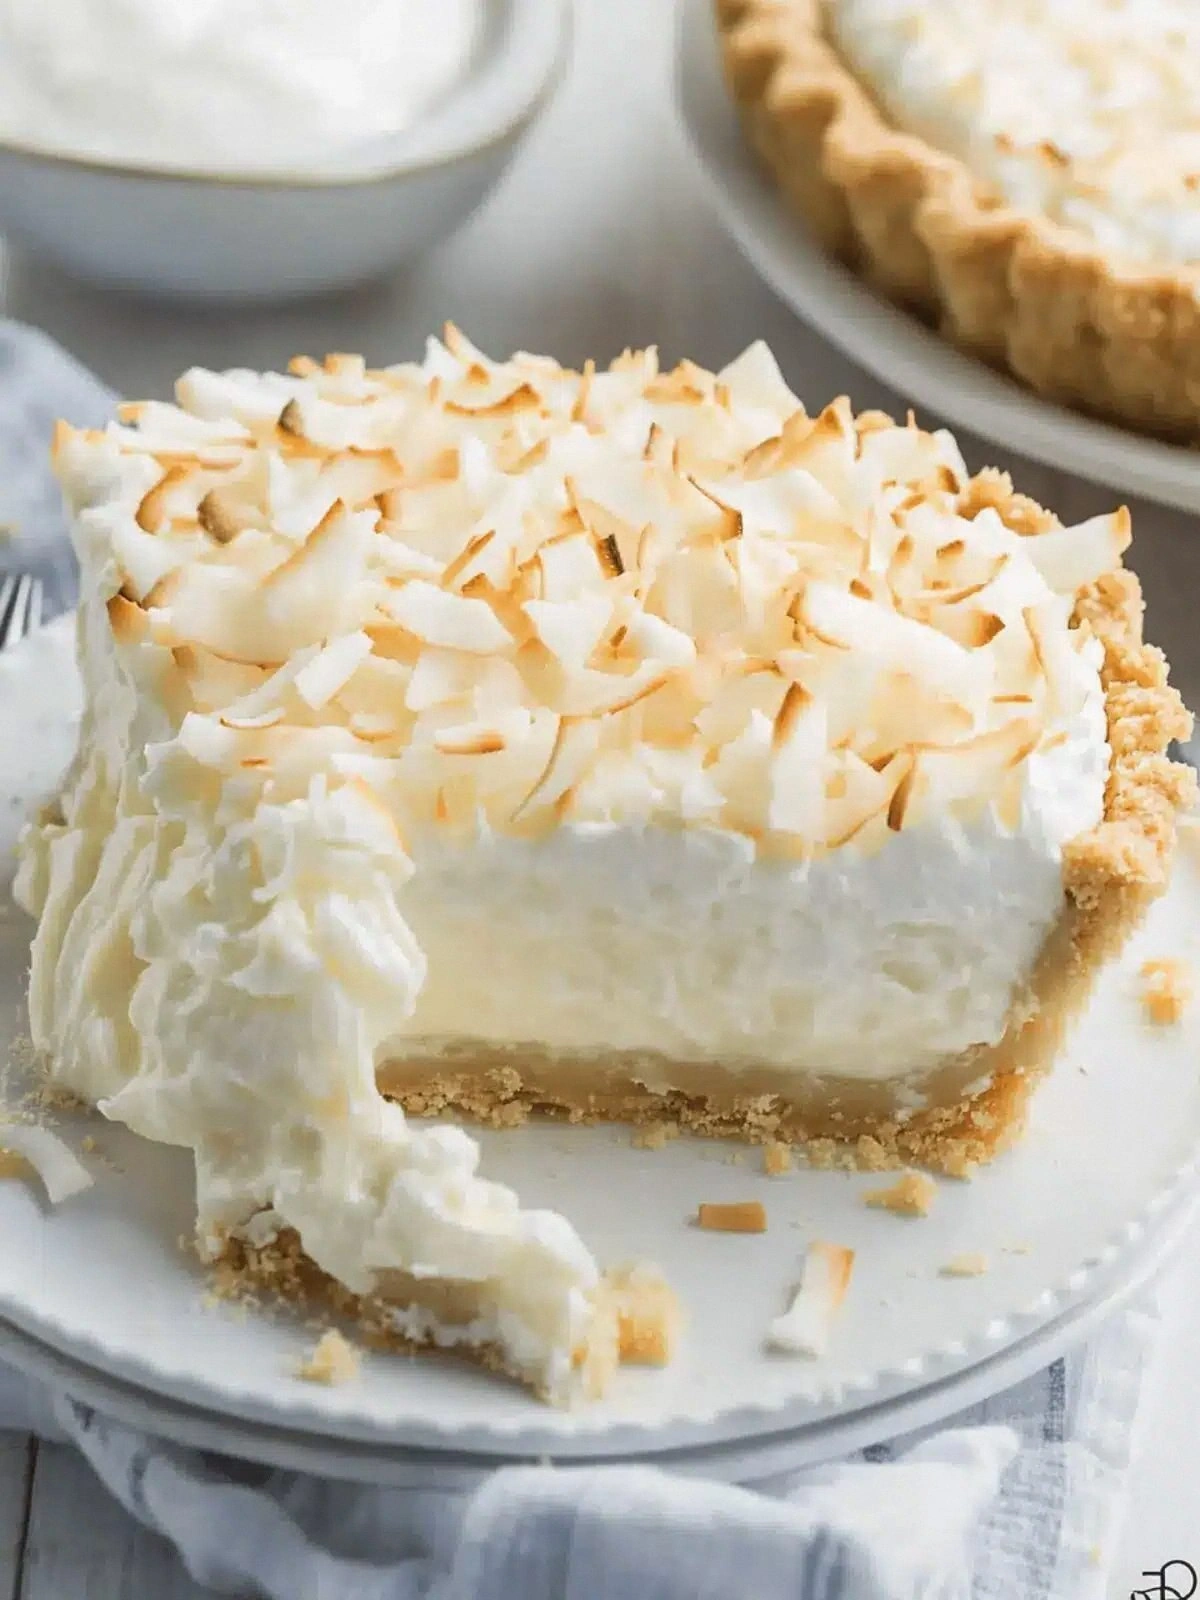
It started with a kitchen disaster that I still laugh about. I was attempting a low‑carb dessert for a friend who swore she could never handle sugar, and the first batch of cheesecake I made ended up looking like a melted, soggy mess that smelled like burnt butter. The moment I tasted it, I knew I was onto something that could actually satisfy the sweet tooth while keeping the carb count low. I was determined to find the secret that would make the texture silky, the flavor bright, and the finish utterly irresistible.
Picture this: the kitchen is a battlefield of aromas—almond flour crunching in a saucepan, the buttery scent of melted butter dancing with the sharp tang of lemon, and the faint, sweet whisper of powdered sweetener. You can hear the gentle sizzle as the crust forms, the soft hiss of cream whipping to a glossy sheen, and the quiet pop when the final glaze sets. The colors are a buttery ivory base with specks of dark berries that pop like tiny jewels, and the texture is a creamy dream that feels like velvet on the tongue. The taste is a harmonious blend of citrus brightness, subtle nutty undertones, and a sweet finish that lingers without cloying.
What makes this version stand out is the meticulous balance of ingredients and techniques that elevate a simple no‑bake cheesecake into a showstopper. I’ve stripped away the fluff, replaced high‑glycemic sweeteners with low‑carb alternatives, and added a surprising twist that gives the crust a crisp edge while keeping the center luxuriously smooth. The result is a dessert that’s both indulgent and guilt‑free, a sweet revelation that will make you question every other cheesecake recipe you’ve ever tried. I dare you to taste this and not go back for seconds.
If you’ve ever struggled with making a no‑bake cheesecake that actually tastes good, you’re not alone. I’ve been there, watching the mixture collapse or the crust turn rubbery, and I’ve learned the exact tweaks that fix these common problems. The next section will break down why this recipe is hands down the best version you’ll ever make at home. Let me walk you through every single step—by the end, you’ll wonder how you ever made it any other way.
What Makes This Version Stand Out
- Taste: The combination of lemon zest, vanilla, and a subtle hint of citrus from the fresh berries creates a flavor profile that’s bright and sophisticated, unlike the bland sweetness of traditional cheesecakes.
- Texture: The crust is crisp yet buttery, while the filling is silky and airy, thanks to the careful whipping of cream cheese and the addition of liquid stevia for a smooth finish.
- Simplicity: No oven, no complicated steps—just a few ingredients you can find in any grocery store, and a handful of kitchen tools.
- Uniqueness: The use of powdered erythritol and liquid stevia together creates a balanced sweetness that’s both low‑carb and indulgently sweet.
- Crowd Reaction: Friends who are skeptical of low‑carb desserts rave about the rich, creamy texture and the burst of berry freshness.
- Ingredient Quality: Fresh, high‑quality almond flour and coconut flour give the crust a natural nutty flavor that elevates the entire dish.
- Cooking Method: The no‑bake technique saves time, energy, and the hassle of oven cleanup while still delivering a professional‑grade dessert.
- Make‑Ahead Potential: You can prepare the crust and filling a day in advance, refrigerate, and serve with a quick glaze—ideal for entertaining.
Alright, let's break down exactly what goes into this masterpiece...
Inside the Ingredient List
The Flavor Base
Almond Flour (0.75 cup): This is the backbone of the crust, providing a subtle nutty flavor that pairs beautifully with the buttery undertones. Skipping it will leave your base flat and lacking depth. If you prefer a slightly sweeter crust, you can add a teaspoon of powdered erythritol here, but be careful not to overpower the other flavors.
Coconut Flour (0.25 cup): Coconut flour adds a hint of tropical sweetness and helps bind the crust together. It’s also incredibly low in carbs, making it the perfect complement to almond flour. If you’re allergic to nuts, substitute it with oat flour—just keep an eye on the moisture level.
Powdered Sweetener (1 tbsp): This sweetener balances the tartness of the lemon and the richness of the cream cheese. It’s a low‑glycemic option that won’t spike blood sugar. For a more natural touch, you can use a small amount of monk fruit sweetener.
The Texture Crew
Butter (0.25 cup): Butter melts into the crust, giving it a rich, buttery flavor that’s essential for that mouth‑watering finish. If you’re vegan, a plant‑based butter works fine, but the flavor profile will shift slightly.
Cream Cheese (1.5 cups): The star of the filling, cream cheese provides a smooth, dense texture that’s the hallmark of a great cheesecake. Use full‑fat for the creamiest result; low‑fat will leave the filling a bit watery.
Powdered Erythritol (0.66 cup): This sweetener blends seamlessly into the filling, ensuring a sweet taste without the aftertaste that some sugar substitutes bring. If you prefer a sweeter finish, add a tablespoon more.
The Unexpected Star
Liquid Stevia (10 drops): Stevia gives a subtle, natural sweetness that balances the erythritol’s sharpness. It’s potent, so a few drops are enough. If you’re sensitive to stevia, reduce the amount to five drops and compensate with a touch more powdered sweetener.
Heavy Cream (1 cup + 0.75 cup): The two separate additions of heavy cream provide richness and a silky mouthfeel to the filling. The first cup is whisked into the cream cheese mixture, while the second cup is folded in at the end to keep the filling light. Use a double‑cream for an extra luscious texture.
The Final Flourish
Lemon Juice (1 tsp) & Vanilla Extract (1 tbsp): These aromatics lift the filling, adding brightness and depth. Lemon juice also helps stabilize the cream cheese, while vanilla rounds out the flavor. If you’re feeling adventurous, try a splash of almond extract instead of vanilla for a nutty twist.
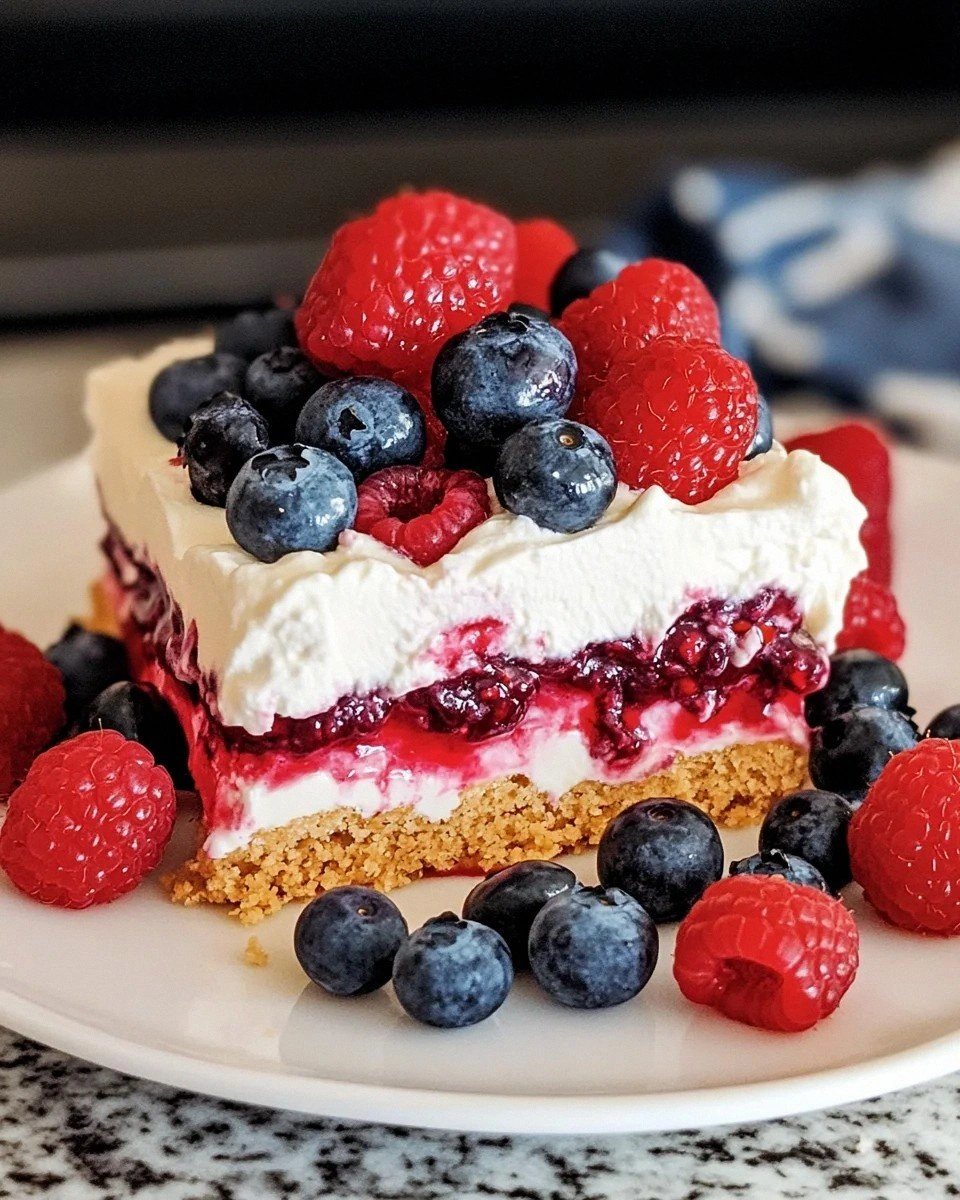
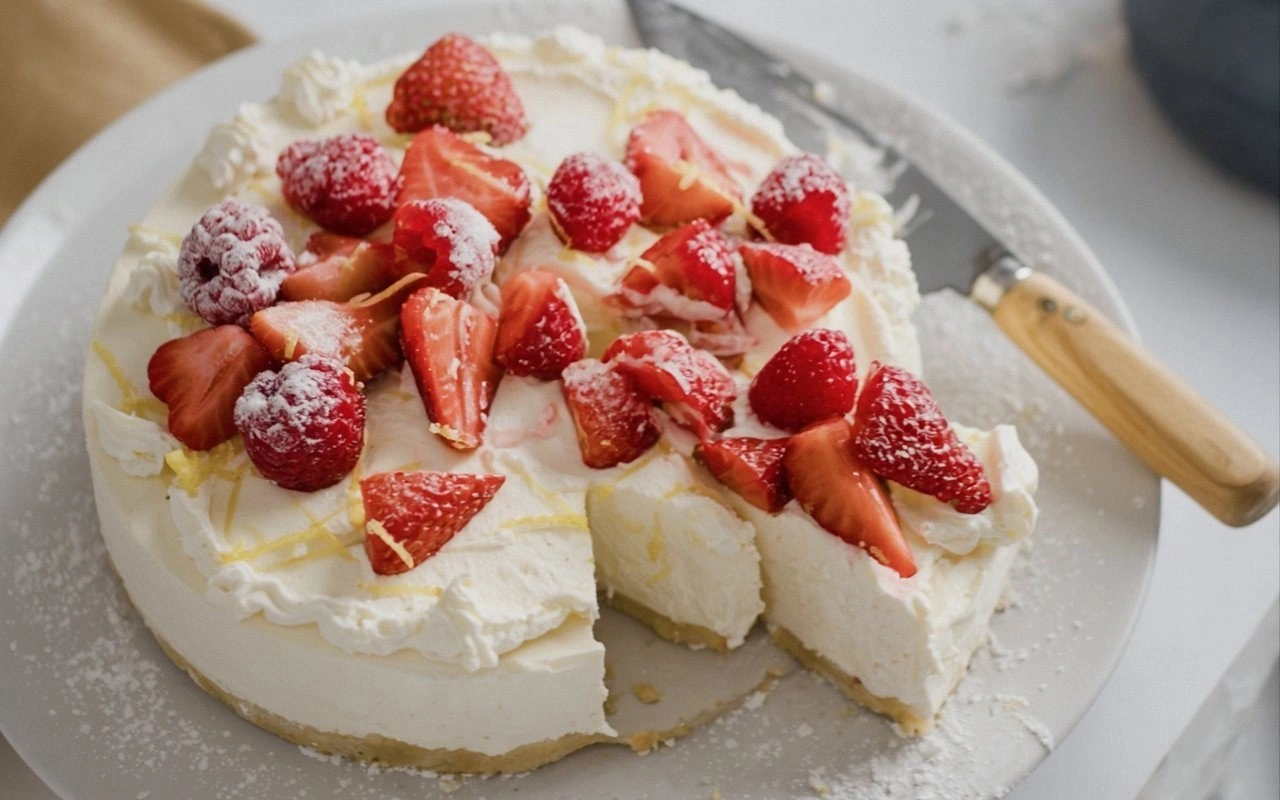
Fresh Berries (0.5 cup strawberries + 0.33 cup raspberries): The berries add a burst of natural sweetness and a pop of color that makes the dessert visually stunning. They also provide antioxidants that complement the low‑carb profile. Freeze them for a chilled, slushy effect if you’re serving on a hot day.
Everything's prepped? Good. Let's get into the real action...
The Method — Step by Step
- Step 1: Prepare the Crust. In a medium bowl, combine almond flour, coconut flour, powdered sweetener, and a pinch of salt. Add the melted butter and mix until the mixture resembles coarse crumbs. Press the dough evenly into the bottom of a 9‑inch springform pan lined with parchment. Chill in the fridge for 10 minutes so it firms up before the filling is added. This step is crucial for a solid base; don’t skip the chilling—your cheesecake will collapse otherwise.
- Step 2: Blend the Cream Cheese. In a large mixing bowl, beat the cream cheese with an electric hand mixer until smooth and creamy, about 2 minutes. Add the powdered erythritol, liquid stevia, lemon juice, and vanilla extract, and continue beating until fully incorporated. The mixture should look silky and have no lumps—if it’s gritty, give it another minute of mixing. This ensures a smooth filling that won’t crack when set.
- Step 3: Whip the Heavy Cream. In a separate bowl, whip the first cup of heavy cream to soft peaks. Gently fold the whipped cream into the cream cheese mixture, being careful not to deflate the air. The filling should feel light and airy, yet still dense enough to hold shape. If you want a richer texture, use full‑fat cream instead of light.
- Step 4: Combine. Pour the filling over the chilled crust, smoothing the top with a spatula. The edges should be level with the crust. This is the moment of truth—if the filling is too thick, it will be hard to spread; if too thin, it will be watery. Adjust consistency by adding a little more cream cheese if needed.
- Step 5: Chill. Cover the pan with plastic wrap and refrigerate for at least 4 hours, preferably overnight. The cheesecake will firm up and the flavors will meld. A quick 30‑minute chill will set the edges, but overnight gives the fullest flavor.
- Step 6: Prepare the Berry Topping. While the cheesecake chills, blend the strawberries and raspberries into a smooth puree. Strain through a fine mesh to remove seeds for a silky topping. Measure 1 cup of the puree and set aside. This topping adds a vibrant color and a burst of natural sweetness that balances the richness of the filling.
- Step 7: Add the Final Cream. Whip the remaining 0.75 cup of heavy cream to soft peaks. Fold this into the berry puree until fully blended. This step creates a glossy glaze that will sit atop the cheesecake, adding a fresh, fruity contrast. If you like a thicker glaze, add a tablespoon of powdered erythritol to sweeten slightly.
- Step 8: Assemble the Final Touch. Spoon the berry‑cream glaze over the chilled cheesecake, spreading it evenly with a spatula. Let it set in the fridge for 15 minutes before serving. The glaze will firm slightly, creating a beautiful finish that’s both edible and decorative.
- Step 9: Serve. Release the springform pan, slice with a hot knife dipped in warm water for clean cuts. Serve chilled, optionally topped with fresh berries or a dusting of powdered erythritol. Enjoy the creamy, citrusy, berry‑rich flavor that makes this a standout dessert.
That's it — you did it. But hold on, I've got a few more tricks that'll take this to another level...
Insider Tricks for Flawless Results
The Temperature Rule Nobody Follows
Temperature is everything when it comes to a no‑bake cheesecake. The crust should be cold enough to hold its shape but not frozen, while the filling must be at room temperature to blend smoothly. If you notice the filling is too thick, let it sit for a few minutes; if it’s too runny, add a bit more cream cheese and mix again. This subtle adjustment can make the difference between a creamy masterpiece and a soggy disaster.
Why Your Nose Knows Best
Before you even taste the cheesecake, give it a sniff. A faint, buttery aroma is a sign that the crust is properly toasted, while a strong lemon scent indicates that the filling has absorbed the citrus well. If the aroma feels off, it might mean you missed a step, so double‑check your mixing and chilling times. Trust your nose; it’s the most reliable quality control tool you’ll have.
The 5-Minute Rest That Changes Everything
After you pour the filling into the crust, let the cheesecake rest for 5 minutes before chilling. This short pause allows the filling to settle and reduces the chance of cracks forming during refrigeration. It also gives the crust a chance to absorb any excess moisture, ensuring a firmer base.
The Perfect Glaze Balance
If you prefer a sweeter glaze, add a teaspoon of powdered erythritol to the berry‑cream mixture. For a tangier finish, a splash of fresh lemon juice can brighten the flavor profile. Remember, the glaze should be thick enough to hold its shape but still glossy and fluid when you spread it.
The Secret to a Smooth Finish
Use a fine mesh sieve when straining the berry puree. Any seeds or pulp left in the glaze will create an uneven texture that can be jarring when you cut into the cheesecake. Straining twice ensures a silky topping that complements the creamy filling perfectly.
Creative Twists and Variations
This recipe is a playground. Here are some of my favorite ways to switch things up:
Chocolate Swirl Variation
Swirl a tablespoon of unsweetened cocoa powder into the cream cheese mixture before adding the whipped cream. The result is a chocolate‑cream layer that adds depth and a rich chocolate finish. Pair it with a drizzle of melted dark chocolate on top for an extra indulgence.
Tropical Paradise
Replace the berry puree with a blend of mango and pineapple. Add a splash of coconut milk for extra tropical flavor. This version is perfect for summer parties and brings a refreshing, sweet‑tart balance.
Minty Fresh
Add a teaspoon of fresh mint extract to the filling for a cool, refreshing twist. Top with a few fresh mint leaves and a sprinkle of crushed pistachios for a visual and flavor contrast. Mint pairs beautifully with the creamy base and brightens the overall taste.
Nutty Crunch
Fold finely chopped walnuts or pecans into the crust before chilling. The nuts add a delightful crunch that contrasts the smooth filling. This variation also boosts the protein content, making it a more satisfying dessert.
Low‑Sugar Vanilla Bean
Swap the vanilla extract for a vanilla bean paste for an intensified vanilla flavor. Use the bean seeds in the filling for an aromatic touch. The result is a richer, more fragrant cheesecake that feels luxurious.
Storing and Bringing It Back to Life
Fridge Storage
Store the cheesecake in the refrigerator for up to 5 days in an airtight container. Keep it chilled to preserve the creamy texture. If you want to serve it at room temperature, let it sit for 10–15 minutes before cutting.
Freezer Friendly
Wrap the cheesecake tightly in plastic wrap and place it in a freezer bag. It will keep well for up to 2 months. Thaw overnight in the refrigerator before serving to maintain the silky texture.
Best Reheating Method
To revive a frozen cheesecake, let it thaw in the fridge for 12–24 hours. Before serving, add a splash of water to the glaze and gently warm it in a microwave for 10–15 seconds. The water steams the glaze back to perfection, giving it a fresh, glossy finish.