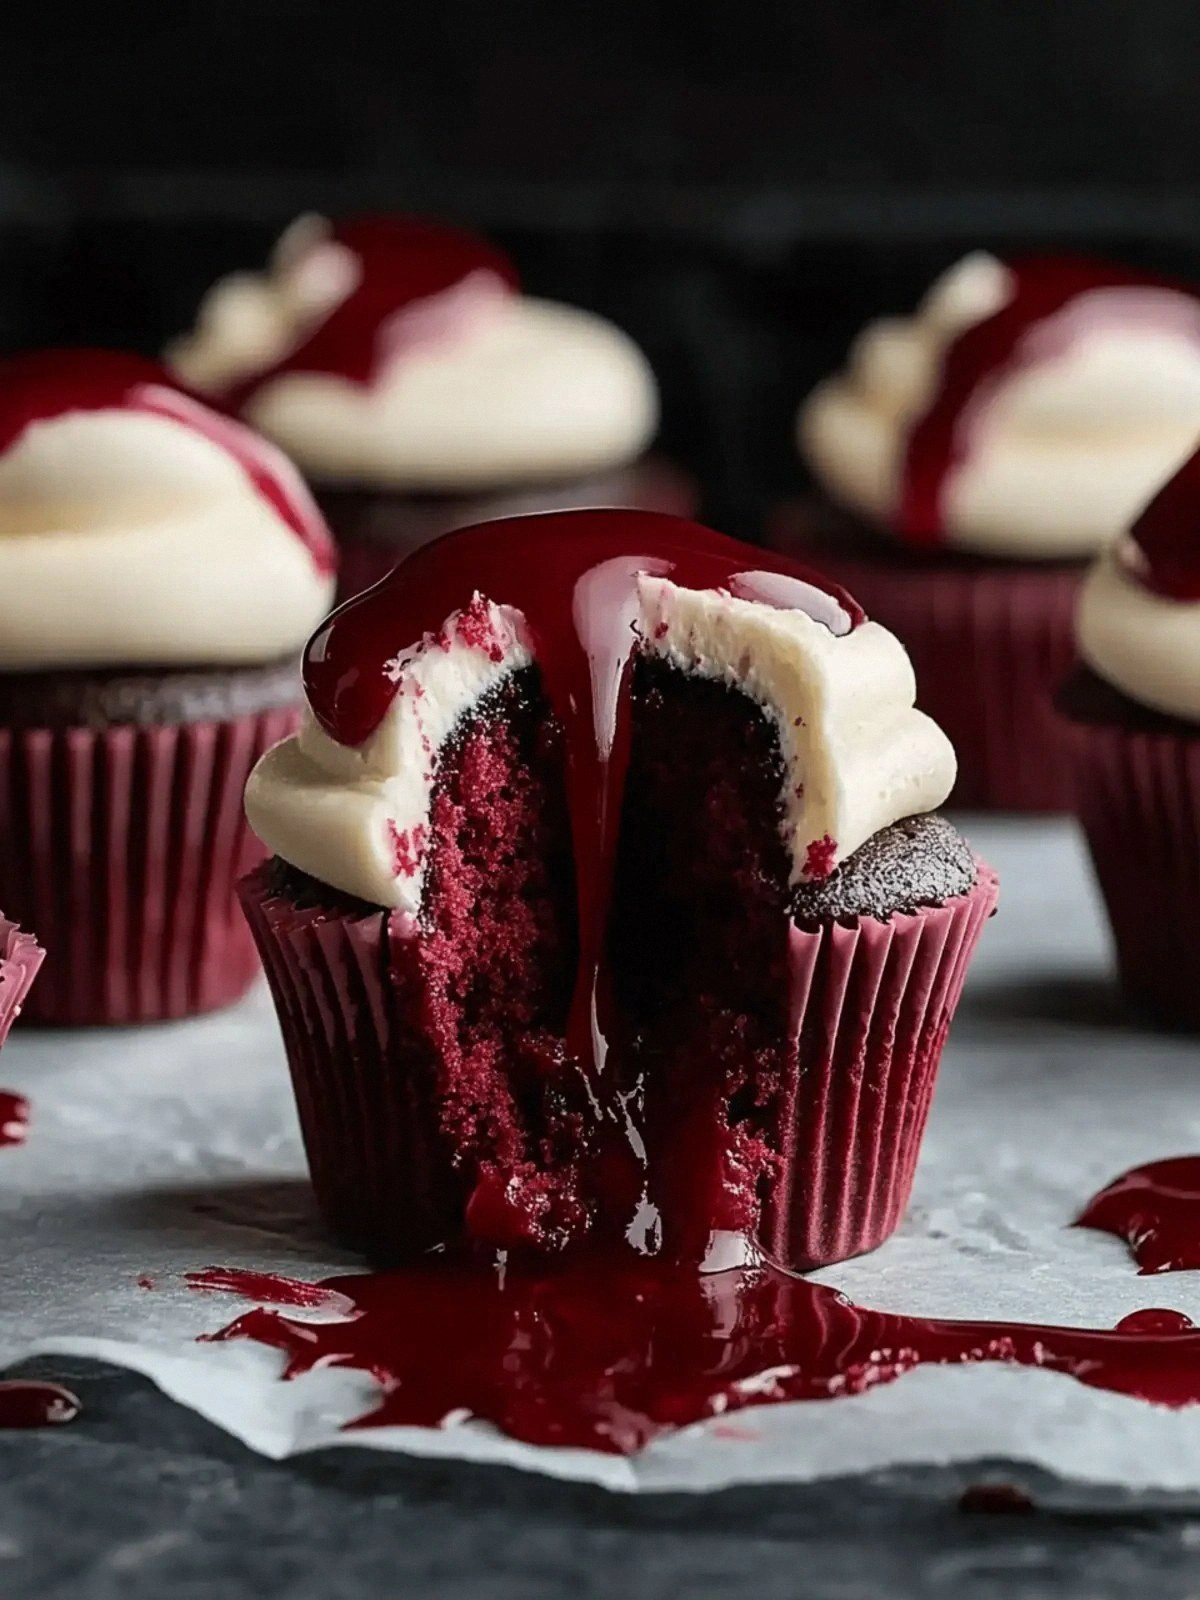
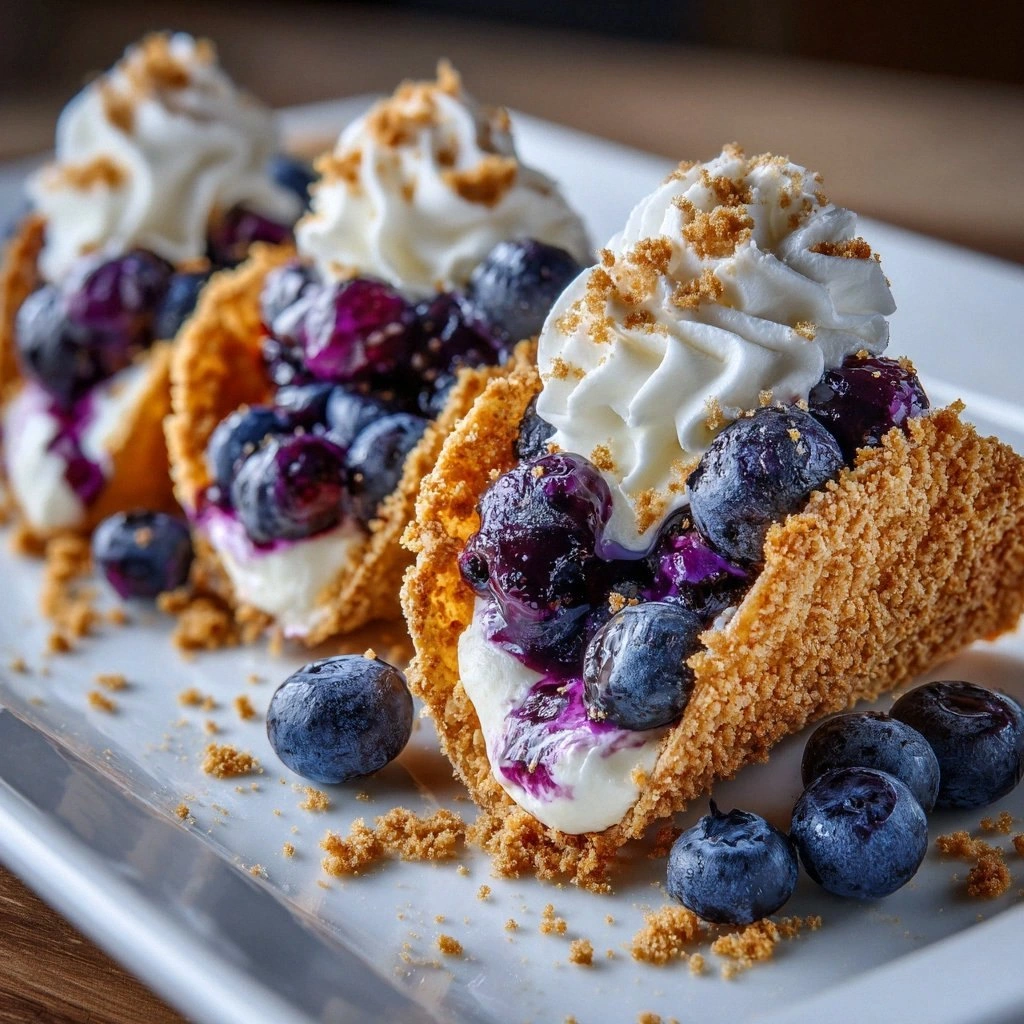
I was standing in the middle of a kitchen that looked like a culinary battlefield, the fridge humming like a war drum, and the air thick with the scent of melted butter and crushed graham crackers. My friends had dared me to turn a plain cheesecake into something that would make dessert tables tremble, and I took that dare like a chef takes a spice rack—with reckless confidence. The moment I cracked the first fresh blueberry onto the skillet, the room filled with a sweet, slightly tart aroma that made my eyes water in the most delicious way possible. I knew from the start that this would not be just another cheesecake; it would be a taco shell that sings, a crunchy, creamy, blueberry‑laden symphony that will haunt your taste buds long after the last bite. I swear, the first bite was a revelation—crispy edges that crack like thin ice, a silky filling that melts in your mouth, and blueberries that burst like confetti in a velvet night. By the end of that moment, I was convinced that I had stumbled upon the ultimate dessert hack, and I couldn't wait to spill every secret.
Picture yourself in a bustling kitchen, the timer ticking, the oven preheating to that perfect 350°F, and a pot of butter sizzling in a pan that smells like summer. The sound of blueberries popping is a cue to the symphony of textures: the crunch of the shell, the smoothness of the cheesecake, and the airy lift of whipped cream. I’ve tried countless variations of cheesecake tacos, but none have captured the delicate balance of sweet, tangy, and buttery that this recipe does. The secret? A simple twist that transforms ordinary ingredients into a masterpiece—think of it as turning a plain old taco into a dessert that feels like a celebration. If you’ve ever wondered why your attempts at cheesecake tacos have fallen flat, this is the recipe that will finally lift you above the ordinary. Stay with me, and I’ll walk you through every single step, and by the end, you’ll wonder how you ever made it any other way.
What makes this version stand out isn’t just the ingredients; it’s the way each component is treated as a character in a story. The graham cracker crumbs aren’t just a base—they’re the sturdy foundation that holds the flavor together like a reliable backbone. The unsalted butter brings a silky richness that melts into the crumbs, creating a shell that’s both crisp and tender. Cream cheese is the star, but it’s elevated by powdered sugar and a splash of vanilla that lifts its flavor profile to new heights. Fresh blueberries are not merely a garnish; they’re a burst of juiciness that cuts through the richness, offering a refreshing contrast that keeps every bite exciting. And the whipped cream isn’t just a topping—it’s the final flourish that adds lightness and a touch of elegance. Together, these elements create a dish that feels both indulgent and refreshing, a paradox that will leave your guests begging for a second plate.
I dare you to taste this and not go back for seconds. This is hands down the best version you'll ever make at home, and it’s so simple that even a novice can pull it off with a little confidence. I’ll be honest—you might find yourself reaching for the spoon before the recipe even says “serve.” Most recipes get this completely wrong, focusing on either the shell or the filling but never balancing both. Picture yourself pulling this out of the oven, the whole kitchen smelling incredible, and the plates glistening with blueberry glaze. The anticipation is almost tangible, and the moment the first bite hits your palate, it’s pure magic—an explosion of flavors that will have you saying, “I can’t believe I made this.”
The beauty of this recipe lies in its simplicity and its ability to transform ordinary ingredients into something extraordinary. The graham cracker crumbs give a subtle crunch that’s reminiscent of a buttery cookie, while the butter adds depth and a caramelized edge. The creamy filling is smooth, not clumpy, because the cream cheese is softened just enough to blend seamlessly with the powdered sugar. The blueberries add a pop of color and a burst of freshness that cuts through the richness, making each bite feel balanced. The whipped cream finishes the dish with a lightness that prevents it from feeling too heavy, making it perfect for any occasion—from a casual brunch to a sophisticated dinner party. This is not just a dessert; it’s an experience that will leave a lasting impression on anyone who tastes it.
If you’ve ever struggled with making taco shells that hold their shape, you’re not alone—I've had my fair share of shells that collapsed like a bad soufflé. The trick is to keep the crumb mixture moist enough to bind, but not so wet that it becomes gummy. Using unsalted butter instead of salted helps control the salt level, and adding a touch of powdered sugar ensures the shell has a subtle sweetness that complements the cheesecake. When you press the mixture into the pan, make sure to press firmly and evenly; this creates a uniform thickness that cooks evenly. Once the shells are baked, let them cool on a rack before filling—this prevents the shells from becoming soggy. With these simple adjustments, you’ll have shells that are crisp on the outside and tender on the inside, setting the stage for the creamy filling that follows.
What Makes This Version Stand Out
I’ve taken the time to dissect every element of this recipe, and here’s why it outshines the rest:
- Flavor: The combination of sweet and tart from blueberries and the mellow richness of cream cheese creates a flavor profile that lingers on the palate. The subtle vanilla note lifts the entire dish, making it feel luxurious.
- Texture: The shell is both crunchy and tender, thanks to the balanced crumb-to-butter ratio. The filling is silky without being too heavy, and the whipped cream adds a fluffy finish.
- Simplicity: No complex techniques or exotic ingredients are required—just common pantry staples and a few fresh berries.
- Uniqueness: Unlike most cheesecake tacos that focus on either the shell or the filling, this recipe harmonizes both, creating a cohesive taste experience.
- Audience Appeal: Whether you’re serving a crowd or a couple, the presentation is impressive enough to wow anyone, while the flavors are universally appealing.
- Ingredient Quality: Using high‑quality cream cheese and fresh blueberries makes a noticeable difference, turning a simple dessert into something memorable.
- Make‑Ahead Friendly: You can assemble the shells and fill them up to an hour before serving, saving precious time on the day of the event.
- Scalability: The recipe scales effortlessly, whether you’re cooking for four or forty.
Alright, let's break down exactly what goes into this masterpiece...
Inside the Ingredient List
The Flavor Base
Graham cracker crumbs are the backbone of the shell, delivering a buttery, slightly sweet foundation that echoes the classic cheesecake taste. They absorb the butter, creating a cohesive mass that holds together during baking. Skipping them would leave you with a shell that either crumbles or is too dense. For a gluten‑free version, replace them with almond flour or finely ground oats, but be sure to adjust the butter proportion to maintain moisture.
Sugar is the first sweetener that balances the savory notes of the crumbs. It caramelizes slightly in the oven, giving the shell a golden hue and a subtle crunch. If you prefer a lower‑sugar option, half the amount works fine, but expect a slightly less sweet finish. The key is to keep the sugar evenly distributed so it doesn’t clump during baking.
The Texture Crew
Unsalted butter is the secret weapon that binds the crumbs together while adding a silky richness that melts into the shell. Its fat content ensures a tender crumb that crisps beautifully on the edges. Using salted butter will alter the flavor balance, so always opt for the unsalted version. Melted butter also helps the crumbs clump together; if it’s too hot, it can make the mixture runny.
Cream cheese is the star of the filling, providing a creamy, slightly tangy base that sets the stage for the other flavors. It’s essential to let it soften to room temperature before mixing, which prevents lumps and ensures a smooth consistency. A high‑fat cream cheese yields a richer filling, whereas a low‑fat version will feel lighter but may not set as firmly.
The Unexpected Star
Fresh blueberries are the unexpected hero that adds a burst of juiciness and a pop of color. They also contribute a subtle tartness that cuts through the richness of the cheesecake, creating a balanced taste profile. When selecting blueberries, choose firm, plump berries that hold their shape during baking. If you’re out of fresh blueberries, frozen berries can work, but thaw them first and pat dry to avoid excess moisture.
Whipped cream is the final flourish that adds a light, airy texture and a touch of sweetness. It’s best whipped to soft peaks, so it holds its shape without becoming too runny. A pinch of powdered sugar can sweeten it further, but be careful not to over‑whip, or it will separate. Using heavy cream instead of whipping cream can give a richer finish but will also increase the fat content.
The Final Flourish
Vanilla extract is the subtle flavor enhancer that ties everything together. It elevates the sweetness of the sugar and the creaminess of the cheese, creating a harmonious blend. Use a pure vanilla extract for the best aroma; imitation vanilla can leave a chemical taste. A small splash of vanilla—just a teaspoon—goes a long way, so measure carefully.
Powdered sugar is the finishing touch that sweetens the filling without adding grit. It dissolves quickly in the cream cheese, ensuring a silky texture. If you prefer a lighter sweetness, reduce the amount, but remember that powdered sugar also helps the filling set. For a dusting on top, reserve a little extra and sprinkle over the finished tacos.
Everything's prepped? Good. Let's get into the real action...
The Method — Step by Step
- Preheat your oven to 350°F (175°C). Line a silicone muffin pan with paper liners to keep the shells from sticking. In a medium bowl, combine the graham cracker crumbs, sugar, and a pinch of salt; this ensures an even distribution of flavor. Melt the unsalted butter in a small saucepan over low heat until it’s liquid but not browned. Pour the melted butter over the crumb mixture, stirring until the crumbs are evenly coated and the mixture feels slightly damp but not wet. Let the mixture sit for a minute so the crumbs can absorb the butter before shaping.
- Divide the crumb mixture into eight equal portions. Press each portion firmly into the bottom and up the sides of a paper‑lined muffin cup, aiming for a thickness of about 1/4 inch. Use the back of a spoon to smooth the surface; a smooth base ensures even baking. Place the pan in the preheated oven and bake for 12–15 minutes, or until the shells are golden brown and firm to the touch. The aroma will be irresistible, and the shells will feel like the perfect foundation for the filling. Remove the pan from the oven and let the shells cool on a rack for at least 10 minutes to set fully.
- While the shells are cooling, prepare the cheesecake filling. In a large mixing bowl, beat the softened cream cheese on medium speed until smooth and creamy, about 2 minutes. Add the powdered sugar and vanilla extract, and continue beating until the mixture is silky and free of lumps. Gently fold in the fresh blueberries, reserving a handful for topping later; the berries should be evenly distributed without sinking to the bottom. If the filling feels too thick, add a splash of heavy cream to achieve a pourable consistency. Taste the mixture; it should be sweet but not cloying—adjust the sugar if needed.
- Using a spoon, fill each cooled shell with the cheesecake mixture, pressing down lightly to eliminate air pockets. The filling should sit just below the edge of the shell, creating a neat, uniform look. Carefully arrange the filled shells on a serving platter or individual plates, arranging them so the blueberry tops are visible. At this point, you can drizzle a thin blueberry compote over the tops for an extra burst of flavor, but it’s optional.
- Return the filled shells to the oven for an additional 8–10 minutes, or until the edges are set but the centers remain slightly jiggle. This ensures the filling is fully cooked while maintaining a creamy texture. Keep a close eye on the shells; overbaking can cause the filling to dry out. Once baked, remove from the oven and let them cool completely at room temperature. This step is crucial for achieving the right texture.
- Whip the heavy cream to soft peaks, adding a pinch of powdered sugar for sweetness. This whipped cream will be the final touch that balances the richness of the filling. Use a light hand to avoid over‑whipping, which can cause the cream to separate. If you’re preparing this in advance, cover the tops of the shells with plastic wrap and refrigerate until ready to serve.
- Just before serving, dollop a generous amount of whipped cream onto each shell. Top with the reserved blueberries for a pop of color and a burst of fresh flavor. The contrast between the creamy filling and the airy whipped cream is what makes this dish truly special. The blueberries on top also add a slight tang that brightens the overall taste profile.
- Serve immediately, or chill in the refrigerator for up to 2 hours before serving if you prefer a slightly firmer texture. The shells will remain crisp, and the filling will be creamy and luscious. If you’re serving a crowd, keep the shells warm in a low oven (200°F) to maintain their texture. Remember, the key to this dessert is the balance of sweet, tart, and creamy—every bite should feel like a new discovery.
- If you’re feeling adventurous, drizzle a light raspberry coulis over the tops for an extra layer of flavor. This adds a bright, tart contrast that complements the blueberries and cream. Alternatively, a dusting of cocoa powder or a sprinkle of crushed pistachios can give the dish a different twist. The possibilities are endless, but the core recipe remains the same—simple, elegant, and utterly delicious.
- Before you serve, give the shells a quick visual inspection. They should have a golden crust, a creamy interior, and a glossy, fresh blueberry topping. The presentation is just as important as the flavor, so arrange them neatly on a platter or plate for a stunning visual appeal. If you’re hosting a dinner party, a small drizzle of honey over the whipped cream adds a subtle sweet glaze that looks professional.
- Finally, take a moment to savor the aroma that fills the kitchen—sweet, buttery, and berry‑laden. Invite your guests to take their first bite and watch their faces light up. This is the moment you’ve been building up to, the culmination of all the careful preparation and attention to detail. Enjoy the smiles and the compliments that will follow; you’ve just served a dessert that’s as impressive as it is delicious.
That’s it— you did it. But hold on, I've got a few more tricks that'll take this to another level. The next section will give you insider knowledge that will make your taco shells the talk of the town.
Insider Tricks for Flawless Results
The Temperature Rule Nobody Follows
Many bakers bake at a high temperature, hoping for a quick crust, but the shell ends up too hard or uneven. The trick is to keep the oven at a moderate 350°F and let the shells bake slowly; this allows the butter to render evenly and the crumbs to set without burning. A thermometer is essential—if the oven temperature fluctuates, the shells may end up under‑cooked or over‑baked. I’ve seen shells that were still soft in the middle and crisp on the edges because the oven was too hot; this subtle temperature control is the difference between good and great.
Why Your Nose Knows Best
The aroma of the baking shells is your best judge of doneness. When you smell a slight caramel scent and a buttery fragrance, the shells are ready. If the smell is overly sweet or has a burnt edge, pull them out immediately. Your nose is a reliable indicator, and relying on visual cues alone can lead to over‑baked shells.
The 5-Minute Rest That Changes Everything
After baking, let the shells rest on a rack for at least 5 minutes before filling. This short rest allows the crust to firm up, preventing it from becoming soggy when the cheesecake mixture is added. If you rush the process, the shells may collapse under the weight of the filling. I’ve seen shells that were too soft, and the cheesecake seeped through the cracks—nothing like that!
The Secret of a Smooth Filling
Beat the cream cheese on low speed for the first minute, then switch to medium. This gradual increase in speed prevents the mixture from splattering, keeping the kitchen clean and the texture smooth. A sudden burst of high speed can cause the filling to become airy, which is not desirable. Keep the mixture silky; this is the foundation of a perfect cheesecake.
The Blueberry Boost
When adding blueberries, gently fold them in rather than stirring vigorously. This preserves their shape and prevents them from breaking apart, which could release excess juice and make the filling watery. Reserve a few berries for topping to add a burst of color and flavor that contrasts with the creamy filling.
The Whipped Cream Finish
Whip the cream just until soft peaks form—over‑whipped cream becomes grainy and may separate. Adding a pinch of powdered sugar not only sweetens but also stabilizes the peaks. If you’re serving the dessert chilled, keep the whipped cream in the refrigerator until just before serving to maintain its airy texture.
Creative Twists and Variations
This recipe is a playground. Here are some of my favorite ways to switch things up:
Chocolate Chip Crunch
Swap out half the graham cracker crumbs for finely chopped dark chocolate chips to add a bittersweet crunch. The chocolate pairs beautifully with the blueberry filling, creating a layered flavor profile. Use semi‑sweet chips for balance, and sprinkle a pinch of sea salt on top for a savory finish. This variation is perfect for chocolate lovers who still crave a fruity note.
Lemon Zest Surprise
Add a tablespoon of lemon zest to the filling for a bright, citrusy lift that cuts through the richness. Lemon also enhances the blueberry flavor, making the dessert feel lighter. For an extra zing, drizzle a thin lemon glaze over the top before serving. This twist is ideal for spring or summer gatherings.
Minty Freshness
Fold in a handful of fresh mint leaves into the filling for a refreshing herbal note. The mint complements the blueberries and adds a subtle cooling effect. Garnish the tops with a sprig of mint to add visual appeal and a hint of aroma. This variation is great for a brunch or a light dessert.
Nutty Delight
Replace the graham cracker crumbs with crushed toasted pecans for a nutty base. The pecans add a buttery flavor and a crunchy texture that contrasts with the creamy filling. Sprinkle a few toasted pecan halves on top for an elegant finish. This version is a hit with nut lovers and adds a sophisticated twist.
Raspberry Swirl
Blend a cup of fresh raspberries into the cheesecake mixture, creating a swirl of deep red. The raspberries add a tart contrast that pairs well with the blueberries. Drizzle a raspberry coulis over the tops for a glossy finish. This variation is perfect for those who love a berry‑rich dessert.
Spiced Cinnamon Touch
Sprinkle a teaspoon of ground cinnamon into the crumb mixture for a warm, aromatic base. The cinnamon adds depth to the shell and pairs nicely with the blueberry filling. Finish with a dusting of cinnamon sugar on top for an extra burst of flavor. This twist is especially cozy during cooler months.
Storing and Bringing It Back to Life
Fridge Storage
Store the filled shells in an airtight container in the refrigerator for up to 2 days. The shells will remain crisp, and the filling will keep its creamy texture. When ready to serve, let the shells sit at room temperature for 10 minutes to soften slightly. If you need to keep the shells crisp longer, keep them in a cool, dry place away from direct light. The key is to avoid moisture, which can make the shells soggy.
Freezer Friendly
For longer storage, freeze the shells before filling. Wrap each shell tightly in plastic wrap and place them in a freezer bag. They’ll stay good for up to 3 months. When you’re ready to serve, thaw them at room temperature for 30 minutes, then fill as directed. The frozen shells retain their texture, and the filling sets beautifully when baked fresh.
Best Reheating Method
To reheat the shells, preheat your oven to 300°F and place the filled shells on a baking sheet. Warm for 8–10 minutes, or until the filling is heated through. Avoid overheating, as this can cause the filling to separate. Add a splash of water to the baking sheet to create steam, which keeps the shells from drying out. Once reheated, let them cool slightly before topping with whipped cream and fresh berries.