I still remember the day I accidentally created these chocolate chip cheesecake bars. It was one of those rainy Saturday afternoons when the universe conspires to keep you indoors, and I had promised to bring dessert to my neighbor's dinner party. My original plan was a simple chocolate chip cookie bar, but as I stood in my kitchen watching the rain streak down the windows, I spotted that lonely block of cream cheese in my fridge — the one I'd bought for bagels and forgotten about. Something inside me whispered, "what if?" Ten minutes later, I was beating cream cheese with sugar like my life depended on it, creating a cheesecake layer that would transform ordinary cookie bars into something that made grown adults close their eyes and sigh when they took the first bite.
The smell that filled my apartment that afternoon was nothing short of intoxicating. Imagine the warm, buttery scent of chocolate chip cookies mingling with the tangy sweetness of cheesecake, all wrapped up in a vanilla-scented embrace that made my upstairs neighbor knock on my door to ask what I was baking. That first batch never made it to the dinner party — I ate three bars while they were still warm, standing at my kitchen counter in my pajamas, rain tapping against the windows, convinced I'd stumbled upon dessert nirvana. My neighbors understood when I showed up the next day with profuse apologies and a fresh pan of these bars. One bite and they forgave me completely, even demanding the recipe with the kind of urgency usually reserved for state secrets.
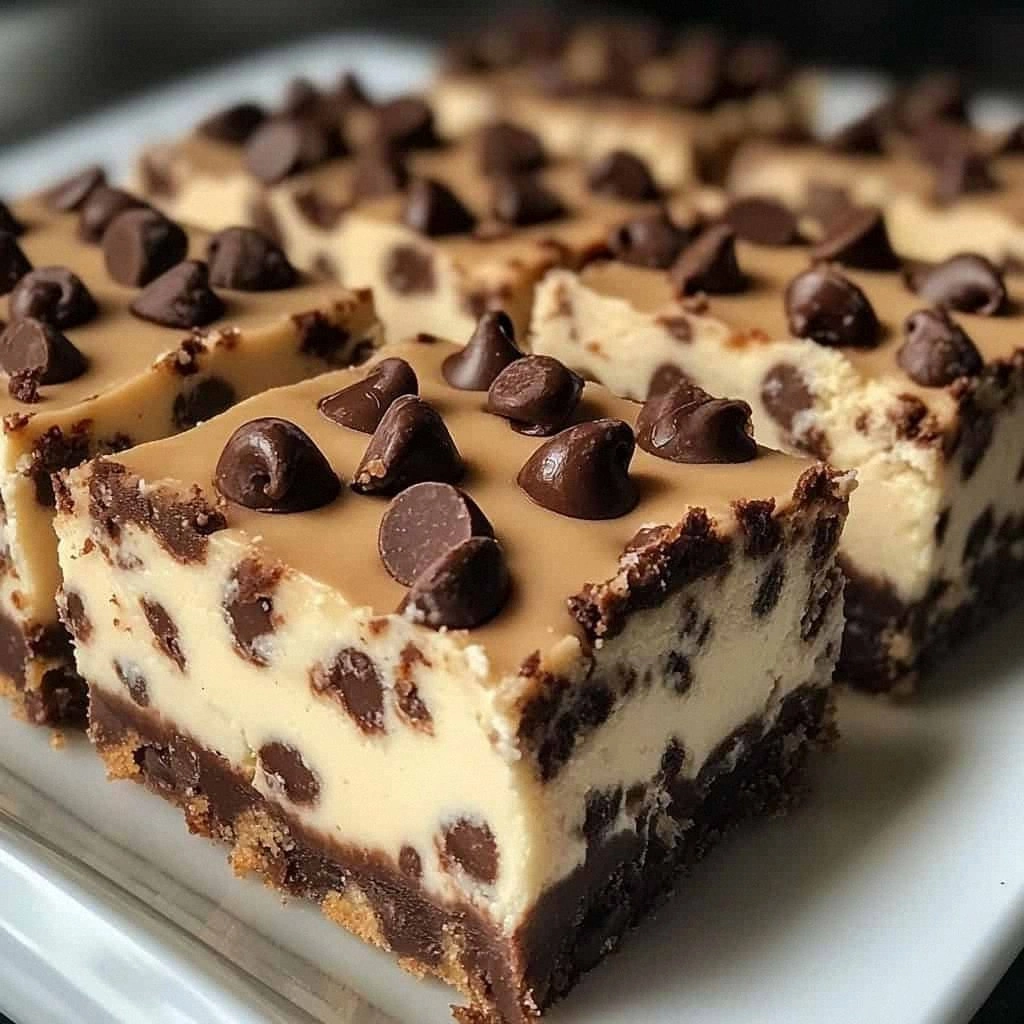
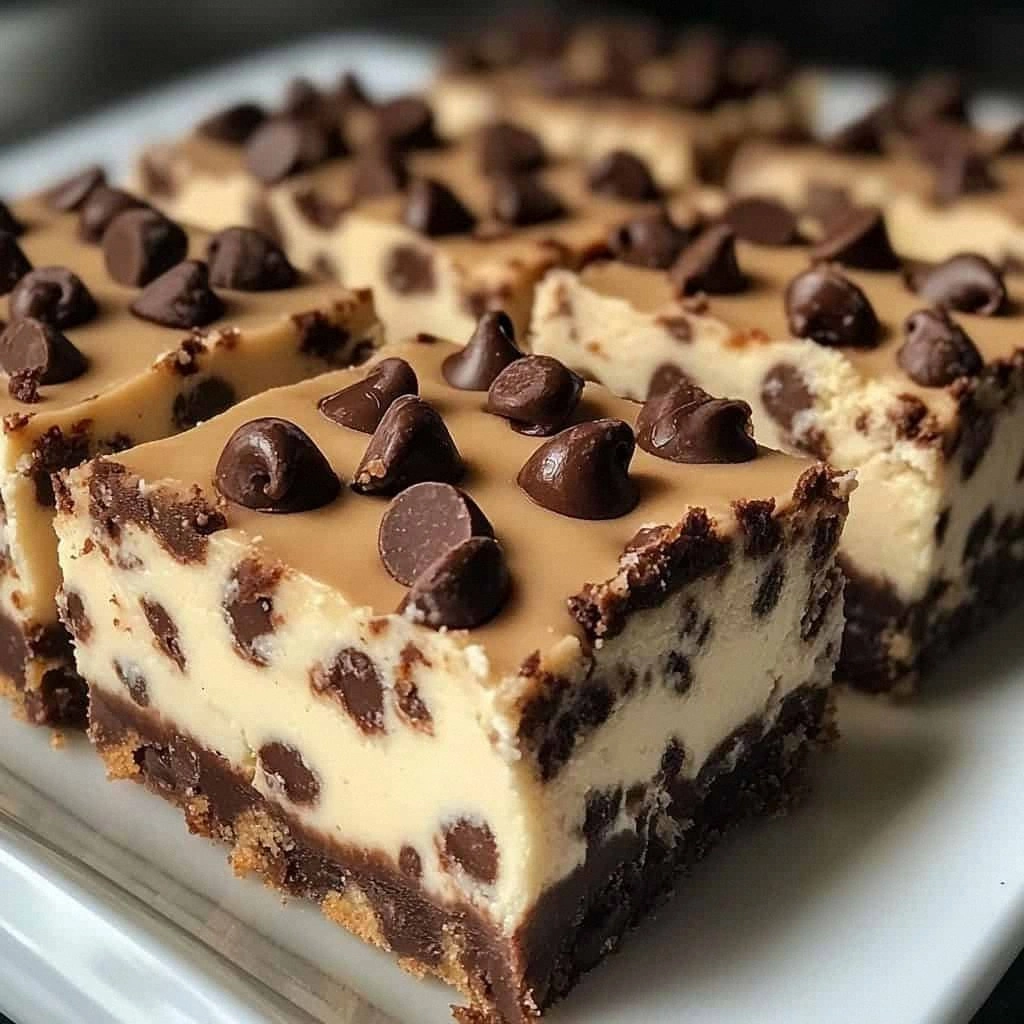
Here's what makes these bars absolutely legendary: they're the love child of two desserts that should have gotten together ages ago. You get that familiar comfort of chocolate chip cookies with their crisp edges and gooey centers, but then — plot twist — there's this silky cheesecake layer that adds a tangy richness most cookie recipes can only dream of achieving. The chocolate chips dot both layers like little treasures, melting into pockets of chocolate that create a surprise in every bite. It's like someone took your favorite cookie and your favorite cheesecake on a romantic date, and nine months later, these bars happened.
I've spent the last two years perfecting this recipe, testing different ratios, temperatures, and techniques until I could make them with my eyes closed. The result is a dessert that disappears faster than you can say "diet," a recipe that friends text me about at midnight because they can't stop thinking about making another batch. Picture yourself pulling these out of the oven, the whole kitchen smelling like Willy Wonka's factory had a baby with a French patisserie, your family hovering nearby like dessert vultures. Let me walk you through every single step — by the end, you'll wonder how you ever made it any other way.
What Makes This Version Stand Out
Flavor Explosion: Most chocolate chip cheesecake bars taste like someone just stacked cookies on top of cheesecake and called it a day. Not these babies. The cream cheese layer is infused with vanilla and a touch of sour cream that makes it taste like cheesecake and cookie dough had a beautiful baby. Each bite delivers this incredible dance between familiar cookie comfort and sophisticated cheesecake elegance.
Texture Heaven: We're talking about a graham cracker crust that stays miraculously crisp despite all that creamy filling, a cheesecake layer that's silkier than your favorite cashmere sweater, and cookie dough that bakes up with those perfect crispy edges while staying chewy in the middle. It's like a symphony of textures that keeps your mouth interested from first bite to last crumb.
Foolproof Technique: I've stripped away all the fussy steps that make most cheesecake recipes feel like you need a culinary degree. No water bath, no complicated springform pans, no worrying about cracks on top. These bars are supposed to look rustic and homemade — perfection through imperfection is the name of the the game here.
Make-Ahead Magic: These bars actually taste better the next day after the flavors have had time to meld together in the fridge. I make a double batch every time because they freeze beautifully and having these on standby has saved me during more last-minute dinner parties than I can count. Plus, cold cheesecake bars straight from the freezer? Life-changing.
Crowd Psychology: I don't know what it is about combining chocolate chip cookies with cheesecake, but it triggers some primitive response in people. I've watched the most disciplined health nuts break down after one bite. Kids go feral for them. Adults hoard them. They're like dessert catnip — impossible to resist and even harder to forget.
Ingredient Quality Flexibility: While I love using good chocolate and real vanilla, these bars are incredibly forgiving. Use those chocolate chips that have been sitting in your pantry since last Christmas. Generic cream cheese works fine. They're like that friend who looks good in anything — they make whatever you give them taste incredible.
The Surprise Factor: Everyone expects regular chocolate chip cookie bars. When they bite into these and discover that creamy cheesecake layer, their eyes go wide and they make that involuntary "oh my god" sound. It's like a dessert magic trick that never gets old, no matter how many times you pull it out of your hat.
Inside the Ingredient List
The Flavor Base
Graham cracker crumbs form the foundation of our crust, but don't just grab any old box off the shelf. I learned the hard way that generic graham crackers can taste like sweetened cardboard. Go for the real deal — Honey Maid or similar quality brands — because that honey-wheat flavor is what gives our crust its distinctive taste. The crumbs need to be fine but not powdery; think coarse sand at your favorite beach. If they're too fine, the crust becomes dense and pasty. Too coarse, and it falls apart when you try to cut the bars. I pulse mine in the food processor for exactly eight one-second pulses — yes, I've counted — for the perfect texture.
Melted butter acts like the glue holding our crust together, but it does so much more than that. I use unsalted butter because I want to control the salt level, and here's a secret: brown the butter first for an incredible nutty depth that makes people ask what that amazing flavor is. Just melt it in a saucepan until it foams and turns golden brown, then let it cool slightly before mixing. The difference is dramatic — like the distinction between a regular photograph and one that's been professionally edited.
The Texture Crew
Cream cheese is obviously the star here, but not all cream cheese is created equal. I've tested every brand available at my grocery store, and Philadelphia original wins every time. The full-fat version is non-negotiable — those reduced-fat options contain more water and stabilizers that leave you with a grainy, sad cheesecake layer that weeps moisture like it's crying about its diet. Let it soften completely, until you can press your finger through it easily. Cold cream cheese won't incorporate properly, leaving you with little white lumps that no amount of mixing will smooth out.
Eggs provide structure to our cheesecake layer, but they're surprisingly easy to mess up. I use large eggs straight from the fridge — cold eggs incorporate more slowly, which prevents overmixing. Overmixing incorporates too much air, causing the cheesecake to puff up like a balloon in the oven, then collapse and crack as it cools. Mix just until the yolks disappear, then stop. Your arm might want to keep going, but resist the urge. Think of it like folding laundry — gentle and deliberate beats aggressive and fast every time.
The Unexpected Star
Sour cream might seem like an odd addition, but it's what separates good cheesecake from great cheesecake. It adds a subtle tang that balances the sweetness and creates this incredible silky texture that makes people close their eyes when they taste it. Full-fat sour cream works best, but in a pinch, you can substitute plain Greek yogurt. Just don't use low-fat versions — they contain stabilizers that can make your cheesecake layer rubbery. The sour cream should be at room temperature too, so it incorporates smoothly without cooling down your cream cheese mixture.
Mini chocolate chips are my secret weapon here. Regular chips are too heavy and sink to the bottom of the cheesecake layer, creating a chocolate layer that, while delicious, isn't what we're after. Mini chips stay suspended throughout, giving you little bursts of chocolate in every bite without overwhelming the delicate cheesecake flavor. Plus, they distribute more evenly, so you don't get bites that are all chocolate and others with none. If you can't find mini chips, chop regular ones into smaller pieces — your forearm will get a workout, but it's worth it.
The Final Flourish
Vanilla extract might seem basic, but please, for the love of all things sweet, use real vanilla. Imitation vanilla has this sharp, artificial edge that becomes more pronounced in delicate desserts like cheesecake. Real vanilla adds these warm, complex notes that make everything taste more expensive and restaurant-quality. I splurge on Madagascar vanilla — it's like the difference between a hand-written thank you note and a text message. Both work, but one makes you feel genuinely appreciated.
Brown sugar in the cookie layer isn't just for sweetness — it's what creates that chewy texture and caramel flavor that makes chocolate chip cookies addictive. I use light brown sugar because dark brown can overpower the delicate cheesecake. Make sure it's fresh and soft; hard brown sugar won't cream properly with the butter, leaving you with grainy cookie dough. If yours has turned into a brown sugar brick, microwave it for 20 seconds with a damp paper towel over the bowl. It'll soften right up and save you a trip to the store.
The Method — Step by Step
- Preheat your oven to 325°F (not 350°F — we're baking these low and slow to prevent the cheesecake from cracking). Line a 9x13-inch baking pan with parchment paper, leaving an overhang on the sides so you can lift the bars out easily. I learned this the hard way after spending twenty minutes chiseling stuck bars out of a pan with a butter knife, creating a mess that looked like a dessert crime scene. The parchment is your friend; don't skip it unless you enjoy frustration and broken bars.
- Make the graham cracker crust by combining the crumbs, melted butter, sugar, and salt in a medium bowl. Mix until it looks like wet sand and holds together when you squeeze it — think of building a sandcastle, but one you actually want to eat. Press this mixture firmly into the bottom of your prepared pan, using the bottom of a measuring cup to create an even layer. Really pack it down; a loose crust will crumble when you try to cut the bars, leaving you with a mess that won't hold together. Bake this for 8 minutes, just until it starts to smell toasty and the edges turn golden. Your kitchen should start smelling like a graham cracker factory, which is honestly one of life's simple pleasures.
- While the crust bakes, start on the cheesecake layer. Beat the softened cream cheese until it's completely smooth and fluffy, about 2 minutes on medium speed. Scrape down the bowl obsessively — I mean it, get in there with a spatula after every addition. Add the sugar and beat until combined, then add the eggs one at a time, mixing just until each disappears. Stir in the sour cream and vanilla, mixing just until combined. Overmixing here is the enemy of smooth cheesecake. Fold in the mini chocolate chips with a spatula, not the mixer — we want them distributed, not pulverized.
- For the cookie layer, cream together the softened butter with both sugars until light and fluffy, about 3 minutes. Add the egg and vanilla, beating until combined. In a separate bowl, whisk together the flour, baking soda, and salt. Add this to the butter mixture and mix just until no dry streaks remain. Fold in the chocolate chips with a wooden spoon — the dough should be thick enough that you need to use some muscle. If it's too soft to handle, pop it in the fridge for 15 minutes. Cold cookie dough is easier to work with and won't melt into the cheesecake layer.
- Assemble these beauties by first pouring the cheesecake mixture over your pre-baked crust, spreading it into an even layer. Now here's the key: drop spoonfuls of cookie dough all over the top, leaving little gaps between them. Don't worry about covering every inch — the cookie dough will spread as it bakes. Use your fingers to gently press the dough pieces together, creating a cobblestone effect. This method prevents you from having to spread raw cookie dough over liquid cheesecake, which is about as easy as herding cats.
- Bake for 35-40 minutes, until the cookie top is golden brown and a toothpick inserted in the center comes out with just a few moist crumbs. The center should still jiggle slightly when you gently shake the pan — it will continue to set as it cools. If the top is browning too quickly, tent it with foil for the last 10 minutes. The smell at this point will be absolutely maddening, like someone opened a bakery in your oven. Resist the urge to dive in immediately; these need to cool completely to set properly.
- Cool completely in the pan on a wire rack for at least 2 hours, then refrigerate for at least 4 hours or overnight. This is torture, I know, but cutting warm cheesecake bars is like trying to slice jello — messy and disappointing. The chilling process allows the cheesecake to firm up properly, creating clean cuts and the perfect texture. I usually make these the day before I need them, because they're actually better after an overnight rest in the fridge. Plus, having these ready to go makes you feel like a dessert superhero.
- Lift the bars out using the parchment paper handles, then cut into squares with a sharp knife. Dip your knife in hot water and wipe it clean between cuts for picture-perfect squares. These are rich, so I cut them into 24 small bars rather than 12 huge ones. Though honestly, once people taste them, they'll come back for seconds and thirds regardless of size. Store leftovers in an airtight container in the fridge for up to 5 days, though I've never actually tested that limit because they disappear long before then.
- Serve these slightly chilled for the best texture and flavor. The cold enhances the cheesecake's tang and makes the chocolate chips provide that satisfying snap when you bite into them. They're perfect as-is, but if you want to get fancy, a dusting of powdered sugar or a drizzle of chocolate sauce never hurt anyone. I dare you to taste one and not immediately reach for another — these have ruined many a dinner appetite, but nobody ever complains about being too full for dessert.
That's it — you did it. But hold on, I've got a few more tricks that'll take this to another level...
Insider Tricks for Flawless Results
The Temperature Rule Nobody Follows
Room temperature ingredients aren't just baking snobbery — they're the difference between cheesecake nirvana and a lumpy disaster. Cold cream cheese refuses to blend smoothly, leaving you with white flecks that no amount of mixing will eliminate. Cold eggs don't incorporate properly, creating a curdled appearance that bakes into a grainy texture. I set everything out on the counter at least two hours before baking, arranging my ingredients like I'm preparing for a cooking show. If you're rushed, submerge your eggs in warm (not hot) water for 10 minutes, and cube your cream cheese onto a plate — it'll soften in about 20 minutes instead of two hours. Your future self will thank you when you're slicing into silky smooth bars instead of cursing at a lumpy mess.
Why Your Nose Knows Best
Don't rely solely on timers — your sense of smell is incredibly reliable for knowing when these are perfectly baked. When the cookie top turns golden and you can smell toasted butter mingling with vanilla and chocolate, start checking for doneness. The aroma should fill your kitchen with this warm, inviting scent that makes your mouth water involuntarily. If you smell something sharp or toasty, check immediately — you're probably 30 seconds away from overbaked. I set my timer for 5 minutes less than the minimum time because every oven is different, and I'd rather check early than cry over overbaked bars. Trust your senses — they've been evolving for millions of years to detect exactly when sweet, buttery things reach their peak.
The 5-Minute Rest That Changes Everything
After you pull these from the oven, let them sit undisturbed for exactly 5 minutes before moving them to a cooling rack. This brief rest allows the cheesecake to set slightly, preventing cracks from thermal shock when you move the hot pan. During these 5 minutes, the residual heat continues cooking the center gently, while the edges start pulling away from the sides of the pan — your visual cue that they're properly baked. I use this time to run a thin knife around the edges, ensuring clean release later. My neighbor once skipped this step in her rush to cool them quickly, and her bars developed these hairline cracks that, while harmless, made her swear they tasted different. They probably didn't, but we eat with our eyes first, and cracked cheesecake bars just look sad.
The Overnight Magic Trick
These bars transform from delicious to transcendent after an overnight rest in the fridge. During those 8 hours, the flavors meld together in ways that science probably understands but I prefer to think of as kitchen magic. The cookie layer softens slightly from the moisture in the cheesecake, creating this perfect texture that's neither crisp nor soggy. The cheesecake develops a more complex flavor as the vanilla and cream cheese have time to party together. I always make these the day before I need them, wrapped tightly in plastic wrap after they're completely cool. The anticipation is killer, but that first bite of a properly aged bar makes the wait worthwhile. My record is five days — they just get better and better, if you can resist them that long.
The Salt Secret
Don't skip the salt in either layer — it's not for saltiness, it's for flavor enhancement. Salt makes sweet things taste sweeter and chocolate taste more chocolatey, like turning up the contrast on a photo. I use fine sea salt because it distributes evenly without creating salty pockets. The small amount in the graham cracker crust balances the sweetness and brings out the honey notes in the crackers. In the cookie layer, salt makes the chocolate chips pop and prevents the whole thing from tasting one-dimensionally sweet. A friend tried making these without salt because she's "not a salt person," and they tasted flat and boring, like someone had turned down the volume on all the flavors. Just a pinch transforms everything from meh to magnificent.
Creative Twists and Variations
This recipe is a playground. Here are some of my favorite ways to switch things up:
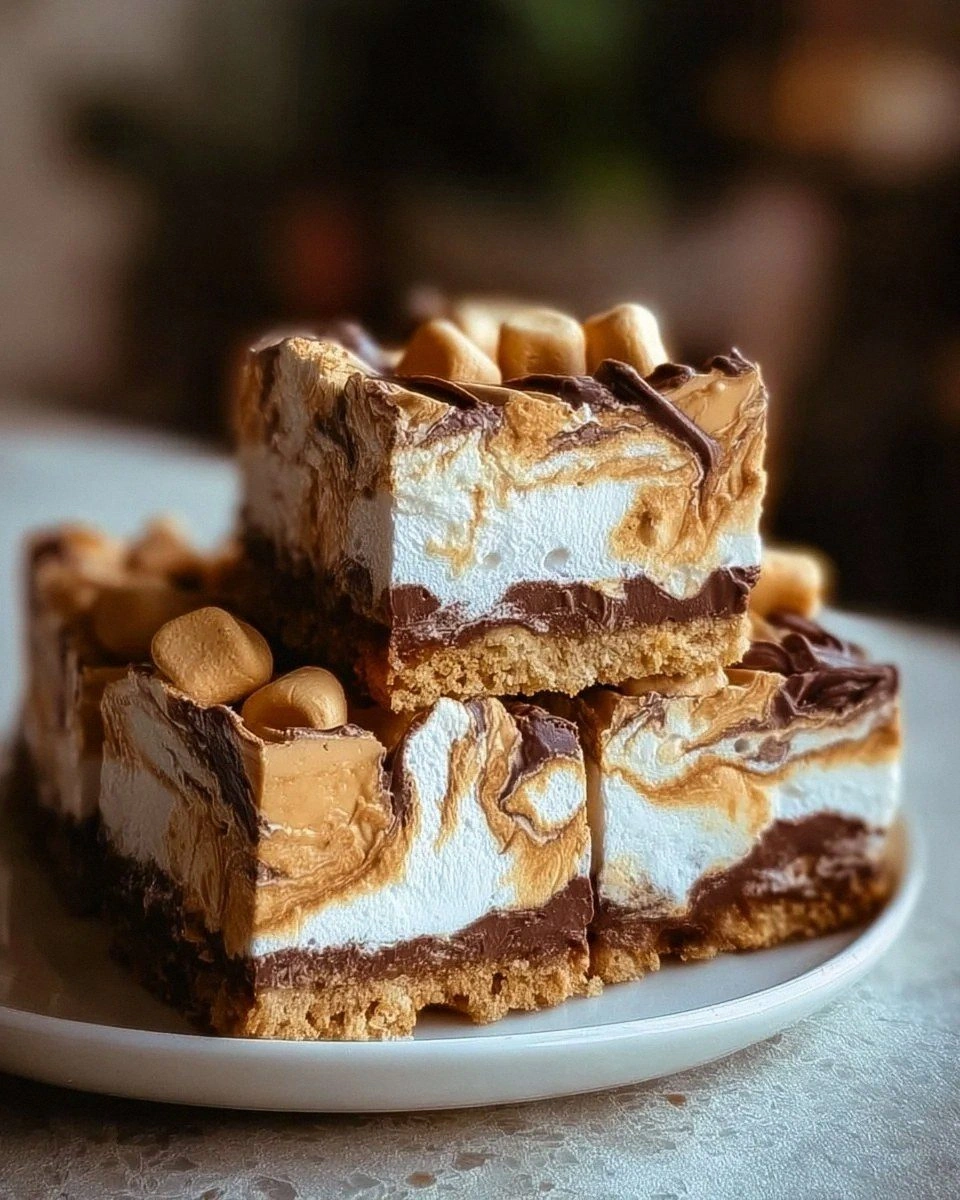
Peanut Butter Cup Paradise
Replace half the butter in the cookie layer with creamy peanut butter, and swap the chocolate chips for chopped peanut butter cups. The peanut butter adds this incredible richness that pairs perfectly with the tangy cheesecake. I use Reese's cups because they're readily available, but any chocolate-covered peanut butter candy works. The result tastes like someone took your favorite peanut butter cookie and your favorite cheesecake on a romantic getaway to flavor town. Just be warned — these disappear even faster than the original, if that's possible.
S'mores Dream Version
Add 1/4 cup cocoa powder to the graham cracker crust and replace the chocolate chips in the cookie layer with mini marshmallows and chocolate chunks. After baking, broil the top for 30 seconds to toast the marshmallows to golden perfection. The marshmallows create these gooey pockets that stretch like edible silly string, while the chocolate chunks provide those satisfying melty bits. It's like summer camp and fine dining had a beautiful, delicious baby. Pro tip: use kitchen shears to cut the marshmallows in half — whole ones are too bulky and create weird air pockets.
White Chocolate Raspberry
Fold 1/2 cup of raspberry jam into the cheesecake layer for beautiful swirls, and use white chocolate chips instead of regular ones. The tart raspberries cut through the richness while the white chocolate adds caramel-like sweetness. I warm the jam slightly so it swirls more easily without overmixing the cheesecake. Drop spoonfuls over the cheesecake layer and use a knife to create marbled patterns. These look incredibly fancy but take no extra effort — perfect for when you want to impress without stress.
Salted Caramel Dream
Drizzle 1/2 cup of dulce de leche over the cheesecake layer before adding the cookie dough, then sprinkle everything with flaky sea salt after baking. The caramel sinks slightly during baking, creating these incredible pockets of gooey sweetness that contrast beautifully with the tangy cheesecake. The flaky salt on top makes each bite a perfect balance of sweet, salty, creamy, and chewy. I use Maldon salt because the large flakes provide little bursts of salt rather than overall saltiness. These are what I make when I need to bribe someone — they're that good.
Double Chocolate Decadence
Add 1/4 cup cocoa powder to the cookie dough and use dark chocolate chips for an ultra-chocolate version. Replace 2 tablespoons of flour with cocoa powder to maintain the right texture. The double chocolate makes these incredibly rich — one small bar satisfies even the most hardcore chocoholics. I serve these with a glass of cold milk because they demand it, like chocolate calling to its dairy soulmate. These are what I make for my chocolate-obsessed friends who think regular desserts are "just okay."
Coconut Cream Edition
Add 1/2 cup of sweetened shredded coconut to the graham cracker crust, and use coconut extract instead of vanilla in the cheesecake layer. Toast some coconut and sprinkle it on top during the last 5 minutes of baking for extra texture and flavor. The coconut adds this tropical note that makes these perfect for summer gatherings or when you need to mentally transport yourself to a beach somewhere. They're like a vacation in dessert form, minus the sunburn and sand in uncomfortable places.
Storing and Bringing It Back to Life
Fridge Storage
These bars keep beautifully in the refrigerator for up to 5 days, though I've never personally witnessed them lasting that long. Wrap them tightly in plastic wrap or store in an airtight container to prevent them from absorbing other fridge odors — nobody wants cheesecake bars that taste like last night's garlic chicken. I separate layers with parchment paper to prevent sticking, and I always hide a few in the back of the fridge for emergency dessert situations. The cold enhances their flavor, making them even more refreshing and satisfying. If they develop any condensation on top, just blot gently with a paper towel before serving.
Freezer Friendly
These freeze incredibly well for up to 3 months, making them perfect for advance preparation or saving yourself from eating the entire pan in one sitting. Cut them into individual portions first, then wrap each bar in plastic wrap followed by aluminum foil. This double wrapping prevents freezer burn and keeps them tasting fresh. I always label them with the date because frozen dessert archaeology is never fun. Thaw overnight in the refrigerator, or for a quick fix, microwave individual bars for 15-20 seconds. Frozen cheesecake bars have this incredible texture — like ice cream meets cheesecake meets cookie, perfect for hot summer days when turning on the oven sounds like torture.
Best Reheating Method
While these are best served cold or at room temperature, sometimes you want that fresh-baked warmth. The trick is gentle heat — too much and the cheesecake layer becomes rubbery and sad. I microwave individual bars for 10-15 seconds, just until the chocolate chips start to glisten slightly. You want them barely warm, not hot. For a larger batch, wrap them in foil and warm in a 250°F oven for 10 minutes. Add a tiny splash of water to the foil packet before sealing — it creates steam that brings back that fresh-baked texture without drying them out. It's like having fresh bars without any of the work, which is my favorite kind of dessert magic.