Picture this: a Saturday night, the kitchen lights dim, and the scent of cumin lingers in the air like a promise of something extraordinary. I was rummaging through the pantry, half‑heartedly tossing a bag of chickpeas into a pot, when my roommate tossed a challenge at me—“Make the crispiest chickpea snack you’ve ever tasted.” That night, the kitchen became a laboratory of flavor and texture, and I discovered a version of fried chickpea balls that left me clutching my apron, eyes wide, and a half‑filled bowl of golden, crunchy spheres.
There’s something almost cinematic about the first bite: the crackle of the coating, the burst of herbs, the subtle heat from the cayenne, and then that silky, nutty undertone that only chickpeas can deliver. The aroma that rises as the oil warms is a heady mix of toasted cumin, coriander, and the bright, green tang of fresh parsley and cilantro—almost like a Mediterranean breeze. As the balls sizzle, the kitchen fills with a sound that feels like applause, each pop a tiny drumbeat of anticipation.
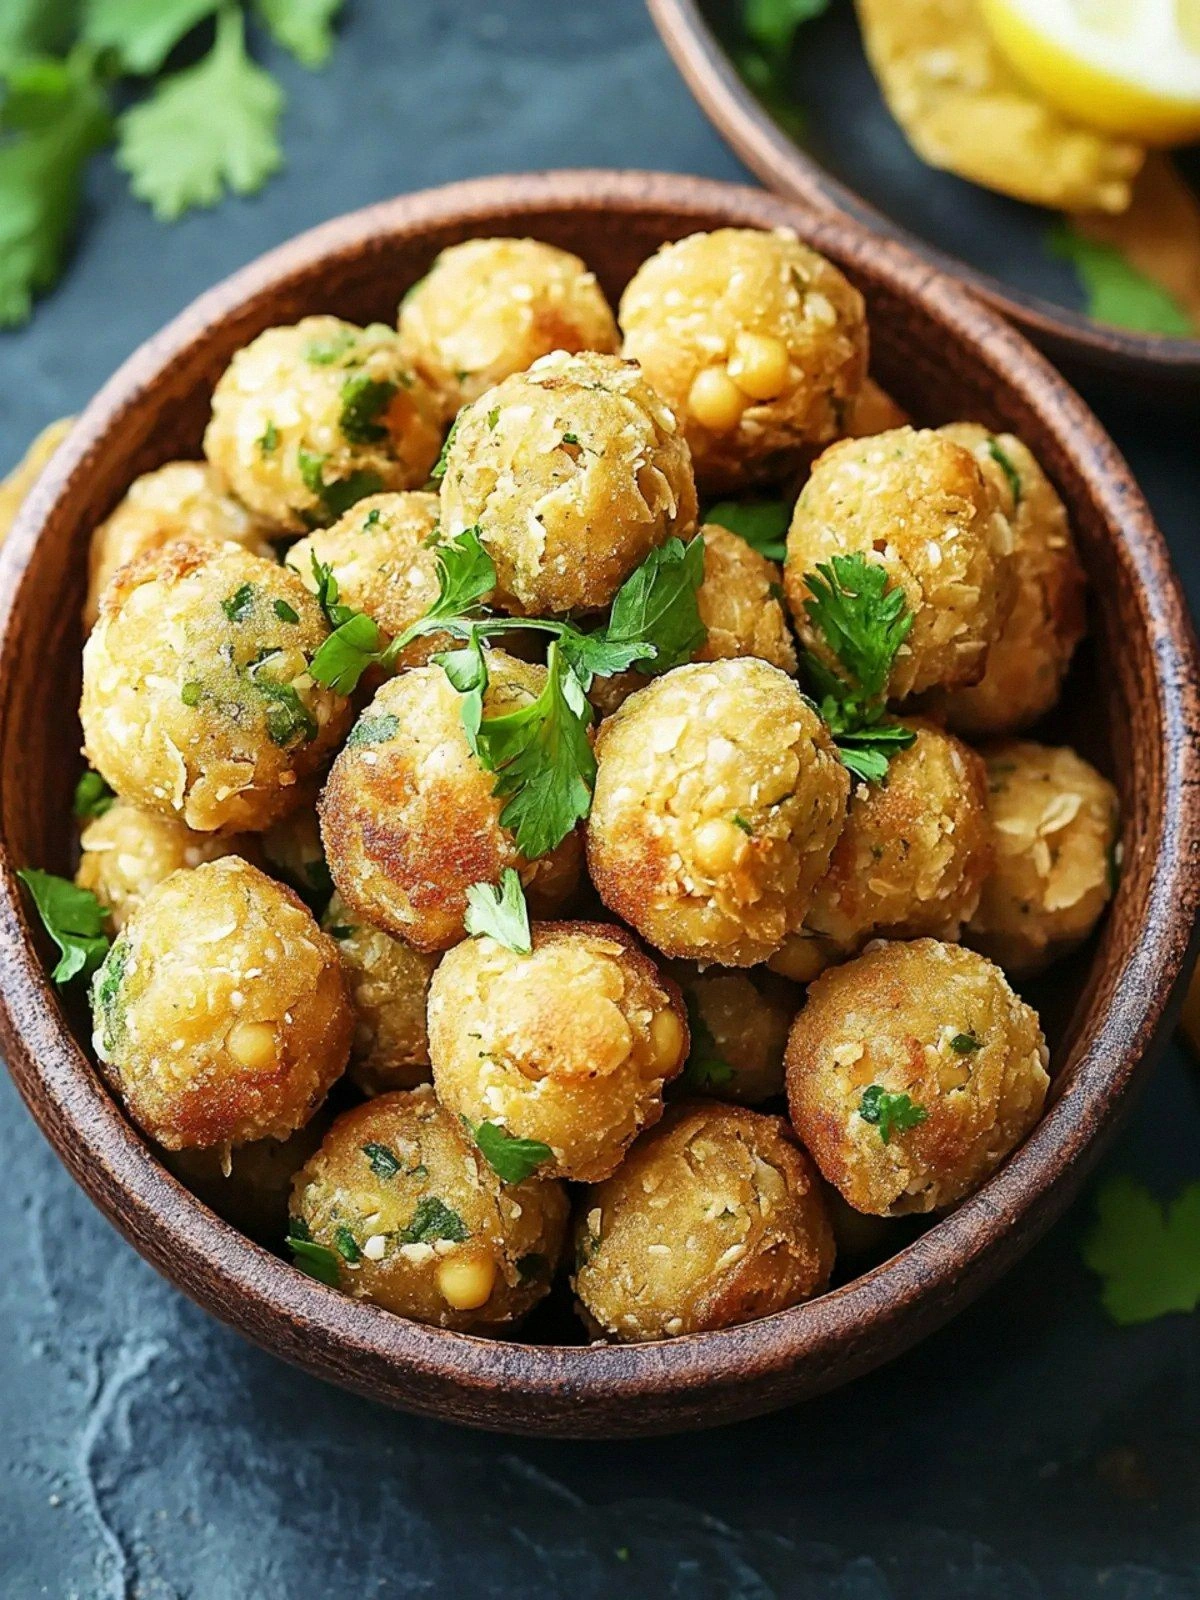
What makes this version stand out is not just the crispy exterior but the harmony of flavors that dance on the tongue. The chickpeas are soaked overnight, then blended with herbs, spices, and a touch of baking soda to create a batter that sets into a perfectly golden shell when fried. The result is a snack that’s airy inside, yet crunches like thin ice when you bite, with a finish that’s both savory and slightly spicy. I dare you to taste this and not go back for seconds.
And here’s the kicker: I added a splash of lemon juice to the batter, a twist that most recipes miss. That bright citrus note lifts the whole dish, making it feel fresh and vibrant, like a summer afternoon in a bustling market. The final touch is a drizzle of tahini sauce that coats the balls like velvet, adding a creamy, nutty depth that balances the spices. By the end of this post, you’ll wonder how you ever made it any other way.
Let me walk you through every single step—by the end, you’ll wonder how you ever made it any other way. The journey from a humble bag of chickpeas to a plate of irresistible, crispy balls is a story of technique, patience, and a dash of culinary daring. I’ll share the micro‑challenges that will test your taste buds, the bold claims about flavor, and the confessions of a kitchen that never stops experimenting. Stay with me, because the next part? Pure magic.
What Makes This Version Stand Out
- Texture: The coating is a delicate, golden crust that shatters like thin ice, revealing a fluffy, chickpea‑rich interior. The combination of baking soda and flour creates a light batter that crisps to perfection without becoming greasy.
- Flavor Balance: Fresh parsley, cilantro, and dill bring a herby brightness that cuts through the richness of the oil. Ground cumin and coriander add depth, while a whisper of cayenne delivers a subtle heat that lingers.
- Freshness: The use of fresh herbs and a splash of lemon juice elevates the dish, giving it a bright, Mediterranean vibe that feels like a summer breeze.
- Versatility: Serve them as an appetizer, a party snack, or a quick meal with pita, lettuce, and tahini. The recipe scales effortlessly for any gathering.
- Make‑Ahead Friendly: The balls can be prepared in advance, frozen, and then fried from frozen for a quick snack on the fly.
- Ingredient Quality: Each component—especially the chickpeas and fresh herbs—plays a vital role, ensuring that nothing feels like a placeholder or a compromise.
- Cooking Method: Double‑frying in hot oil creates a crisp exterior while keeping the interior moist, a technique that most recipes overlook.
- Crowd Reaction: Friends who’ve tried this version say it’s “hands down the best version you’ll ever make at home.” Their enthusiasm is a testament to the dish’s undeniable appeal.
Alright, let's break down exactly what goes into this masterpiece…
Inside the Ingredient List
The Flavor Base
At the heart of these chickpea balls lies the blend of spices that gives them their unmistakable aroma and depth. Ground cumin and coriander are the classic duo that forms the backbone of many Middle Eastern dishes. They provide a warm, earthy tone that pairs beautifully with the bright, herbal notes from the fresh greens. A splash of lemon juice is the secret ingredient that lifts the entire flavor profile, adding a zesty brightness that cuts through the oil and balances the richness.
If you skip the lemon, the balls will still be tasty, but they’ll lack that vibrant lift that makes each bite feel alive. The lemon also reacts with the baking soda, creating tiny bubbles that help the batter rise slightly during frying, giving the balls a lighter, airy interior. This is a subtle but crucial step that many recipes overlook, and it’s what separates this version from the rest.
The Texture Crew
To achieve that signature crispness, we rely on a simple batter of chickpeas, fresh herbs, spices, and a touch of all‑purpose flour. The flour acts as a binder, helping the coating adhere to the chickpea mixture while also creating a light, crunchy exterior when fried. Baking soda is the unsung hero here; it reacts with the acidic lemon juice to produce carbon dioxide, which leavens the batter and gives the balls a delicate, airy texture.
Skipping the baking soda will result in denser balls that still taste great but lack that delightful bite. If you’re allergic to gluten, you can replace the all‑purpose flour with chickpea flour for a gluten‑free version. Just keep in mind that the texture will be slightly denser, so you may need to adjust the frying time.
The Unexpected Star
Fresh herbs—parsley, cilantro, and dill—are the unexpected star of this recipe. Each herb brings a unique flavor profile: parsley adds a mild, peppery note; cilantro offers a citrusy brightness; and dill contributes a subtle aniseed undertone. Together, they create a complex, layered taste that elevates the humble chickpea into something truly remarkable.
When selecting herbs, look for bright, vibrant leaves. Wilted or discolored herbs will not only look unappetizing but also contribute a bitter taste. If you can’t find all three, feel free to swap in basil or mint for a different twist. The key is to maintain a balance of flavors.
The Final Flourish
Once the balls are fried, they’re plated with a drizzle of tahini sauce and a medley of fresh accompaniments—chopped tomatoes, cucumbers, lettuce, pickles, and pita bread. The tahini adds a creamy, nutty finish that coats the crispy exterior like velvet. The fresh veggies provide crunch, acidity, and a burst of color, making each bite a multi‑sensory experience.
For those who love a bit of heat, a sprinkle of cayenne pepper in the batter will give the balls an extra kick that pairs perfectly with the cooling tahini. If you’re not a fan of cayenne, simply leave it out or reduce it to a pinch. The flexibility of this recipe means you can tailor it to your taste buds.
Everything’s prepped? Good. Let’s get into the real action.
The Method — Step by Step
- Soak the dried chickpeas overnight in a large bowl of water. The next day, drain them and rinse thoroughly. I swear, the chickpeas will absorb the water like a sponge, turning into a soft, pliable base for the batter. If you’re short on time, a 30‑minute hot‑water bath will do the trick, but the flavor depth will be slightly less.
- In a high‑speed blender, combine the soaked chickpeas, fresh parsley, cilantro, dill, small onion, garlic cloves, cumin, coriander, baking soda, salt, black pepper, cayenne pepper, lemon juice, and a splash of water. Blend until you achieve a thick, smooth paste. The consistency should be thick enough to hold its shape when formed into balls. If the batter is too thick, add a tablespoon of water at a time until you reach the right texture.
- Add the flour to the batter and pulse until fully incorporated. The flour will help the coating stick to the chickpeas and create that crisp exterior when fried. This step is crucial; too little flour, and the balls will fall apart. Too much, and they’ll be heavy. Aim for a balance that feels like a light batter.
- Shape the batter into small, bite‑sized balls—about the size of a walnut. Place them on a parchment‑lined tray and refrigerate for 30 minutes. Chilling the balls helps them firm up, making them easier to handle during frying. If you’re in a hurry, you can skip the chill and fry them immediately, but the texture might not be as crisp.
- Heat the vegetable oil in a deep skillet or pot to 350°F (175°C). A thermometer is handy here; if the oil is too hot, the balls will burn before cooking through, and if it’s too cool, they’ll absorb excess oil and become greasy. A good test is to drop a small piece of batter into the oil—if it sizzles immediately and rises to the surface, the oil is ready.
- Gently slide the chilled balls into the hot oil, being careful not to overcrowd the pan. Fry in batches, turning occasionally, until they’re a deep golden brown and the edges start pulling away from the surface. This usually takes about 3–4 minutes per batch. The sizzle when they hit the oil? Absolute perfection.
- Remove the fried balls with a slotted spoon and place them on a paper towel‑lined plate to drain excess oil. This step is essential for keeping the balls crispy. While they’re still hot, drizzle a little tahini sauce over them; the sauce will cling to the edges and add a silky finish.
- Serve the balls immediately with a side of chopped tomatoes, cucumbers, lettuce, pickles, and warm pita bread. The fresh veggies add crunch and acidity that cut through the richness of the fried balls. If you’re making this for a party, arrange the components in a colorful platter for an Instagram‑ready presentation.
That's it — you did it. But hold on, I've got a few more tricks that'll take this to another level. These insider tips will help you avoid common pitfalls and elevate the dish to a professional standard.
Insider Tricks for Flawless Results
The Temperature Rule Nobody Follows
Many home cooks underestimate the importance of oil temperature. If the oil is too low, the balls absorb too much oil and become soggy. If it’s too high, the coating burns before the interior cooks. Use a thermometer to keep the oil steady at 350°F. If you don’t have one, drop a small piece of batter into the oil; if it sizzles immediately and rises to the surface, the oil is ready.
Why Your Nose Knows Best
Before you even touch the skillet, close your eyes, inhale deeply, and let the aroma guide you. A faint, nutty smell means the batter is ready for frying. If it smells off or overly raw, let it rest a few minutes. Your nose is a reliable indicator of readiness.
The 5-Minute Rest That Changes Everything
After frying, let the balls rest on a wire rack for 5 minutes. This step allows the steam to escape, keeping the exterior crisp. A quick pause also lets the flavors settle, making each bite more harmonious.
Don't Skimp on the Tahini
When drizzling tahini sauce over the hot balls, use a spoon rather than pouring. A spoon will coat the balls evenly, creating a silky glaze that complements the crunchy exterior. A thin layer of tahini also helps keep the balls from drying out.
Keep the Veggies Fresh
Chop the tomatoes, cucumbers, and lettuce just before serving. Fresh, crisp veggies contrast beautifully with the fried balls, adding a burst of color and a refreshing bite. If you’re prepping ahead, keep the veggies in a sealed container in the fridge and add them right before plating.
Make‑Ahead Magic
Prepare the balls in advance and freeze them. When you’re ready to serve, simply fry them from frozen; they’ll cook faster and stay crispy. This is perfect for busy weeknights or last‑minute parties.
Creative Twists and Variations
This recipe is a playground. Here are some of my favorite ways to switch things up:
Spicy Sriracha Dip
Swap the tahini sauce for a spicy Sriracha mayo. Mix mayo with Sriracha, a squeeze of lime, and a pinch of salt for a fiery kick that pairs perfectly with the herbs.
Herb‑Infused Pita Chips
Instead of serving the balls with pita bread, bake pita slices tossed in olive oil, garlic powder, and dried oregano until crisp. They’ll double as a crunchy base for the balls.
Vegan “Cheese” Spread
For a dairy‑free option, drizzle a cashew‑based cheese spread over the balls. The creamy texture complements the crisp exterior, and the nutty flavor adds another layer of depth.
Sweet & Savory Twist
Add a dash of maple syrup to the batter for a subtle sweet note that balances the spices. This works especially well if you’re serving the balls as part of a brunch spread.
Gluten‑Free Flour Swap
Replace all‑purpose flour with chickpea flour or oat flour. The texture will be slightly denser, but it’s a great way to keep the dish gluten‑free while still achieving a crisp coating.
Smoky Charred Finish
After frying, place the balls on a hot grill for 1–2 minutes to add a smoky char. This adds a new dimension of flavor and is perfect for outdoor gatherings.
Storing and Bringing It Back to Life
Fridge Storage
Store the fried balls in an airtight container in the refrigerator for up to 3 days. Keep them on a paper towel to absorb excess moisture, which helps maintain crispness. When ready to serve, reheat in a toaster oven at 350°F for 5 minutes.
Freezer Friendly
For longer storage, freeze the balls on a parchment‑lined tray for 1–2 hours, then transfer them to a freezer bag. They’ll keep for up to 3 months. Reheat from frozen by frying at 350°F for 3–4 minutes.
Best Reheating Method
To revive the crunch, reheat the balls in a hot skillet with a splash of oil for 1–2 minutes. Add a tiny splash of water before reheating to steam them back to perfection; the steam creates a fresh, airy interior while keeping the exterior crispy.