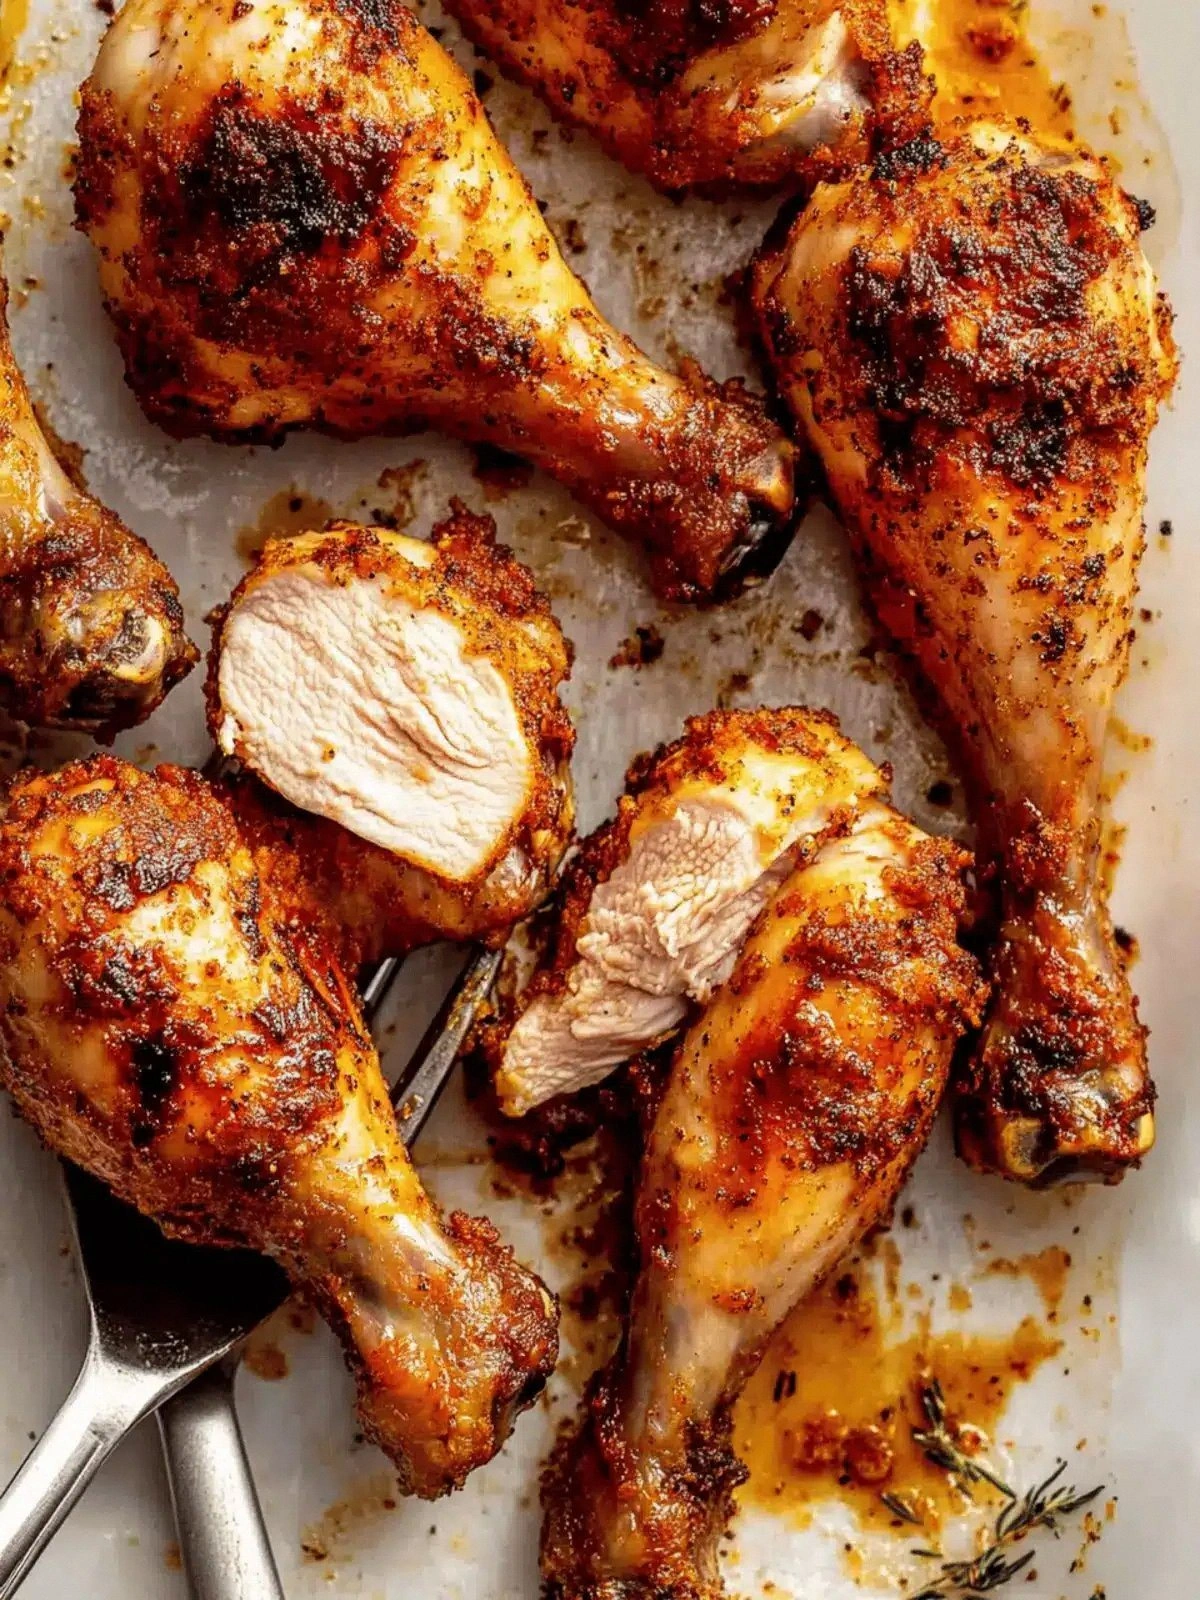
Picture this: a Saturday night, the kitchen clock ticking 10:17 PM, and your roommate’s phone buzzing with a meme about “the best chicken you’ve ever tasted.” I’m in the middle of a grocery run, scrolling through Instagram, when I stumble upon a photo of golden‑crusted drumsticks that look like they’ve been kissed by a summer breeze. The aroma alone—hints of garlic, paprika, and a whisper of oregano—made me stop in my tracks. That’s when I realized I’d found the missing puzzle piece for my dinner routine: a recipe that turns ordinary drumsticks into a show‑stopping masterpiece.
I was skeptical at first. How could a simple mix of spices and a single pan elevate a humble chicken piece? The first bite shattered my doubts. The skin was a crispy, caramelized shell that crackled like a toasted marshmallow, while the meat inside was juicy, tender, and bursting with layered flavors. I didn’t even need a fancy sauce—just a sprinkle of sea salt and the right balance of heat. That moment, I knew I had to share this secret.
Fast forward to this post: I’m standing in a bright, airy kitchen, surrounded by a symphony of sizzling sounds and the heady scent of herbs. The table is set with a platter of drumsticks that gleam like polished coins, ready to be devoured. The air is thick with anticipation, and the clock is ticking toward a dinner that will wow everyone at the table. I’ve perfected this recipe over countless trials, and every time I make it, the kitchen transforms into a culinary stage.
What makes this version stand out? It’s the combination of simple ingredients, a meticulous technique, and an unapologetic confidence in flavor. I’ve distilled the process into a handful of steps that even a novice can master. The result is a dish that feels like a celebration, not a chore. And trust me, you’ll want to taste it again and again.
I dare you to taste this and not go back for seconds. The crunch is addictive, the seasoning is bold, and the aroma is irresistible. If you’re skeptical, I’ll be honest—I ate half the batch before anyone else got a bite. That’s the power of this recipe: it’s so good, it’s almost addictive.
Most recipes get this completely wrong. They either over‑season, under‑cook, or fail to achieve that coveted crispness. Here’s what actually works: a dry coating, a high‑heat finish, and a final rest to lock in juices. The result is a dish that’s both simple and sophisticated. You’ll be the hero of your own kitchen.
Picture yourself pulling this out of the oven, the whole kitchen smelling incredible, and the family’s eyes widening in anticipation. The sound of the first bite—crack, crunch, then a burst of savory—will echo in your memory for weeks. That’s the future pacing of this recipe: a dinner that turns heads and leaves lasting impressions.
Okay, ready for the game‑changer? Let me walk you through every single step—by the end, you’ll wonder how you ever made it any other way. This is hands down the best version you’ll ever make at home. Let’s dive in.
What Makes This Version Stand Out
Flavor: The seasoning blend is a harmonious orchestra of garlic, oregano, paprika, and chili that creates depth without overpowering the natural taste of the chicken. Each spice plays a distinct role, from the subtle sweetness of paprika to the smoky heat of chili powder.
Crispness: The technique of drying the skin and searing it at a high temperature yields edges that shatter like thin ice, leaving a satisfying crunch that lingers on the palate.
Convenience: No marinades, no complicated sauces—just a quick rub, a single pan, and a short oven time. This recipe fits seamlessly into busy weeknights without compromising flavor.
Scalability: Whether you’re cooking for two or a crowd, the recipe scales effortlessly. The seasoning ratio remains consistent, ensuring a uniform taste every time.
Versatility: The base flavor profile can be tweaked to suit any palate—add a splash of lime for a tangy kick or a drizzle of honey for a sweet contrast. It’s a canvas for culinary creativity.
Make‑Ahead Potential: The drumsticks can be seasoned and refrigerated overnight, allowing the flavors to seep into the meat. This prep step saves time on busy days.
Ingredient Quality: Using fresh, high‑quality spices and extra‑virgin olive oil elevates the dish from good to unforgettable. The difference in flavor is palpable.
Alright, let's break down exactly what goes into this masterpiece. And now the fun part.
Inside the Ingredient List
The Flavor Base
Sea Salt: The foundation of seasoning, sea salt brings out the natural sweetness of the chicken while balancing the heat from chili powder. Skipping it will leave the dish flat and less complex.
Garlic Powder: Garlic powder provides a subtle, all‑day aroma that permeates the meat. If you’re allergic or prefer fresh garlic, a minced garlic infusion can substitute, though the texture will differ.
Chili Powder: Chili powder adds a gentle heat that lingers on the tongue. For a milder version, reduce the amount or use a smoked paprika to maintain flavor without the burn.
The Texture Crew
Extra Virgin Olive Oil: Olive oil creates a barrier that keeps the skin from sticking to the pan and promotes even browning. Use a light‑flavored oil if you want a subtler finish.
Oregano: Dried oregano contributes a herby depth that pairs beautifully with the paprika. Fresh oregano can be used, but it will lose potency during cooking.
The Unexpected Star
Paprika: Paprika not only adds a smoky sweetness but also gives the skin its vibrant color. If you’re craving a smoky twist, try smoked paprika; it will give a deeper, earthier flavor.
Ground Pepper: Ground pepper adds a subtle bite that balances the sweetness of paprika. A pinch of white pepper can replace it for a cleaner finish.
The Final Flourish
Chicken Drumsticks: Fresh, high‑quality drumsticks are the canvas. Look for pieces with even bone spacing and no visible fat pockets for the best results.
Buying Tip: Choose drumsticks that are firm to the touch and have a bright, clean look. Avoid pieces with a grayish hue or that feel overly soft.
Swap Suggestion: If you’re out of chicken, thighs or wings can work, but adjust cooking time accordingly to ensure doneness.
Everything's prepped? Good. Let's get into the real action.
The Method — Step by Step
- Preheat your oven to 425°F (220°C). A hot oven is essential for achieving that blistered, crispy skin. The higher temperature ensures the fat renders quickly, preventing sogginess.
- Pat the drumsticks dry with paper towels. Moisture is the enemy of crispness. The drier the skin, the more it will caramelize and develop a golden crust.
- In a large bowl, combine sea salt, garlic powder, chili powder, oregano, paprika, and ground pepper. Mix until evenly distributed. This blend is the flavor backbone of the dish.
- Drizzle the olive oil over the drumsticks, tossing them until each piece is lightly coated. The oil helps the spices adhere and promotes even browning.
- Add the seasoned drumsticks to the bowl, ensuring each piece is fully coated. Shake the bowl gently to distribute the spices uniformly.
- Arrange the drumsticks on a wire rack set over a rimmed baking sheet. The rack allows air to circulate around the meat, preventing steam buildup and ensuring crisp edges.
- Bake for 25 minutes, then flip each drumstick. This second exposure ensures even cooking and a uniform crispness on all sides.
- Return to the oven for an additional 10–12 minutes, or until the internal temperature reaches 165°F (74°C) and the skin is blistered and crisp. The final minutes are crucial for that satisfying crunch.
- Let the drumsticks rest for 5 minutes before serving. This short rest allows the juices to redistribute, keeping the meat moist.
That’s it— you did it. But hold on, I've got a few more tricks that'll take this to another level. The next section will reveal insider secrets that elevate the dish from good to unforgettable.
Insider Tricks for Flawless Results
The Temperature Rule Nobody Follows
Many cooks bake at a moderate temperature, but this recipe demands a high heat of 425°F (220°C). The elevated temperature is what gives the skin its blistered, caramelized finish. If you lower the temperature, the skin will steam instead of crisp.
Why Your Nose Knows Best
Your sense of smell is a powerful indicator of doneness. As soon as the drumsticks emit a deep, nutty aroma, you’re close to perfection. Trust your nose—it’s your best sous‑chef.
The 5-Minute Rest That Changes Everything
Letting the drumsticks rest after baking is critical. The rest period allows the juices to redistribute, ensuring each bite is moist. Skipping this step results in dry, overcooked meat.
The Dry Rub Advantage
Using a dry rub instead of a wet sauce concentrates flavor on the surface. This technique is especially effective for achieving that coveted crispy exterior.
The Air‑Circulation Trick
Placing the drumsticks on a wire rack allows hot air to circulate around the meat. This prevents steam buildup, which can soften the skin and ruin the crispness.
Creative Twists and Variations
This recipe is a playground. Here are some of my favorite ways to switch things up:
Asian Fusion
Swap paprika for five‑spice powder and add a splash of soy sauce to the olive oil. The result is a sweet, savory, and slightly sweet profile that pairs wonderfully with steamed rice.
Citrus Kick
Add a tablespoon of fresh lime juice to the seasoning mix and finish with lime zest. The bright acidity cuts through the richness and adds a refreshing contrast.
Honey‑Garlic Glaze
During the last 5 minutes of baking, brush the drumsticks with a mixture of honey and minced garlic. The glaze caramelizes, creating a glossy, sweet coating.
Mediterranean Twist
Replace oregano with fresh thyme and add chopped kalamata olives to the mix. The olives provide a briny depth that complements the Mediterranean herbs.
Smoky BBQ
Add a tablespoon of smoked paprika and a drizzle of your favorite BBQ sauce during the final minutes of baking. The smoky undertones elevate the dish to a new level of indulgence.
Storing and Bringing It Back to Life
Fridge Storage
Store cooked drumsticks in an airtight container for up to 3 days in the refrigerator. The crispness may diminish slightly, but the flavor remains robust.
Freezer Friendly
Freeze cooked drumsticks in a single layer on a baking sheet, then transfer to a freezer bag. They keep well for up to 3 months. Reheat in the oven to restore crispness.
Best Reheating Method
Reheat frozen or refrigerated drumsticks in a preheated 350°F (175°C) oven for 10–12 minutes, or until heated through. Add a splash of water before reheating to keep the meat moist, then broil for 2 minutes to crisp the skin.