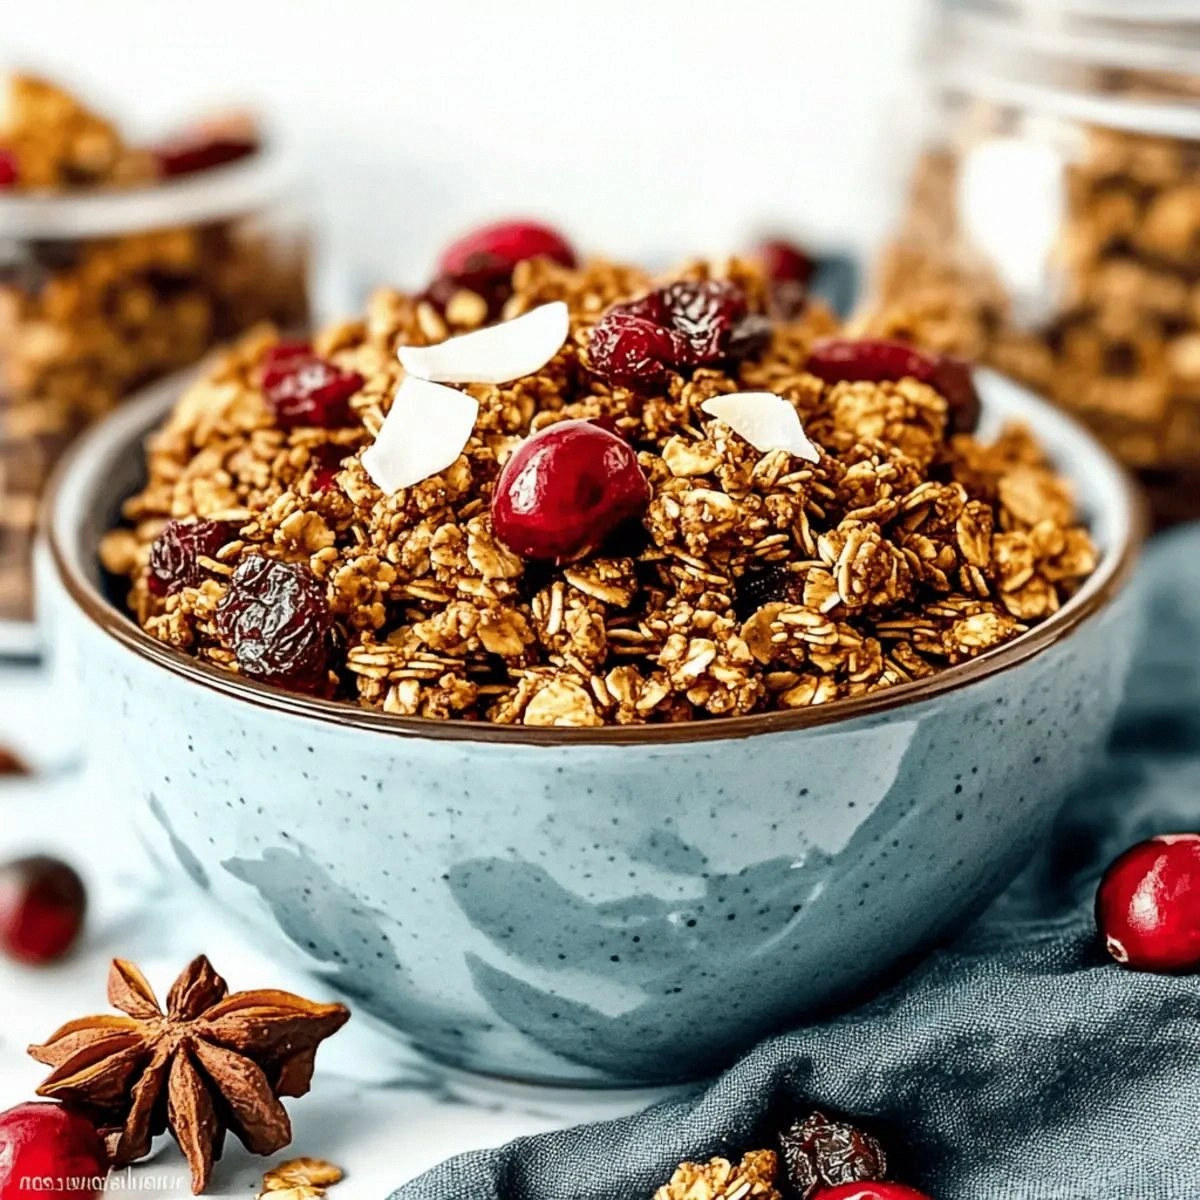
I burned three batches of granola before I cracked the code. The first one tasted like cardboard sprinkled with regret. The second glued itself to the pan like it was trying to fuse with the metal. By the third attempt, my kitchen looked like a crime scene of molasses and desperation. But then—then something magical happened. The air filled with gingerbread perfume so intense that my neighbor knocked to ask if I was running a secret bakery. That fourth batch? Let me tell you, it disappeared faster than free concert tickets. Clusters so crisp they snap like autumn twigs, warm spices that wrap around you like your favorite sweater, and that deep molasses richness that makes you close your eyes and sigh. This isn't just granola—this is December mornings in edible form.
Picture this: It's 6:30 AM, still dark outside, and you're standing in your kitchen wearing mismatched socks. The oven clicks on, and within minutes, your house transforms into a gingerbread house without the structural engineering problems. The scent sneaks into every corner—cardamom dancing with cinnamon, ginger doing the tango with nutmeg, and that mysterious something that makes everyone ask, "What are you making?" Here's the thing: most granola recipes get gingerbread wrong. They either go too timid and you end up with vaguely spiced oats, or they dump in so much molasses it tastes like you're chewing on a gingerbread man's shoe. This version? It hits that perfect balance where every bite tastes like you crumbled up a fresh gingerbread cookie and somehow made it socially acceptable to eat for breakfast.
I'll be honest—I ate half the batch before anyone else got to try it. Straight off the baking sheet, still warm, clusters breaking into perfect pieces between my fingers. My partner walked in to find me hunched over the pan like a dragon guarding treasure, molasses smudged on my cheek. But here's what makes this recipe different from every other granola you've tried: we're using a technique that creates those coveted clusters without any egg whites or strange binders. The secret lies in the molasses-maple syrup ratio and a specific pressing method that transforms loose oats into golden nuggets of joy. Plus, we're toasting our spices first because, trust me, that thirty-second step is the difference between "good" and "I need to hide this from myself."
Okay, ready for the game-changer? We're taking this beyond breakfast. This gingerbread granola becomes the star of ice cream sundaes, the crunchy crown on yogurt parfaits, the gift that makes people think you're a kitchen wizard, and the midnight snack that ruins all other midnight snacks forever. The recipe makes a generous batch because, between taste-testing, gift-giving, and those sneaky handfuls every time you pass the jar, you'll need it. Let me walk you through every single step—by the end, you'll wonder how you ever made it any other way.
What Makes This Version Stand Out
Cluster Magic: Forget those sad, loose oat situations. This recipe creates those gorgeous, break-apart clusters that make store-bought granola jealous. The trick is in the molasses acting as a natural binder, plus a specific pressing technique that transforms everything into golden nuggets.
Spice Symphony: Most recipes hit you with one-dimensional cinnamon. We're building layers—ginger for brightness, cinnamon for warmth, nutmeg for mystery, and cloves for that lingering depth. Each spice plays its part in perfect harmony, like a well-rehearsed orchestra in your mouth.
Texture Paradise: We're talking crispy edges that shatter like thin ice, giving way to chewy centers packed with toasted nuts and coconut flakes. The contrast between crunchy clusters and tender dried fruit creates a textural experience that keeps you reaching for more.
Breakfast Flexibility: This isn't just for morning yogurt. Crumble it over vanilla ice cream for instant gingerbread à la mode. Pack it in mason jars for gifts that make people actually excited about your Christmas presents. Sneak it straight from the container at midnight—no judgment here.
Ingredient Integrity: Using real molasses instead of brown sugar gives that authentic gingerbread depth. Real maple syrup provides complex sweetness that corn syrup could never achieve. Quality nuts, toasted to perfection, add protein and staying power that keeps you full until lunch.
Make-Ahead Champion: Stays crispy for weeks in an airtight container. Actually improves in flavor after day two when the spices meld and deepen. Make a double batch on Sunday, and you've got breakfast sorted through the holidays.
Customization Playground: Swap pecans for almonds, add orange zest for brightness, throw in crystallized ginger for extra zing. The base recipe is bulletproof, letting you play without fear of failure.
Crowd Reaction: I've seen grown adults fight over the last handful. Kids think it's candy. Health-conscious friends pretend they're only having "a little bit" before demolishing half the jar. It's the great unifier—everyone becomes a granola monster.
Inside the Ingredient List
The Flavor Base
Rolled oats form the backbone of this operation, but not all oats are created equal. Skip those instant packets that turn to mush faster than a snowman in July. We're looking for old-fashioned rolled oats with texture—flakes thick enough to create those gorgeous clusters when they hit the hot oven. The molasses isn't just for sweetness; it's liquid gingerbread essence, dark and mysterious with hints of caramel and smoke. Combined with maple syrup, it creates a lacquer that transforms ordinary oats into candied jewels. This dynamic duo also provides the perfect stickiness for cluster formation without any weird additives. If you've ever wondered why your homemade granola tastes flat compared to the fancy stuff, this two-syrup approach is your answer.
The Texture Crew
Nuts bring the crunch party, and we're not skimping. Almonds provide that satisfying snap, while pecans contribute buttery richness that plays beautifully with the molasses. Toast them first—this isn't optional if you want that deep, nutty flavor that makes people close their eyes when they taste it. The coconut flakes aren't just there for tropical vibes; they crisp up into golden shards that add shattering texture to every bite. Salt might seem counterintuitive in a sweet granola, but it's the magic ingredient that makes all the other flavors sing louder and clearer. Without it, everything tastes flat and one-dimensional.
The Spice Cabinet
Ground ginger brings bright, zingy heat that wakes up your palate like a splash of cold water. Cinnamon adds familiar warmth that wraps around you like a hug from Grandma. Nutmeg contributes mysterious complexity—just a whisper makes people ask, "What's that I can't quite place?" Cloves provide the finishing touch, intense and lingering, like the final note of a great song that hangs in the air. Together, they create that unmistakable gingerbread profile that transports you straight to December, even if you're making this in July. Fresh spices matter here; that five-year-old jar from the back of your cabinet won't cut it.
The Final Flourish
Dried fruits are where most recipes go wrong—they add them too early and end up with fruit leather. We're stirring them in after baking, so they stay plump and jewel-like against the crunchy backdrop. Cranberries provide tart pops that cut through the sweetness, while apricots contribute honeyed notes and chewy texture. The nut butter acts as our secret weapon, adding richness and helping those clusters stick together like best friends at a school dance. Choose almond butter for clean flavor or peanut butter for nostalgic comfort—both work beautifully depending on your mood.

The Method — Step by Step
- Preheat your oven to 325°F—not 350, not 300, but exactly 325. This temperature is the sweet spot where everything toasts evenly without burning the edges while leaving the center raw. Position your rack in the middle because heat distribution matters more than you think. While it's heating, spread your nuts on a baking sheet and toast them for 8 minutes. Your kitchen should start smelling like a nut shop, and that's when you know they're ready. Let them cool while you move to the next step, and resist the urge to snack on them all.
- In a large bowl, combine your rolled oats with the cooled toasted nuts. Add the coconut flakes now if you're using them—they'll toast beautifully in the oven and add shattering texture. In a small saucepan over medium heat, warm the maple syrup and molasses until they become loose and runny, about 2 minutes. Don't let it boil—just warm it enough that it pours like liquid gold. Stir in the nut butter until it melts into the syrup mixture, creating a glossy emulsion that looks like caramel's sophisticated cousin.
- Here's where the magic happens: pour that warm syrup mixture over your oat mixture. Don't dump it all in one spot—drizzle it around like Jackson Pollock so every oat gets a fair shot at the sweet coating. Now comes the fun part—get your hands in there and mix. Yes, your hands. A spoon can't properly massage the syrup into every nook and cranny. Squish and squeeze until everything is evenly coated and starting to clump together like it belongs together.
- Spread the mixture onto a parchment-lined baking sheet. Don't crowd it—use two sheets if necessary because overcrowding leads to steaming instead of crisping. Now press it down firmly with the back of a spatula or your hands. Really pack it in there like you're making a giant oat cookie. This compression is crucial for cluster formation. Slide it into your preheated oven and set a timer for 15 minutes.
- When the timer dings, pull out the sheet and let it cool for exactly 5 minutes. This brief rest lets the sugars set up slightly, making the clusters more stable when you break them up. Now grab a spatula and gently turn sections over, breaking up the giant sheet into smaller chunks. Don't get too aggressive here—think of it like folding laundry, not demolishing a building. Return it to the oven for another 10-12 minutes.
- This next part? Pure magic. Your kitchen should smell like you're baking gingerbread cookies for Santa. The edges should be turning deep golden, and the coconut (if using) should be toasted to perfection. Keep a close eye during these final minutes because molasses goes from perfect to burnt faster than you can say "gingerbread man." When it looks like dark caramel and smells like December, pull it out.
- Let the granola cool completely on the baking sheet. I know, I know—warm granola is irresistible. But cooling is when the final crispification happens. The molasses and maple syrup continue to harden, creating those addictive clusters. If you try to break it up while warm, you'll end up with granola confetti instead of glorious chunks. Use this time to chop your dried fruits and prepare your storage containers.
- Once completely cool—this takes about 45 minutes, so maybe do some dishes or dance around to holiday music—break it into chunks. Some pieces will be massive clusters perfect for snacking, others will be smaller bits ideal for yogurt topping. Stir in your dried fruits now, tossing gently so they distribute evenly without crushing the delicate clusters. Transfer to an airtight container and try not to eat it all before breakfast tomorrow.
Insider Tricks for Flawless Results
The Temperature Rule Nobody Follows
Most people crank their oven to 350°F because that's what their grandmother did. But here's the thing—granola is delicate. At 350, the edges burn before the center crisps, leaving you with a bitter outer ring and soggy middle bits. 325°F is the sweet spot where everything happens in harmony. The sugars caramelize slowly, developing complex flavors without burning. The nuts toast evenly, releasing their oils gradually. The oats dry out properly, creating that shattering crispness that makes people wonder if you added something special. A friend tried skipping this step once—let's just say it didn't end well for her breakfast plans.
Why Your Nose Knows Best
Don't trust the timer alone—your nose is the most sophisticated kitchen tool you own. When the spices hit their peak, they'll announce themselves like a brass section in a parade. First, you'll smell toasty oats, then warm spices, and finally that deep molasses richness. When all three scents harmonize, you're about 2-3 minutes from perfection. If you catch a whiff of anything sharp or bitter, you've gone too far. That smell test has saved more batches than I can count, especially during holiday baking when my kitchen smells like a spice market and timers become unreliable.
The 5-Minute Rest That Changes Everything
After the first 15 minutes of baking, resist the urge to immediately stir. Let it sit for exactly 5 minutes. During this time, the molasses and maple syrup cool slightly, creating a sticky web that holds everything together. Stir too soon, and you break up all those beautiful clusters before they set. Wait too long, and you'll need a chisel to break apart your granola sheet. Five minutes is the Goldilocks zone where everything is perfectly pliable but still holds together when you break it into chunks. Set a timer and walk away if you must—your patience will be rewarded with Instagram-worthy clusters.
The Storage Secret That Keeps It Crispy
Here's where most homemade granolas go wrong—they get soft and sad after a day. The culprit? Moisture sneaking in through improper storage. Wait until your granola is absolutely, completely, totally cool before you even think about putting it in a container. Even slight warmth creates condensation, and condensation is the enemy of crunch. Use a container with a tight-fitting lid, and if you're really serious, add a packet of food-grade silica gel to absorb any rogue moisture. Stored properly, this granola stays crispy for three weeks—though honestly, it's never lasted more than five days in my house.
The Double-Batch Wisdom
Listen, you're already making a mess of your kitchen. The measuring cups are out, the baking sheet is dirty, and your hands smell like gingerbread heaven. Make a double batch. Trust me on this. This granola disappears faster than free samples at Costco, and nothing's sadder than running out on Tuesday morning when you need that sweet, spiced crunch. A double batch fits perfectly on two baking sheets, and the recipe scales beautifully. Plus, you'll have extras for gifting, which makes you look like someone who has their life together—even if you're eating granola for dinner because adulting is hard.
Creative Twists and Variations
This recipe is a playground. Here are some of my favorite ways to switch things up:
Orange-Cranberry Winter Wonderland
Add the zest of two oranges to the wet ingredients along with a teaspoon of orange extract. Swap half the cranberries for dried cherries and add a handful of white chocolate chips after cooling. The result tastes like Christmas morning in Florida—familiar spices with bright citrus notes that wake up your whole mouth. This version disappears fastest at holiday potlucks, and people will ask for the recipe while their mouths are still full.
Chocolate Chili Heatwave
Replace half the molasses with dark cocoa powder and add a quarter teaspoon of cayenne pepper to the spice mix. Use dark chocolate chunks instead of dried fruit, stirring them in while the granola is just slightly warm so they melt slightly and create chocolate-coated clusters. The heat builds slowly, hitting you with gentle warmth after the chocolate melts on your tongue. It's addictive in that "I can't stop eating this even though my mouth is tingling" kind of way.
Pumpkin Spice Paradise
Swap the molasses for pumpkin puree and add two tablespoons of brown butter to the wet ingredients. Increase the cinnamon and add a teaspoon of allspice. Stir in pepitas and dried cranberries at the end for that perfect autumn color palette. It tastes like you blended pumpkin pie with granola, which honestly should be a food group. Perfect for those basic fall vibes we all secretly love.
Tropical Ginger Escape
Use coconut oil instead of nut butter and add a cup of chopped dried mango and crystallized ginger. The tropical fruits play beautifully with the warm spices, creating this vacation-in-a-bowl situation that makes January bearable. Add some toasted macadamia nuts if you're feeling fancy, or if you just need to use up that expensive bag you bought for that one recipe.
Savory-Sweet Rosemary Remix
Add a tablespoon of fresh chopped rosemary to the spice mix and use salted pistachios for the nuts. The herbaceous note sounds weird until you taste it—suddenly it's sophisticated and addictive, like something you'd pay $12 for at a fancy brunch place. This version pairs ridiculously well with goat cheese on a cheese board, making you look like a culinary genius at dinner parties.
Breakfast Sundae Supreme
Make the original recipe but add mini chocolate chips and crushed candy canes after cooling. Serve it over vanilla ice cream with a drizzle of warm maple syrup for the most indulgent breakfast that still technically counts as granola. It's what you serve when you want to impress brunch guests but also want to eat ice cream for breakfast. No one will judge you—they'll just ask for seconds.
Storing and Bringing It Back to Life
Fridge Storage
Don't refrigerate your granola unless you live in a tropical rainforest without air conditioning. The cold creates condensation, and condensation is the arch-nemesis of crunch. Keep it in an airtight container at room temperature, away from direct sunlight and heat sources. A dark pantry is ideal, but your counter works if you use it daily. The granola stays crispy for three weeks—though good luck having it last that long. If you notice slight softening, spread it on a baking sheet and pop it in a 300°F oven for 5-7 minutes to restore the crunch.
Freezer Friendly
Here's a pro move: portion your granola into freezer bags and freeze for up to three months. The freezer actually helps maintain that perfect crunch because it prevents moisture absorption. When you're ready to use it, just let it come to room temperature for 10 minutes. Don't microwave it—that way lies soggy sadness. Frozen granola is actually amazing on ice cream because it creates this contrast between cold cream and crunchy clusters that'll make you weep with joy.
Best Reheating Method
If your granola has lost its snap, spread it on a baking sheet and warm it in a 300°F oven for 5-8 minutes. Let it cool completely before storing again. For an instant refresh, add a tiny splash of water before reheating—it steams back to perfection. This trick works because the water creates a bit of steam that rehydrates the sugars, helping them crystallize again as they cool. Just don't overdo it—too much water makes sticky granola soup, and nobody wants that.