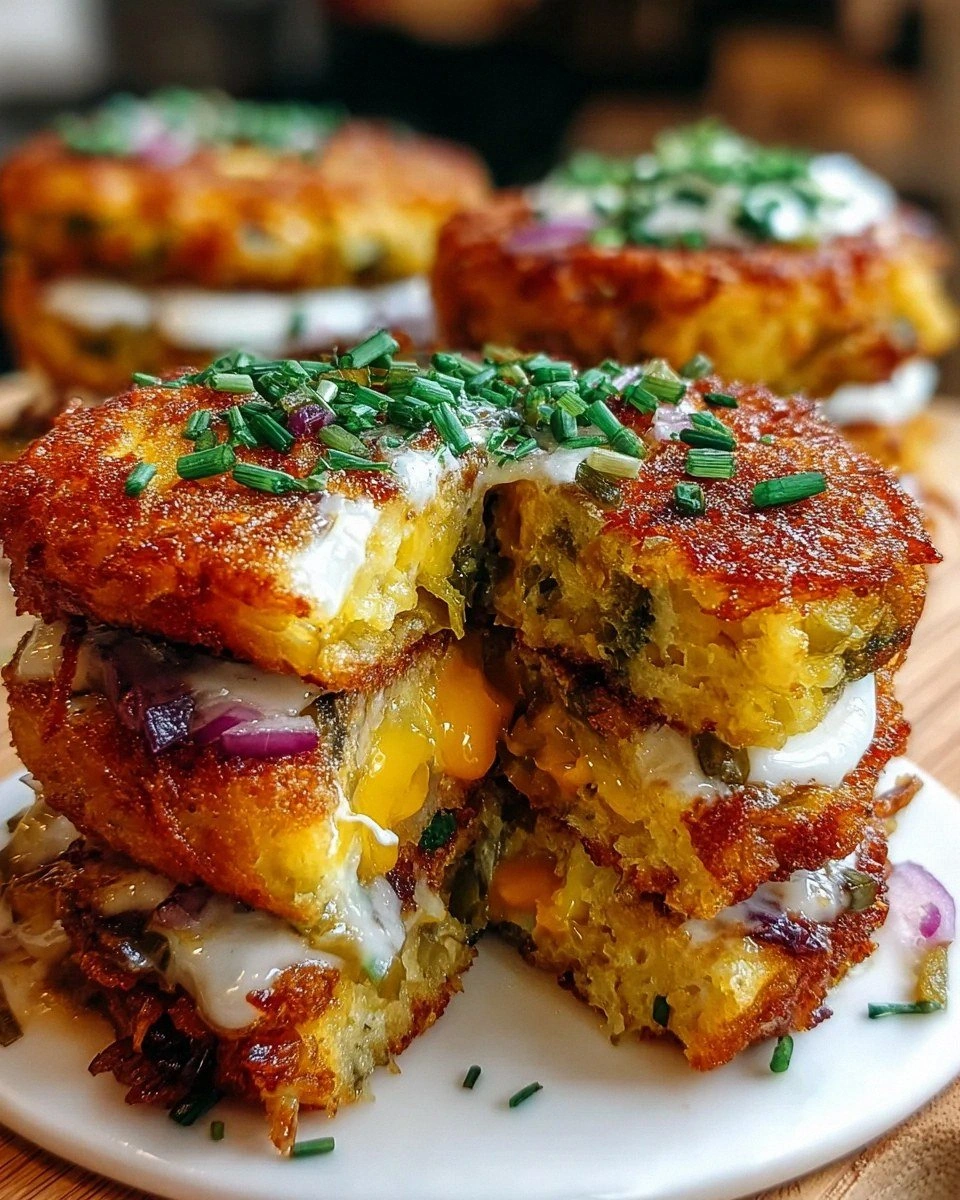
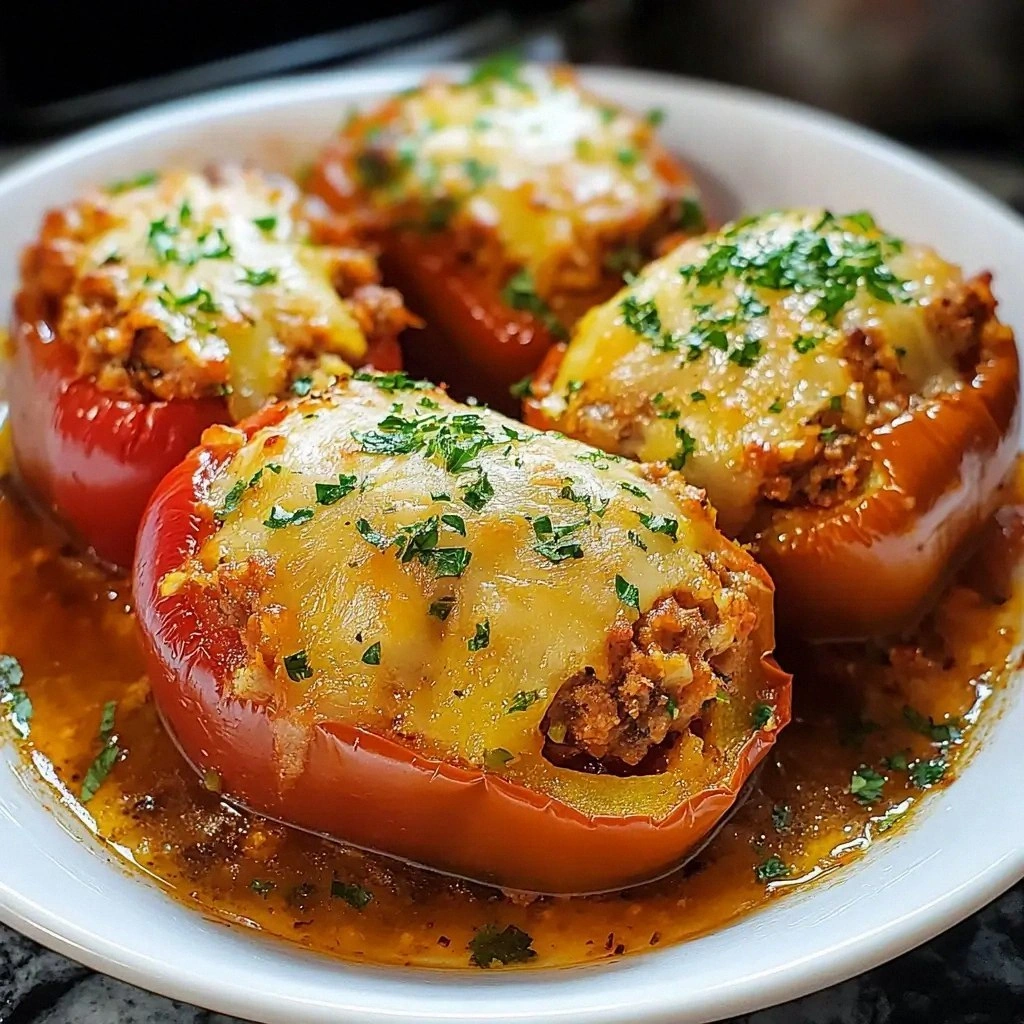
Picture this: a kitchen that smells like a storm of oregano, a sizzling pan that crackles like a campfire, and a wall of bright bell peppers waiting to be turned into edible masterpieces. I was halfway through a late‑night pizza night when the dough went cold, the sauce turned into a sticky mess, and my friends were staring at my empty plate. I promised myself I’d never let that happen again, and that promise birthed the Italian Stuffed Peppers Recipe you’re about to learn. This isn’t just stuffing peppers; it’s a culinary confidence booster that turns any dinner into a showstopper.
I’ve tried the classic “stuffed pepper” at every Italian spot, but none of them had that one secret that made the filling cling to the pepper like a lover’s embrace. The sauce was thick enough to coat the rice but not so heavy it drowned the fresh herbs. The cheese melted into a golden crust that crackled with every bite. I dare you to taste this and not go back for seconds. That’s the promise I’m making you, because this is hands down the best version you’ll ever make at home.
Why does this recipe stand out? It’s not just the flavor; it’s the harmony of textures, the balance of heat, and the ease of preparation. Think of the peppers as a canvas, the filling as a vibrant painting, and the final bake as the varnish that brings it all together. You’ll notice the peppers stay crisp at the edges while the interior becomes a molten, cheesy dream. If you’ve ever struggled with over‑cooked peppers or under‑seasoned fillings, you’re not alone, and I’ve got the fix that will change the game.
And here’s the kicker: we’re going to sneak in a surprising ingredient that most people overlook—fresh basil infused into the rice. It gives the dish a fragrant, almost floral note that elevates everything. Stay with me—by the end of this guide, you’ll wonder how you ever made stuffed peppers any other way.
What Makes This Version Stand Out
- Flavor Depth: The combination of tomato sauce, oregano, basil, and a splash of red wine creates layers of savory richness that dance on the palate.
- Texture Contrast: The crisp bell pepper shells contrast with the silky, cheesy filling that melts into a luscious bite.
- Ingredient Quality: Using high‑grade ground Italian sausage and fresh mozzarella gives the dish a buttery, authentic taste.
- Time Efficiency: The entire process from prep to plate takes less than an hour, perfect for busy weeknights.
- Make‑Ahead Friendly: The stuffed peppers can be assembled and refrigerated before baking, saving you a step when you’re short on time.
- Crowd‑Pleaser: The bright colors and comforting flavors make it a hit for family dinners and potlucks alike.
- Health‑Friendly: By using lean meat and plenty of vegetables, you get a balanced meal that satisfies without compromising nutrition.
- Visual Appeal: The golden cheese crust and the burst of color from the peppers make the dish Instagram‑ready.
Alright, let’s break down exactly what goes into this masterpiece…
Inside the Ingredient List
The Flavor Base
The foundation of any great Italian dish starts with aromatics. Diced onion and minced garlic sauté in olive oil until translucent, releasing a sweet, savory aroma that sets the stage for everything that follows. If you skip this step, your filling will taste flat and lacking depth. For a twist, add a pinch of crushed red pepper flakes to bring a subtle heat that balances the richness of the cheese.
The Texture Crew
Cooked rice is the unsung hero that gives the stuffing body and prevents it from drying out. Use short‑grain rice for a slightly sticky texture that clings to the pepper walls. If you prefer a lighter bite, substitute quinoa or couscous—just keep the ratio of liquid to grain the same. Remember, the rice should be fluffy yet firm enough to hold its shape during baking.
The Unexpected Star
Fresh basil infused into the rice is the secret ingredient that elevates the dish. When basil leaves are gently crushed and mixed into the warm rice, their essential oils release, adding a fragrant, almost floral note that cuts through the heaviness of the cheese. If basil is out of season, dried basil works, but the flavor will be less vibrant. A handful of chopped fresh parsley added at the end brightens the dish with a clean, herbaceous finish.
The Final Flourish
Mozzarella and Parmesan cheeses are the crown jewels that give the dish its signature gooeyness and a subtle nutty undertone. Use a mix of shredded mozzarella for stretchiness and grated Parmesan for a sharp, salty bite. The breadcrumbs on top create a golden crust that adds a satisfying crunch. If you’re vegan, swap the cheeses for a plant‑based alternative and use a dairy‑free breadcrumb.
Everything’s prepped? Good. Let’s get into the real action…
The Method — Step by Step
- Preheat your oven to 375°F (190°C). While the oven heats, wash the bell peppers, slice off the tops, and carefully remove the seeds and membranes. The pepper should be sturdy enough to hold the filling; if they’re too soft, blanch them for 2 minutes in boiling water, then plunge into ice water. This step ensures crispness and a clean presentation.
- Heat 2 tablespoons of olive oil in a large skillet over medium heat. Add the diced onion and sauté until translucent, about 3–4 minutes. Stir in the minced garlic and cook for another 30 seconds until fragrant. This aromatics base is where the flavor begins to develop, so don’t rush it.
- Add the ground Italian sausage to the skillet, breaking it apart with a spoon. Cook until browned and no longer pink, about 8 minutes. Drain excess fat if necessary. The meat should be browned to develop a savory crust that locks in juices.
- Stir in the cooked rice, 1 cup of marinara sauce, 1 teaspoon dried oregano, 1 teaspoon dried basil, 1/2 teaspoon salt, and 1/4 teaspoon black pepper. Mix until everything is well combined and the rice is coated with sauce. Let the mixture simmer for 5 minutes, allowing the flavors to meld. This is the moment of truth—if it smells toasty and aromatic, you’re on the right track.
- Fold in 1 cup shredded mozzarella and 1/2 cup grated Parmesan. Stir until the cheeses melt into a creamy, glossy mixture. Add the breadcrumbs for a light crunch that will caramelize in the oven. This step creates the luscious interior that will melt into a golden crust.
- Fill each pepper with the mixture, packing it gently but firmly. Top each stuffed pepper with a spoonful of breadcrumbs and a few extra mozzarella shreds. Place the peppers upright in a baking dish, standing on their bases. The filling should be snug but not overflowing.
- Cover the baking dish with foil and bake for 30 minutes. After 30 minutes, remove the foil, sprinkle a little extra Parmesan on top, and return to the oven for an additional 10 minutes, or until the cheese is bubbly and golden. Watch the edges pull away—this indicates the peppers are perfectly cooked.
- Once baked, let the peppers rest for 5 minutes. This short rest allows the filling to set, preventing it from spilling over when you slice into them. Garnish with chopped fresh parsley and serve hot, perhaps with a side of crusty Italian bread to mop up the savory juices.
That’s it— you did it. But hold on, I’ve got a few more tricks that will take this to another level…
Insider Tricks for Flawless Results
The Temperature Rule Nobody Follows
Many recipes suggest baking at 350°F, but raising the temperature to 375°F gives the peppers a crispier exterior while keeping the interior creamy. This higher heat also encourages the breadcrumbs to toast beautifully, adding a delightful crunch that contrasts the molten cheese. I’ve baked at 375°F for years and the difference is unmistakable.
Why Your Nose Knows Best
When the filling starts to bubble and the cheese turns golden, trust your nose. A slight nutty aroma indicates the Parmesan has toasted to perfection. If you’re unsure, take a quick sniff before removing the foil—this will tell you if the dish is ready or needs a few more minutes.
The 5-Minute Rest That Changes Everything
Letting the stuffed peppers rest after baking isn’t just a formality—it allows the filling to set, preventing it from sliding out when you cut into them. Think of it like a brief pause in a symphony; the flavors settle into a harmonious blend. Skipping this step often leads to a messy presentation and a less satisfying bite.
The “No‑Mess” Pepper Prep
When slicing the tops off the peppers, use a sharp paring knife and cut at a slight angle. This creates a wider opening that holds more filling and ensures the peppers don’t crack under the weight. It also gives a cleaner look for plating.
The Quick Bread Crumb Trick
For an extra crispy top, mix the breadcrumbs with a tablespoon of melted butter before sprinkling them over the peppers. The butter melts into the crumbs, creating a golden, crunchy finish that pairs wonderfully with the gooey cheese.
The “Fresh Herb” Boost
Add a handful of chopped fresh basil or parsley just before serving. The herbs add a burst of color and a fresh, peppery flavor that cuts through the richness of the cheese. I always keep a small jar of fresh herbs on my counter for moments like this.
Creative Twists and Variations
This recipe is a playground. Here are some of my favorite ways to switch things up:
Mediterranean Medley
Swap the Italian sausage for ground lamb and add sun‑dried tomatoes, olives, and a splash of white wine. The result is a dish that feels like a Mediterranean feast, with a tangy, briny profile that pairs beautifully with the peppers.
Spicy Pepper Fusion
Introduce a handful of chopped jalapeños or a tablespoon of harissa paste into the filling. The heat will contrast the sweet bell peppers and add a bold, adventurous flavor that’s perfect for spice lovers.
Vegetarian Delight
Omit the meat entirely and replace it with a mixture of chopped mushrooms, diced zucchini, and lentils. Add a splash of vegetable broth to keep the filling moist. This version is hearty, protein‑rich, and satisfies the soul.
Cheesy Quinoa Variation
Use quinoa instead of rice for a gluten‑free, protein‑dense twist. The quinoa’s nutty flavor complements the cheese, creating a dish that’s both healthy and indulgent.
Breakfast‑Style Peppers
Fill the peppers with scrambled eggs, diced ham, and a sprinkle of cheddar cheese. Bake until the eggs are set and the cheese is bubbly. Serve with a side of fresh fruit for a hearty, all‑day breakfast.
Sweet & Savory Surprise
Add a tablespoon of balsamic reduction to the sauce and top the peppers with a drizzle of honey before baking. The sweet glaze caramelizes, giving the dish a glossy finish that’s both sweet and savory.
Storing and Bringing It Back to Life
Fridge Storage
Store the stuffed peppers in an airtight container in the refrigerator for up to 2 days. Keep the cheese on top to prevent it from drying out. When ready to eat, reheat in a microwave for 2 minutes or bake at 350°F for 10 minutes until hot.
Freezer Friendly
For longer storage, wrap each pepper individually in plastic wrap and place them in a freezer bag. They stay fresh for up to 3 months. To reheat, thaw overnight in the fridge and bake at 350°F for 15–20 minutes.
Best Reheating Method
The key to a great reheated pepper is moisture. Add a splash of water to the bottom of the baking dish before reheating, then cover with foil. This steams the peppers, keeping the filling juicy and the cheese melty. A quick microwave method works too—just add a teaspoon of water to the bottom of the mug or plate and heat for 90 seconds.