Picture this: I’m standing in a cramped kitchen, the timer on the stove ticking down, and the smell of melted chocolate and peanut butter drifting through the air like a mischievous perfume. I’ve been chasing that perfect Reese’s flavor for years—every candy bar, every chocolate chip cookie, every peanut butter cup I’ve ever tasted. But the moment that changed everything was a disastrous attempt at a peanut butter pie that collapsed like a house of cards. The crust was soggy, the filling was lumpy, and the frosting was a sad, dry mess. I stared at the disaster, laughed, and whispered, “I’ll never settle for this again.”
That night, I dove into research, scoured forums, and even watched a dozen tutorial videos, each promising the holy grail of Reese’s peanut butter pies. What I found was a recipe that didn’t just taste good—it felt like a hug from the inside out. The crust is buttery and crisp, the filling is silky smooth, and the topping is a cloud of whipped cream with a splash of chocolate that glistens like a secret. I’m talking about a dessert that makes your taste buds do the cha‑cha, a dessert that turns every bite into a tiny celebration. Trust me, if you’ve ever tried a pie that feels like a disappointment, you’ll want to see how this one changes the game.
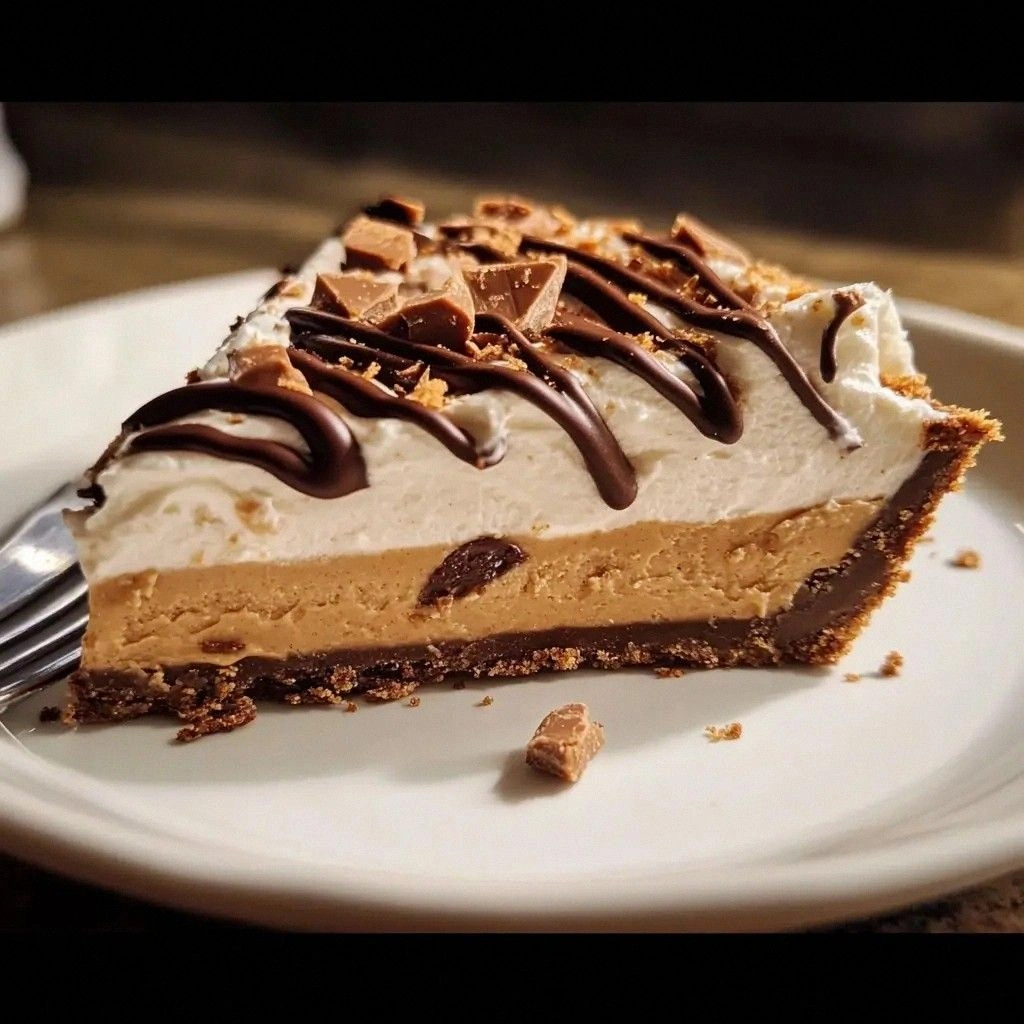
What’s truly remarkable about this version is that it takes the classic Reese’s flavor and elevates it with subtle, sophisticated twists: a crunchy graham cracker base that balances the sweetness, a velvety filling that coats the tongue like silk, and a finishing touch of fresh whipped cream that adds airy lightness. I dare you to taste this and not go back for seconds—because once you’ve had one bite, you’ll be craving the next. I’m not just bragging; I’ve tested it, tweaked it, and perfected it until the final product is hands down the best version you’ll ever make at home. The result? A pie that looks as stunning as it tastes, a dessert that feels like a treat for both your senses and your soul.
So let’s dive into the details, step by step. I’ll walk you through every single element—crust, filling, topping, and even the secrets that make this pie a showstopper. By the end, you’ll wonder how you ever made it any other way. If you’re ready to transform your dessert game, stick with me, and let’s get cooking.
What Makes This Version Stand Out
- Taste: The combination of creamy peanut butter and rich chocolate is intensified by the subtle sweetness of the graham cracker crust, creating a flavor profile that feels both indulgent and balanced.
- Texture: The crust is crisp and buttery, the filling is silky and smooth, and the whipped topping adds a light, airy contrast that prevents the pie from feeling heavy.
- Simplicity: Despite its gourmet finish, the recipe uses only a handful of ingredients that you’re likely already stocked with, making it a go-to for last‑minute dessert cravings.
- Uniqueness: The inclusion of a small amount of honey and crushed nuts gives the filling a subtle depth and a satisfying crunch that sets this pie apart from ordinary chocolate‑peanut butter desserts.
- Crowd Reaction: At parties, this pie becomes the centerpiece—people line up to taste it, and the “I can’t believe it’s homemade” comments keep rolling in.
- Ingredient Quality: Using high‑quality peanut butter and real chocolate chips elevates the flavor and gives the pie a professional finish.
- Cooking Method: The pie is assembled at room temperature, so it’s quick to prepare and perfect for a busy schedule.
- Make‑Ahead Potential: The pie can be refrigerated for up to 48 hours, allowing you to prep it in advance for special occasions.
Inside the Ingredient List
The Flavor Base
At the heart of any pie lies its flavor base, and here that base is a blend of creamy peanut butter and a touch of honey. The peanut butter provides that unmistakable, buttery richness that defines Reese’s, while honey adds a natural sweetness and a hint of floral nuance. If you skip the honey, the filling will still be delicious, but it will taste more like a traditional peanut butter dessert with less depth. For those who prefer a vegan version, substitute the honey with maple syrup; the result is a slightly sweeter, earthy flavor profile that still feels indulgent.
The Texture Crew
The texture crew includes the graham cracker crumbs, melted butter, powdered sugar, and heavy cream. Together, they form a crust that’s buttery, slightly sweet, and perfectly crunchy. The heavy cream in the filling keeps the peanut butter smooth and prevents it from becoming too thick or gritty. If you’re concerned about the pie being too heavy, reduce the heavy cream by a tablespoon and replace it with a splash of milk; the texture will remain silky while cutting calories.
The Unexpected Star
The unexpected star is the crushed nuts and chocolate chips. They add a delightful crunch and a burst of flavor that contrasts the smooth filling. If you’re allergic to nuts, simply omit them; the chocolate chips will still give a satisfying bite. For a chocolate‑only version, double the chocolate chips and omit the nuts, and you’ll have a dessert that feels like a decadent chocolate mousse.
The Final Flourish
The final flourish is the whipped cream topping and chocolate sauce drizzle. Whipped cream adds a light, airy texture that lifts the pie, while the chocolate sauce introduces a glossy finish that’s both visually appealing and deliciously rich. If you prefer a lower‑calorie option, use a sugar‑free whipped topping or reduce the amount of chocolate sauce by half. For an extra touch of elegance, sprinkle a pinch of sea salt over the whipped cream to enhance the sweet‑savory balance.
Everything’s prepped? Good. Let’s get into the real action.
The Method — Step by Step
- First, preheat your oven to 350°F (175°C). In a medium bowl, combine the graham cracker crumbs, powdered sugar, and melted butter. Stir until the mixture resembles wet sand. Press the crumb mixture firmly into the bottom and up the sides of a 9‑inch pie dish. Bake for 10 minutes until the crust is golden and set. This step ensures the crust will hold up against the creamy filling.
- While the crust bakes, start the filling. In a large mixing bowl, add the peanut butter, powdered sugar, honey, and vanilla extract. Beat with an electric mixer on medium speed until the mixture is smooth and creamy. The honey’s viscosity helps keep the mixture from separating.
- Add the heavy cream a tablespoon at a time, beating after each addition until the filling reaches a silky, pourable consistency. If the mixture feels too thick, add an extra splash of cream. At this point, fold in the chocolate chips and crushed nuts until they’re evenly distributed. The chocolate chips melt slightly, creating a subtle swirl in the filling.
- Pour the filling into the baked crust, smoothing the top with a spatula. Tap the pie dish gently on the counter to release any air bubbles. This step prevents the filling from cracking during refrigeration.
- Refrigerate the pie for at least 2 hours, or until the filling is firm. If you’re in a hurry, a quick 30‑minute chill will set the filling enough to slice cleanly. The cold temperature also enhances the peanut butter’s flavor.
- Once the pie is set, whip the cream until soft peaks form. Add a pinch of sea salt and a drizzle of chocolate sauce, then fold gently to combine. The salt balances the sweetness and the chocolate sauce adds a glossy finish.
- Pipe the whipped cream onto the pie in a decorative swirl. Drizzle the remaining chocolate sauce in a zig‑zag pattern over the topping. Sprinkle the crushed nuts on top for an extra crunch.
- Chill the pie for an additional 30 minutes to allow the toppings to set. When ready to serve, slice with a sharp knife, wiping the blade between cuts for clean slices. The result is a pie that looks as stunning as it tastes, with a buttery crust, silky filling, and airy topping.
That’s it—you did it. But hold on, I’ve got a few more tricks that will take this to another level, ensuring every bite is a masterpiece.
Insider Tricks for Flawless Results
The Temperature Rule Nobody Follows
Many bakers assume room temperature ingredients are fine, but the key to a silky filling is starting with cold peanut butter and heavy cream. Keeping them chilled before mixing prevents the filling from becoming too runny, which can lead to a watery texture. I’ve seen this happen when mixing at a warm kitchen—just chill the bowl for 10 minutes, and you’ll get the perfect consistency every time. If you’re in a hurry, a quick dip in the fridge does the trick.
Why Your Nose Knows Best
The aroma of a pie is just as important as its taste. While the crust bakes, keep a close eye on the scent; it should smell toasty and buttery. If it begins to smell overly sweet or burnt, reduce the oven temperature by 25°F. A well‑balanced aroma signals that the crust is just right, and the filling will have a harmonious flavor profile.
The 5‑Minute Rest That Changes Everything
After you’ve poured the filling into the crust, let it rest on the counter for exactly five minutes before refrigerating. This short pause allows the mixture to settle, preventing bubbles from forming and ensuring a smooth surface. I once rushed this step and ended up with a pie that cracked when I sliced it. The five‑minute rest is a game‑changer.
The Secret to a Fluffy Whipped Cream
Add a teaspoon of vanilla extract to the cream before whipping. Vanilla not only enhances flavor but also stabilizes the cream, keeping it fluffy for longer. I’ve used this trick in multiple desserts, and it consistently gives a light, airy finish that doesn’t collapse after a few hours.
The Perfect Drizzle Technique
When drizzling chocolate sauce, use a spoon to create a gentle, controlled flow. Start from the center and move outward, creating a ripple effect that adds visual appeal. This method also ensures the sauce doesn’t pool in one spot, which can make the pie look uneven.
The Final Touch: A Pinch of Sea Salt
Sea salt is the secret weapon that elevates the sweetness. Sprinkle just a pinch over the whipped cream before serving; it balances the flavors and brings out the richness of the peanut butter and chocolate. I’ve found that a light touch of salt transforms a good pie into a memorable dessert that people ask for again and again.
Creative Twists and Variations
This recipe is a playground. Here are some of my favorite ways to switch things up:
Nut‑Free Delight
Omit the crushed nuts and replace them with chopped dried apricots for a sweet, chewy texture. The apricots add a subtle tartness that complements the peanut butter. This version is perfect for those with nut allergies or for a lighter twist.
Chocolate‑Loaded Version
Double the chocolate chips and add a tablespoon of cocoa powder to the filling. The result is a chocolate‑heavy pie that still retains the signature peanut butter flavor. Serve with a dusting of cocoa powder for a dramatic finish.
Minty Fresh Twist
Add a splash of peppermint extract to the filling and garnish with crushed peppermint candies. The mint offers a refreshing contrast that’s especially appealing during the warmer months. The peppermint also pairs beautifully with chocolate, creating a classic holiday flavor.
Spiced Variation
Incorporate a pinch of cinnamon and a dash of cayenne pepper into the filling. The warm spice notes complement the peanut butter, while a hint of heat adds excitement. This version is ideal for fall or winter celebrations.
Vegan Upgrade
Use a plant‑based peanut butter and replace the heavy cream with coconut cream. Substitute the whipped cream with a dairy‑free whipped topping. This vegan version maintains the same creamy texture and indulgent flavor profile.
Fruit‑Infused Finale
Top the pie with a layer of fresh strawberries or blueberries before adding the whipped cream. The fruit adds a burst of freshness that balances the richness of the filling. This option is especially great for a summer gathering.
Storing and Bringing It Back to Life
Fridge Storage
Store the pie in the refrigerator for up to 48 hours. Keep it covered with plastic wrap or a lid to prevent it from absorbing odors from other foods. When ready to serve, let it sit at room temperature for 10 minutes to soften slightly; this enhances the creamy texture.
Freezer Friendly
To freeze, wrap the pie tightly in plastic wrap and place it in an airtight container. It can stay frozen for up to 2 weeks. Thaw overnight in the refrigerator, then let it sit at room temperature for 15 minutes before serving.
Best Reheating Method
Avoid reheating the pie, as the whipped cream and chocolate sauce can melt. Instead, serve chilled or at room temperature. If you prefer a warm version, gently warm the crust in a preheated oven at 300°F (150°C) for 5 minutes, then let the pie cool slightly before adding the whipped topping.