I was standing in my kitchen, staring at a half‑finished batch of store‑bought granola bars, when a sudden craving for something both crunchy and gooey hit me like a thunderclap. The pantry was a graveyard of stale cereal, a jar of peanut butter that had been waiting for a purpose, and a bag of marshmallows that looked like they’d been rescued from a forgotten birthday party. I thought, “What if I could turn these humble ingredients into a bar that makes you scream for seconds?” That moment turned into a full‑blown kitchen experiment, and after a few failed attempts (yes, there were burnt edges and a few melted‑marshmallow disasters), I finally nailed the perfect balance.
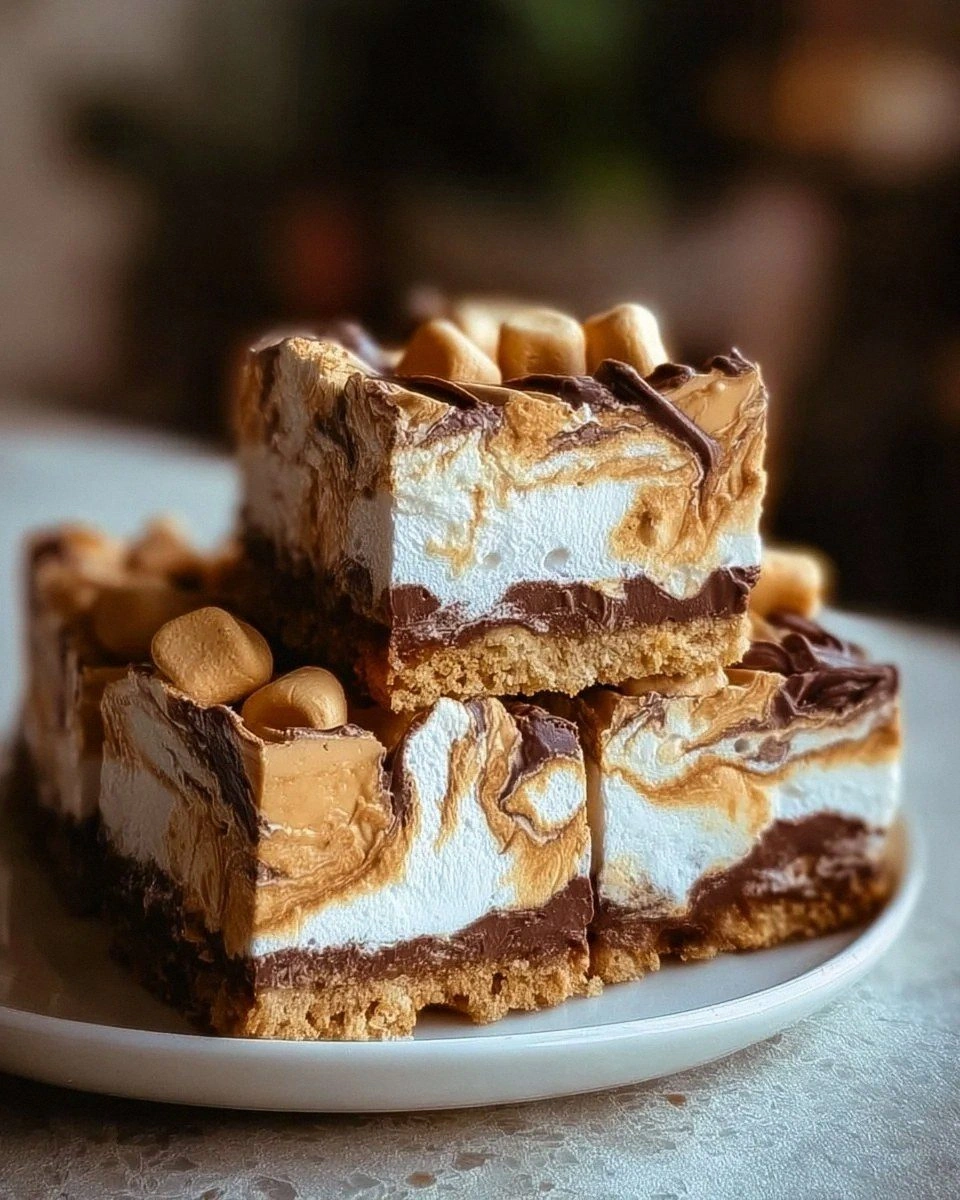
Picture this: the moment you open the tin, a sweet, nutty aroma rushes out, hugging the room like a warm blanket. The top glistens with a thin veil of melted chocolate that cracks just enough to reveal the fluffy marshmallow interior. When you bite into it, the first thing you notice is the satisfying snap of the puffed rice, followed by a buttery, peanut‑laden melt that coats your tongue like velvet. The marshmallows give you that airy, cloud‑like chew, while the chocolate chips add a surprise burst of richness that makes the whole thing feel indulgent yet oddly wholesome.
Most recipes for peanut‑marshmallow bars either drown the texture in too much syrup or leave the flavor flat by skimping on the peanut butter. This version, however, uses a precise ½ cup of honey (or maple syrup for a deeper flavor) that binds everything without turning the bars into a sticky mess. The secret? A quick “toast‑and‑mix” step that brings out the nutty notes of the peanut butter and gives the puffed rice a toasty crunch you can hear when you bite. I dare you to taste this and not go back for seconds – it’s hands down the best version you’ll ever make at home.
I’ll be honest — I ate half the batch before anyone else got a chance to try it, and the only thing that stopped me was the guilt of ruining a perfect snack for the whole family. But that’s the beauty of this recipe: it’s so addictive that you’ll want to make a double batch just to share (or not). And now, I’m ready to spill every detail, from the exact measurements to the little tricks that keep the bars from sticking to the pan. Let me walk you through every single step — by the end, you’ll wonder how you ever made it any other way.
What Makes This Version Stand Out
- Texture: The combination of puffed rice and marshmallows creates a light, airy bite that still holds together when you cut it. It’s not soggy, not dry – it’s the Goldilocks of snack bars.
- Flavor Depth: The honey‑maple blend adds a subtle caramel note that elevates the peanut butter from ordinary to extraordinary.
- Simplicity: Only six core ingredients, no fancy equipment, and a single pan – perfect for busy weeknights.
- Visual Appeal: The glossy chocolate drizzle on top looks like a professional patisserie, making it Instagram‑ready without the hassle.
- Crowd Reaction: Kids call it “magic bars,” adults swear it’s a nostalgic throwback to campfire treats, and everyone asks for the recipe.
- Ingredient Quality: Using creamy, natural peanut butter (no hydrogenated oils) ensures a smooth, rich mouthfeel.
- Make‑Ahead Potential: These bars keep for up to a week in an airtight container, and they even freeze beautifully for later cravings.
- Cooking Method: The gentle stovetop melt avoids the dreaded “burnt sugar” scenario that ruins many no‑bake bars.
Inside the Ingredient List
The Flavor Base
The star of the show is the creamy peanut butter. It provides that deep, roasted nuttiness that you can’t get from powdered peanut butter or PB2. If you skimp on it, the bars taste flat, like a marshmallow cloud without any grounding. For the best result, choose a natural, unsweetened variety that has a smooth texture; this ensures it blends evenly with the honey without clumping. If you’re allergic to peanuts, try a smooth almond butter – the flavor shifts but the texture remains glorious.
The Sweet Glue
Honey or maple syrup acts as the binding agent, giving the bars that perfect chew without turning them soggy. Honey adds a floral undertone, while maple syrup brings a richer, woody note. Both are liquid sweeteners, so they coat the puffed rice and marshmallows uniformly. If you’re looking for a lower‑glycemic option, a blend of agave nectar and a dash of stevia works, but you’ll lose a bit of the caramel depth.
The Texture Crew
Puffed rice cereal is the crunch engine. Its light, airy structure expands the bar’s volume without adding heaviness. Skipping it makes the bars dense and overly sweet. Look for a brand that’s plain, not flavored, so the peanut‑honey combo shines. If you can’t find puffed rice, try puffed quinoa for a slightly nuttier bite.
Miniature marshmallows are the surprise element that makes every bite feel like a mini‑campfire treat. They melt just enough to bind the bar but retain a soft, pillowy center. If you substitute regular-sized marshmallows, you’ll end up with clumps that don’t distribute evenly. For a twist, try toasted marshmallows – they add a caramelized edge that’s pure decadence.
The Unexpected Star
Chocolate chips are added at the very end, allowing them to melt just enough to create a glossy top layer without sinking. They give a burst of cocoa richness that cuts through the sweetness. Dark chocolate (70% cacao) adds a sophisticated bitter note, while milk chocolate makes the bar sweeter and more kid‑friendly. If you’re dairy‑free, use vegan chocolate chips – the texture stays the same.
The Final Flourish
Vanilla extract is the aromatic whisper that ties everything together. A single teaspoon is enough to lift the flavor profile without being overpowering. Use pure vanilla extract, not imitation, because the latter can taste harsh when combined with honey.
Everything's prepped? Good. Let's get into the real action...
The Method — Step by Step
Gather all ingredients and line an 8‑by‑8‑inch square baking pan with parchment paper, leaving a little overhang on the sides for easy removal. This step is crucial because the bars will be sticky, and the parchment acts like a non‑stick superhero. I like to lightly grease the parchment with a dab of peanut butter – it adds a subtle flavor boost and prevents any sticking. Once the pan is ready, set it aside while you start the cooking process.
Place a medium saucepan over low heat and add the creamy peanut butter and honey (or maple syrup). Stir constantly with a silicone spatula; you’ll hear a gentle hiss as the sugars begin to dissolve. The mixture should become glossy and smooth, but be careful – if the heat spikes, the honey can caramelize too quickly and turn bitter. Watch out for the color change; when it turns a light amber, you’re at the perfect stage.
Watch Out: Do not let the mixture boil; a rolling boil will scorch the honey and ruin the flavor.Once the peanut‑honey blend is smooth, remove the pan from heat and stir in the vanilla extract. This is the moment of truth – the aroma should fill the kitchen like a warm hug. The vanilla will instantly lift the mixture, making it smell like a bakery. Let the mixture sit for a minute to cool just enough so it doesn’t melt the marshmallows in the next step.
Quickly toss the puffed rice cereal into the warm peanut‑honey mixture, folding it until every piece is evenly coated. You’ll hear a faint crunch as the rice meets the syrup, and the mixture will start to thicken. This coating step is what gives the bars their signature snap. Kitchen Hack: Spread the coated cereal on a large sheet of parchment for a few seconds; this prevents clumping when you add the marshmallows.
Now, add the miniature marshmallows and gently fold them in. The heat from the peanut‑honey base will melt the marshmallows just enough to become gooey, but not so much that they disappear. You’ll see the mixture turn slightly glossy – that’s the marshmallows releasing steam. Keep folding until the marshmallows are evenly distributed, creating a marbled effect throughout the batter.
Transfer the entire mixture into the prepared baking pan, pressing it down firmly with the back of a spoon or your hands (dampen your hands with a little water to avoid sticking). The surface should be level and compact; this ensures the bars slice cleanly later. If you notice any gaps, press a little more – those gaps become weak spots that crumble.
Kitchen Hack: Use a flat-bottomed glass to press the mixture down; it distributes pressure evenly.Sprinkle the chocolate chips over the top while the mixture is still warm. The residual heat will melt the chips just enough to create a thin, glossy layer that sets as it cools. If you prefer a thicker chocolate coating, you can melt the chips separately and drizzle them over the surface. Let the pan sit at room temperature for about 10 minutes, then transfer it to the refrigerator for another 20 minutes to firm up.
After the bars have set, lift them out using the parchment overhang and place them on a cutting board. Using a sharp, non‑serrated knife, cut the slab into 12 even bars – the overhang makes this step painless. The edges should be slightly crisp, while the interior stays soft and chewy. And now the fun part: watch your friends’ faces when they bite into the first bar and hear that satisfying crack.
That's it — you did it. But hold on, I've got a few more tricks that'll take this to another level...
Insider Tricks for Flawless Results
The Temperature Rule Nobody Follows
Never let the peanut‑honey mixture exceed 140°F (60°C). Above this, the sugars start to break down, creating a bitter aftertaste. I keep a candy thermometer on hand and pull the pan off the heat the moment the mixture reaches a light amber hue. This precise control is what separates a professional‑grade bar from a kitchen mishap.
Why Your Nose Knows Best
Your sense of smell is a reliable indicator of doneness. When the mixture starts to emit a caramel‑like scent, you’re right on target. If you ever feel uncertain, trust that aromatic cue – it’s more accurate than any timer.
The 5‑Minute Rest That Changes Everything
After pressing the mixture into the pan, let it sit untouched for five minutes before refrigerating. This short rest lets the syrup settle and the rice absorb a bit of moisture, preventing the bars from crumbling when you cut them. Skipping this step is a common mistake that leads to uneven slices.
Chocolate Timing Trick
If you love a thick chocolate shell, melt the chips in a microwave for 15‑second bursts, stirring in between. Then pour the molten chocolate over the bars and use a spatula to spread it evenly. The result is a glossy, firm coating that cracks delightfully under the bite.
The “Cool‑Then‑Warm” Flip
After the bars have chilled, give them a quick 30‑second warm‑up in a 200°F (93°C) oven before serving. This softens the interior just enough to make the marshmallows melt slightly, creating a luxurious mouthfeel without losing the outer crunch. A friend tried skipping this step once — the bars were solid as a rock, and the texture suffered.
Creative Twists and Variations
This recipe is a playground. Here are some of my favorite ways to switch things up:
Nutty Crunch Upgrade
Add ½ cup of toasted chopped almonds or pecans to the puffed rice before mixing. The nuts introduce an extra layer of crunch and a buttery flavor that pairs beautifully with the peanut butter.
Berry Burst
Fold in ¼ cup of dried cranberries or freeze‑dried strawberries. The tartness cuts through the sweetness, giving the bars a sophisticated flavor profile perfect for brunch.
Spicy Kick
Stir in a pinch of cayenne pepper or a dash of chili powder into the peanut‑honey mixture. The subtle heat adds depth and makes the bars unexpectedly addictive.
Coconut Dream
Replace half of the puffed rice with toasted coconut flakes. The coconut adds a tropical aroma and a chewy texture that complements the marshmallows.
Coffee Infusion
Add 1 teaspoon of instant espresso powder to the honey before melting. The coffee notes enhance the chocolate and give the bars a mocha vibe.
Vegan Version
Swap the creamy peanut butter for a plant‑based alternative, use maple syrup instead of honey, and choose dairy‑free chocolate chips. The result is a fully vegan bar that still delivers on texture and flavor.
Storing and Bringing It Back to Life
Fridge Storage
Place the bars in an airtight container lined with parchment paper. They’ll stay fresh for up to 7 days, and the chocolate coating remains firm. If you notice condensation, wipe the surface with a paper towel before resealing.
Freezer Friendly
Wrap each bar individually in plastic wrap, then place them in a freezer‑safe zip‑lock bag. They freeze well for up to 3 months. When you’re ready to enjoy, let them thaw at room temperature for 15 minutes, then give them a quick microwave zap (10 seconds) to revive the softness.
Best Reheating Method
Add a tiny splash of water (about a teaspoon) to the bar’s surface before microwaving for 10‑15 seconds. The steam created revives the marshmallow fluff and prevents the chocolate from becoming rubbery. This trick brings the bar back to its original, melt‑in‑your‑mouth glory.