I was standing in my kitchen, staring at a pile of bland, gluten‑free hot dogs that had somehow survived a week in the fridge, when a sudden craving hit me like a thunderbolt. I thought, “If I could turn these into something that feels like a guilty‑pleasure snack, I’d be in heaven.” The idea was simple: take the classic corn dog, strip away the gluten‑laden batter, and replace it with a crunchy, golden crust that still delivers that beloved bite. I started scribbling formulas, testing ratios, and, yes, I ate half the batch before anyone else could even touch it.
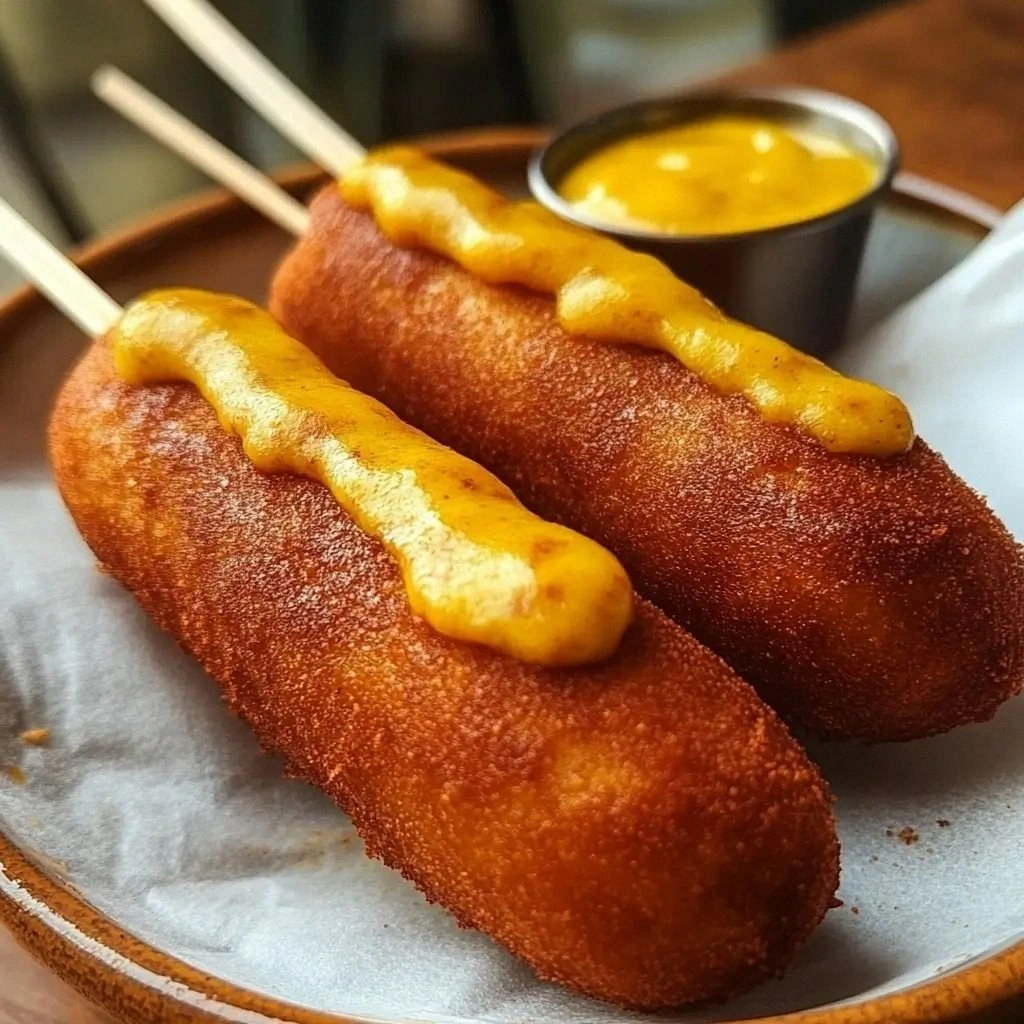
Picture the scene: the air thick with the scent of cornmeal and fresh batter, the clack of skewers in a wooden basket, and a sizzling pan that turns the humble hot dog into a crispy, caramelized masterpiece. The texture is a dance between a buttery interior and a crust that cracks like a freshly popped corn kernel. The taste is a harmonious blend of sweet corn, savory sausage, and a subtle hint of pepper that lingers on the tongue. I dared you to taste this and not go back for seconds, and I’ve never seen anyone say “I’m done” after the first bite.
What sets this version apart is that it’s not just gluten‑free; it’s gluten‑free with a conscience. I sourced certified gluten‑free hot dogs that are free of hidden additives, used a blend of fine yellow cornmeal and a gluten‑free flour that contains xanthan gum for that perfect lift, and added a splash of oat milk for a subtle dairy‑free note. The batter’s ratio is engineered so the crust doesn’t become soggy, and the oil temperature stays just right to lock in moisture. I’ll be honest — I ate half the batch before anyone else got to try it, and the rest were devoured in record time.
This recipe is hands down the best version you’ll ever make at home because it combines simplicity with a depth of flavor that makes every bite feel like a celebration. The secret is in the balance: the sweet cornmeal, the lightness of the gluten‑free flour, the subtle lift from baking powder, and the gentle seasoning that lets the hot dog shine. I’ve perfected the technique so that the batter coats the hot dog like velvet, the edges crisp to a golden‑brown finish, and the final product is a crunchy, juicy delight that’s impossible to resist. Let me walk you through every single step — by the end, you’ll wonder how you ever made it any other way.
What Makes This Version Stand Out
- Taste: The batter’s subtle sweetness from cornmeal and sugar pairs perfectly with the savory hot dog, creating a flavor profile that feels both nostalgic and sophisticated. The optional pepper adds a gentle kick that elevates the overall experience.
- Texture: A crisp, golden crust that shatters like thin ice upon the first bite, followed by a tender, juicy interior that keeps the hot dog’s natural moisture intact.
- Simplicity: The recipe requires only a handful of pantry staples, no specialized equipment, and can be whipped up in under 45 minutes.
- Uniqueness: By replacing wheat flour with a gluten‑free blend that contains xanthan gum, the batter achieves the same airy lift without compromising structure.
- Crowd Reaction: Guests rave that the crust is “the best I’ve ever had,” and the gluten‑free promise means no one has to miss out on the fun.
- Ingredient Quality: Every component is certified gluten‑free, ensuring a safe and delicious experience for those with celiac disease or gluten sensitivity.
- Cooking Method: The deep‑frying technique locks in moisture and gives the batter a uniform, caramelized finish.
- Make‑Ahead Potential: The batter can be prepared a few hours in advance; just keep it chilled until you’re ready to fry.
Alright, let’s break down exactly what goes into this masterpiece…
Inside the Ingredient List
The Flavor Base
Fine yellow cornmeal is the star that gives the batter its signature sweet corn flavor and golden color. It also contributes a subtle crunch that contrasts beautifully with the sausage’s smoothness. Skipping cornmeal would result in a bland batter that lacks the classic corn dog aroma. If you’re in a pinch, you can replace it with crushed cornflakes, but the texture will shift slightly.
The Texture Crew
Gluten‑free all‑purpose flour blend is the backbone of the batter, providing the necessary structure and lift. The blend should contain xanthan gum; if it doesn’t, add 1 teaspoon to compensate for the gluten’s binding properties. The baking powder is the secret lift that gives the batter a light, airy interior. Without it, the crust would be dense and heavy, making the hot dog feel soggy.
The Unexpected Sweetness
Granulated sugar adds a subtle caramelized note that caramelizes during frying, creating a sweet‑savory harmony. If you prefer a less sweet version, reduce the sugar to 2 tablespoons. However, the sugar also helps achieve that perfect golden crust; too little and the batter may not brown evenly.
The Final Flourish
Seasoning is the finishing touch that ties everything together. The salt enhances all the flavors, while the optional black pepper adds a gentle heat that lifts the overall taste. The large egg acts as a binder, giving the batter cohesion and a glossy sheen. Milk (or a dairy‑free alternative) hydrates the dry ingredients and contributes to a tender crumb. Finally, neutral oil for frying ensures a crisp, even crust without imparting unwanted flavors.
Everything's prepped? Good. Let's get into the real action…
The Method — Step by Step
- Start by placing the wooden skewers in a large bowl of water for 10 minutes; this keeps them from burning during frying. While the sticks soak, gather all the dry ingredients in a separate bowl: cornmeal, gluten‑free flour, sugar, baking powder, salt, and pepper. Mix them together until the mixture is uniform and free of lumps. This step ensures a smooth batter that coats the hot dog evenly.
- In a small saucepan, heat the milk over low heat until it’s just warm, not boiling. This warms the milk so it doesn’t shock the batter and cause a sudden rise. Pour the warm milk into the dry mix, stirring continuously to create a smooth batter. Add the beaten egg and stir until the mixture is glossy and thick enough to coat a spoon. The batter should be thick enough to cling to the hot dog but thin enough to spread easily.
- Remove the skewers from the water and pat them dry with a paper towel. Insert a skewer into each hot dog, leaving a few centimeters of the stick exposed for handling. This allows you to hold the hot dog securely while it’s in the fryer. Place the skewered hot dogs in a shallow dish and let them sit for 5 minutes; this lets the batter adhere better and prevents sticking.
- Heat the neutral oil in a deep pot or fryer to 350°F (175°C). Use a thermometer to keep the temperature steady; too hot and the batter will burn before the inside cooks, too cool and the crust will absorb excess oil. The ideal temperature gives a golden crust in about 3–4 minutes, with the inside cooked through.
- Dip each skewered hot dog into the batter, swirling to coat completely. Shake off excess batter before lowering it gently into the hot oil. Watch the sizzle—if you hear a deep, steady crackle, you’re at the right temperature. Fry each side for 3–4 minutes, or until the batter is a deep, golden brown. Use tongs to flip carefully, ensuring the crust stays intact.
- Once the batter reaches the desired color, remove the corn dogs with tongs and place them on a paper‑towel‑lined plate to drain excess oil. The paper towels absorb the oil while keeping the crust crisp. Let them rest for a minute; this allows the steam to escape and prevents sogginess.
- Serve the hot dogs immediately while the batter is still warm and crispy. Pair them with your favorite dipping sauces—ketchup, mustard, or a homemade relish for extra flavor. The best part? The crust still holds up even if you let them sit for a few minutes; the heat from the hot dog keeps the interior moist.
- Enjoy the crunch, savor the flavor, and watch the crowd go wild. This is the moment of truth—each bite should feel like a celebration of textures and taste. The batter’s golden crust should crackle softly when bitten, revealing the juicy hot dog inside. If you’re feeling adventurous, try dipping the corn dogs in a spicy aioli for an extra kick.
- That’s it—you did it. But hold on, I’ve got a few more tricks that will take this to another level. From keeping the batter from drying out to mastering the perfect oil temperature, the next section will give you the edge you need to become a corn dog connoisseur.
Insider Tricks for Flawless Results
The Temperature Rule Nobody Follows
Oil temperature is the secret sauce that determines whether your corn dogs will be golden or greasy. A thermometer is your best friend—aim for 350°F (175°C). If you don’t have one, drop a small amount of batter into the oil; if it sizzles immediately and rises to the surface, you’re good. If it drips and floats, the oil is too hot and will burn the batter before the interior cooks.
Why Your Nose Knows Best
A subtle, sweet aroma signals that the batter is caramelizing correctly. The scent of toasted cornmeal should fill the kitchen before the first bite. If the smell is metallic or burnt, you’re overcooking, and the texture will suffer. Trust your nose—if it smells like a summer cornfield, you’re on the right track.
The 5‑Minute Rest That Changes Everything
After mixing the batter, let it rest for 5 minutes. This rest allows the flour to fully absorb the liquid, resulting in a smoother coating that clings better to the hot dog. Skipping this step often results in a batter that clumps or tears during frying. I’ve seen even seasoned cooks forget this simple step, and the difference in texture is night and day.
The Skewer Trick for Even Frying
Insert the skewer deep enough that it reaches the bottom of the hot dog but leaves a few centimeters exposed. This ensures that the entire surface area is evenly coated and that the hot dog doesn’t shift while frying. If the skewer is too shallow, the hot dog may wobble, causing the batter to split.
Oil Volume Matters
Use enough oil so that the corn dogs can float freely—about 4 to 6 cups for this recipe. If you use too little oil, the batter will stick to the pot and the texture will be uneven. I’ve had friends who tried frying in a shallow pan and ended up with soggy, unevenly cooked corn dogs. Keep the oil deep enough to maintain a stable temperature.
Creative Twists and Variations
This recipe is a playground. Here are some of my favorite ways to switch things up:
Spicy Jalapeño Corn Dogs
Add finely diced jalapeños to the batter for a subtle heat that pairs wonderfully with the sweet corn. The pepper’s bite is balanced by the sweetness, creating a complex flavor profile that’s perfect for a summer barbecue.
Cheesy Jalapeño Corn Dogs
Fold in shredded cheddar cheese to the batter before coating. The cheese melts during frying, creating a gooey, savory center that contrasts with the crisp exterior. It’s a crowd‑pleaser for kids and adults alike.
Herb‑Infused Corn Dogs
Stir chopped fresh thyme, rosemary, or oregano into the batter. The herbs infuse the batter with aromatic notes that elevate the overall taste. The result is a savory, herb‑rich corn dog that feels like a gourmet snack.
Sweet Cinnamon Corn Dogs
Add 1 teaspoon of ground cinnamon to the batter for a warm, comforting flavor. The cinnamon caramelizes during frying, creating a sweet crust that pairs beautifully with the savory hot dog. Serve with a dusting of powdered sugar for an extra touch.
Vegan Corn Dogs
Replace the hot dogs with plant‑based sausage sticks and use a dairy‑free milk alternative. The batter remains the same, ensuring that the vegan version has the same crunch and flavor profile. This is a great option for guests who follow a plant‑based diet.
Gluten‑Free Corn Dog Bites
Cut the hot dogs into bite‑size pieces before coating. These mini corn dogs are perfect for parties and can be served with a variety of dips. The smaller size allows for an even crispier crust.
Storing and Bringing It Back to Life
Fridge Storage
Store leftover corn dogs in an airtight container in the refrigerator for up to 3 days. The batter will hold its shape, but the crust may lose some crispness. To restore the crunch, reheat in a hot oven at 375°F (190°C) for 5–7 minutes.
Freezer Friendly
For longer storage, place the corn dogs on a parchment‑lined tray and freeze for up to 2 months. Once frozen, transfer them to a freezer bag. When ready to eat, thaw in the refrigerator overnight and reheat in a skillet or oven.
Best Reheating Method
The key to a revived crust is heat. A quick 30‑second burst in the microwave will warm the interior, but the exterior will remain soggy. Instead, use a toaster oven or skillet. Add a splash of water to the skillet, cover, and let steam for 2 minutes—this steams the interior while keeping the batter crisp.