I still remember the first time I attempted to make chicken pot pie from scratch. It was a rainy Sunday afternoon, the kind of day that practically begs for comfort food, and I was armed with nothing but a vague memory of my grandmother's recipe and an unhealthy amount of confidence. The result? A soggy-bottomed disaster that looked like something had exploded in my pie dish and tasted only marginally better than the cardboard box the frozen peas came in. Fast forward through three years of obsessive testing, countless failed crusts, and one memorable incident involving a smoke alarm and very judgmental cat, and I've finally cracked the code to what I humbly believe is the most incredible chicken pot pie you'll ever make at home.
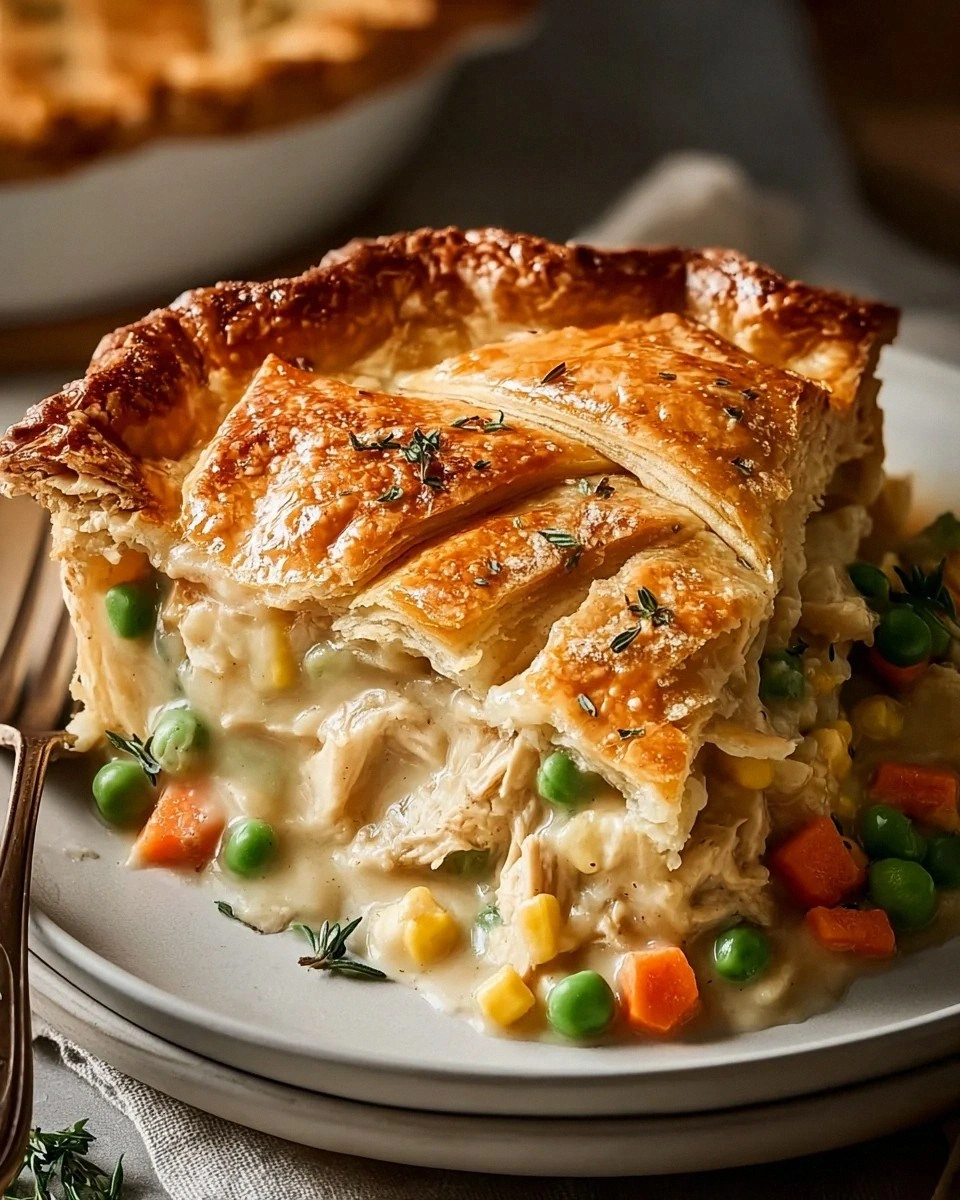
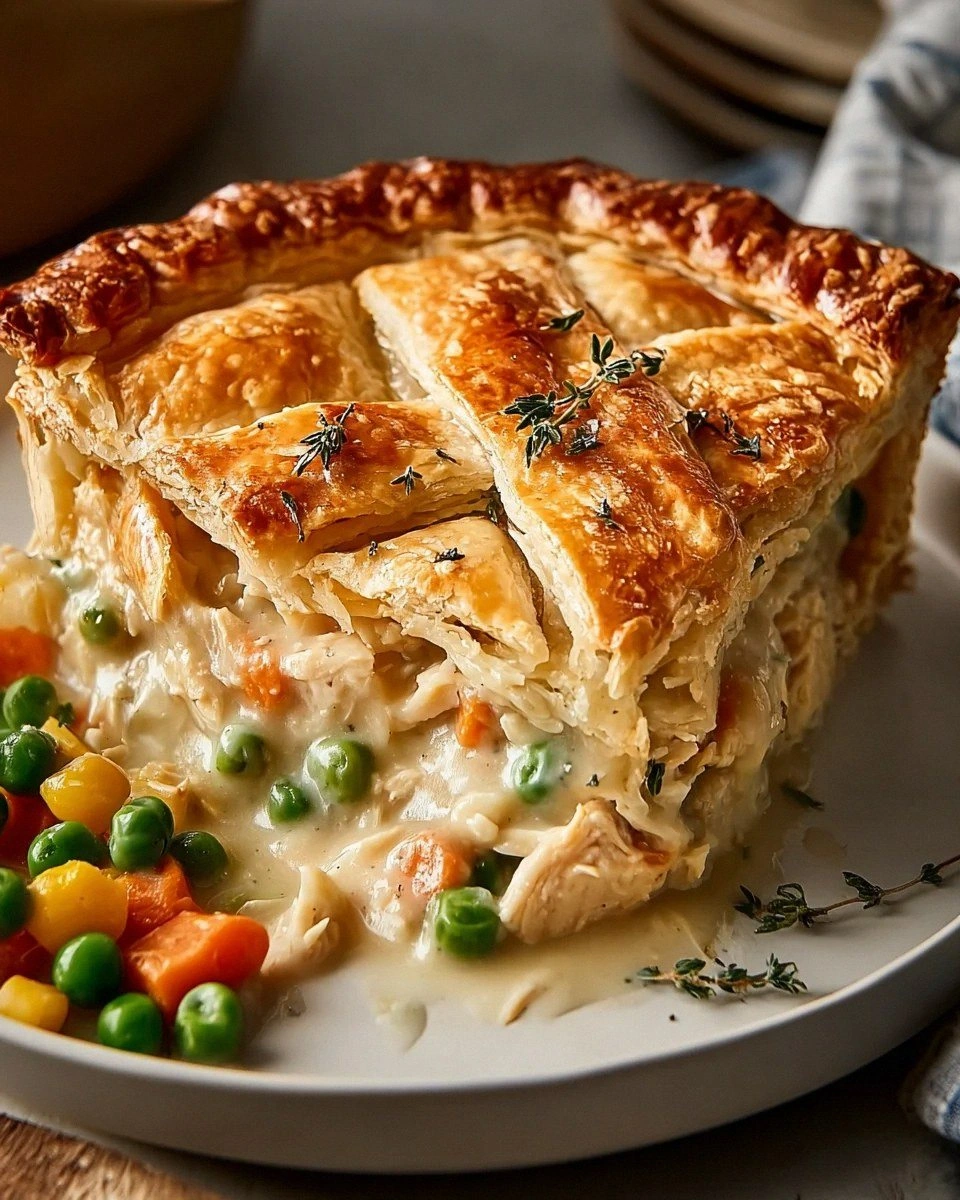
Picture this: a crust so buttery and flaky it practically shatters under your fork, revealing a golden river of velvety sauce studded with tender chunks of chicken and vegetables that still have a bit of bite to them. The aroma that fills your kitchen is nothing short of magical—warm, savory, with hints of thyme and black pepper dancing through the air like culinary fairy dust. This isn't just dinner; it's a hug in pie form, a dish that makes grown adults close their eyes and sigh with contentment after the first bite.
What makes this version different from every other chicken pot pie recipe cluttering up the internet? I'm glad you asked. I've taken everything that usually goes wrong—the watery filling, the under-seasoned chicken, the crust that either burns or stays doughy—and systematically destroyed those problems with techniques I learned from both professional chefs and my own kitchen disasters. The result is a foolproof method that produces a pie so beautiful, you'll want to Instagram it before you eat it (but please, for the love of all that's delicious, eat it while it's hot).
Let me walk you through every single step—by the end, you'll wonder how you ever made it any other way. And trust me, once you master this recipe, you'll be the person everyone calls when they need comfort food that actually comforts instead of just disappointing them like that sad frozen pot pie they keep hidden in the back of their freezer for emergencies.
What Makes This Version Stand Out
Buttery-Flaky Hybrid Crust: I've combined the best elements of puff pastry and traditional pie crust to create something that rises like a dream and shatters into a thousand delicious flakes. The secret? A combination of butter for flavor and cream cheese for tenderness that creates layers so delicate they practically melt on your tongue.
Ultra-Thick Filling: Most pot pies fail because the filling turns into a sad, watery mess that makes the bottom crust soggy. My version uses a concentrated roux and a touch of cream cheese to create a filling that sets up like velvet, coating every piece of chicken and vegetable in a glossy, rich sauce that stays put when you cut into it.
Restaurant-Quality Chicken: Instead of just boiling chicken breasts until they're dry and stringy, we sear them first to develop deep, caramelized flavor, then finish them in the sauce so they stay incredibly moist and tender. I dare you to taste this chicken and not go back for seconds before it even makes it into the pie.
Vegetables with Character: Most recipes murder the vegetables until they're mushy and sad. We give each vegetable the respect it deserves—carrots get a quick blanch to set their color, peas are added at the very end to stay bright and pop in your mouth, and onions are caramelized until they're sweet and complex.
Make-Ahead Magic: This pie freezes beautifully, which means you can make a double batch and have comfort food ready for those nights when you can't even. Picture yourself pulling this golden beauty out of the oven after a terrible day, the whole kitchen smelling like someone loves you very much and wants you to be happy.
Flavor Bomb Seasonings: Instead of just salt and pepper, we build layers of flavor with fresh thyme, a bay leaf, a whisper of nutmeg, and my secret weapon—a teaspoon of Worcestershire sauce that adds an incredible depth that makes people ask, "What is that amazing flavor I can't quite place?"
Perfect Portions: I'll be honest—the first time I made this, I ate half the batch before anyone else got to try it. This recipe makes exactly the right amount for four hungry adults or six reasonable people, with just enough leftovers for tomorrow's lunch if you can resist the temptation to polish it off at midnight.
Alright, let's break down exactly what goes into this masterpiece...
Inside the Ingredient List
The Flavor Base
Every great pot pie starts with the holy trinity of aromatics—onion, celery, and carrot—but we're going to treat them with the respect they deserve. The onion gets diced small and cooked low and slow until it's practically melting, releasing natural sugars that will sweeten our entire filling. Most recipes rush this step and end up with harsh, raw onion flavor that overpowers everything else. We're going to take our time here, letting the onions go golden and translucent, creating a sweet foundation that makes everything else taste better.
Garlic joins the party for just the last minute of cooking because burnt garlic is the fastest way to ruin an otherwise perfect dish. We want it fragrant and golden, not bitter and brown. Fresh thyme gets added here too—dried thyme has its place, but for this pot pie, we want the bright, lemony notes that only fresh herbs can provide. If you've ever struggled with herb-heavy dishes tasting like medicine, you're not alone, and I've got the fix: use half the amount of fresh herbs you think you need, and add them in stages so their flavor develops rather than overwhelming.
The Texture Crew
The chicken is obviously the star here, but we're going to treat it like the diva it is. Boneless, skinless chicken thighs are what actually works best for this recipe—stay with me here, this is worth it. Thighs have more flavor and stay moist even if you accidentally overcook them slightly, unlike chicken breasts that turn into sawdust if you look at them wrong. We cut them into generous chunks because they shrink during cooking, and nobody wants to play "find the chicken" in their pot pie.
Potatoes might seem controversial in pot pie, but they add this incredible creamy texture that rounds everything out. We use Yukon Gold because they hold their shape while getting buttery-soft, unlike russets that dissolve into mush or red potatoes that stay too firm. Cut them into 1/2-inch cubes so they cook evenly and create these little pockets of softness throughout the filling. Frozen peas go in at the very end because they're already perfect—bright, sweet, and with just enough pop to keep things interesting.
The Unexpected Star
Here's where things get interesting. A tablespoon of cream cheese might seem weird in pot pie, but it's the secret to the silkiest, most luxurious filling you've ever tasted. It melts into the sauce and creates this velvety texture that makes restaurant chefs jealous. Don't worry—it won't make your pot pie taste like cheesecake. It just adds richness and body that takes this from good to absolutely legendary.
Worcestershire sauce is another game-changer that most recipes skip. Just a teaspoon adds this incredible umami depth that makes people ask what your secret ingredient is. It's like culinary steroids—completely legal and totally transformative. If you've never cooked with it before, prepare to have your mind blown by how much complexity it adds to savory dishes.
The Final Flourish
The crust needs both butter for flavor and shortening for flakiness. I know, I know—everyone's terrified of shortening, but here's the truth: you need it for structure. All-butter crusts taste amazing but they melt too quickly, creating a greasy mess. We use a combination that gives us the best of both worlds—butter for that incredible flavor and shortening for structure that holds up to the filling.
An egg wash is non-negotiable for that gorgeous golden-brown color that makes your pie look like it belongs on a magazine cover. We add just a splash of milk to thin it out so it brushes on evenly without pooling in the decorative cuts. Those cuts aren't just for show, by the way—they let steam escape so your filling doesn't explode through the crust like a savory volcano.
Everything's prepped? Good. Let's get into the real action...
The Method — Step by Step
- Start with the chicken because it needs time to develop flavor. Heat 2 tablespoons of oil in a heavy-bottomed pot over medium-high heat until it shimmers like a mirage. Season your chicken thighs generously with salt and pepper—be bold here, under-seasoned chicken is a tragedy we can avoid. When the oil is hot enough that a piece of chicken sizzles enthusiastically when it hits the pan, add the chicken in a single layer. Let it cook undisturbed for 4 minutes; I know it's tempting to poke and prod, but that gorgeous brown crust won't form if you keep moving it around. Flip the chicken and cook another 3 minutes, then remove it to a plate. It won't be cooked through yet—that's perfect, we're building flavor layers here.
- Now the fun part—those beautiful brown bits stuck to the bottom of the pan are flavor gold. Reduce the heat to medium and add your diced onions right into the same pot, no need to clean it. The onions will deglaze the pan as they release their moisture, picking up all that caramelized chicken flavor. Cook them slowly, stirring occasionally, for about 8 minutes until they're translucent and starting to turn golden at the edges. Your kitchen should smell like heaven right about now. Add the celery and carrots, cooking for another 5 minutes until they start to soften but still have some crunch.
- Here's where most recipes get it completely wrong—they add the flour too early and it burns, or too late and it stays raw and pasty. We wait until the vegetables are softened, then push everything to the sides of the pot and add 3 tablespoons of butter to the center. When it's melted and foamy, sprinkle in 1/4 cup of flour and whisk constantly for 2 minutes. It should smell slightly nutty and look like wet sand—this is the roux that will thicken our filling to perfection. Don't rush this step; raw flour taste is the fastest way to ruin your pot pie dreams.
- Gradually whisk in your warm chicken stock, a little at a time, letting each addition thicken before adding more. This prevents lumps and creates a smooth, velvety sauce that coats the back of a spoon like liquid velvet. Once all the stock is incorporated, add the cream, cream cheese, and all your seasonings. The cream cheese might look like it's not melting—don't panic, just keep stirring and it will dissolve into silky smoothness. Add the chicken back to the pot, reduce the heat to low, and let everything simmer gently for 15 minutes while the flavors meld and the sauce thickens to the perfect consistency.
- While the filling simmers, it's crust time. In a large bowl, whisk together your flour and salt. Cut in the cold butter and shortening using a pastry cutter or your fingertips until the mixture resembles coarse crumbs with some pea-sized pieces of fat remaining. Those little chunks of butter are what create the flaky layers we're after. Add ice water a tablespoon at a time, mixing just until the dough comes together—don't overwork it or you'll end up with tough, chewy crust that nobody wants to eat.
- Divide your dough into two balls, one slightly larger than the other (that's your bottom crust). Wrap them in plastic wrap and refrigerate for at least 30 minutes. This step is crucial—warm dough is sticky, difficult to roll, and won't create those beautiful layers. While the dough chills, your filling should be ready. Taste it and adjust the seasoning—this is your chance to make it perfect. Remove it from heat and let it cool slightly; hot filling will melt your bottom crust and create that dreaded soggy bottom that makes Paul Hollywood cry.
- Preheat your oven to 425°F and position a rack in the lower third—this ensures your bottom crust gets crisp instead of steamy. Roll out your larger piece of dough on a floured surface, turning it frequently to prevent sticking, until it's about 12 inches in diameter. Gently roll it around your rolling pin and transfer it to a 9-inch pie dish, pressing it gently into the corners and letting it hang over the edges. Don't stretch the dough or it will shrink during baking—just coax it into place like you're tucking in a very delicate blanket.
- Pour your filling into the crust—it should mound up slightly in the center, which looks generous and inviting. Roll out your top crust and place it over the filling. Trim both crusts to about 1 inch overhang, then fold the edges under and crimp them decoratively. Cut 4-5 steam vents in the top crust using a sharp knife—these aren't just decorative, they're essential for letting steam escape so your pie doesn't explode. Brush the entire surface with your egg wash, being careful not to let it pool in the crevices or it will burn.
That's it—you did it. But hold on, I've got a few more tricks that'll take this to another level...
Insider Tricks for Flawless Results
The Temperature Rule Nobody Follows
Here's the thing that separates amateur pot pies from legendary ones: temperature control. Your filling should be warm but not hot when it goes into the crust—around 140°F if you want to get technical about it. Too hot and it melts the bottom crust before it can set, creating that dreaded soggy bottom that makes everyone sad. Too cold and it takes forever to heat through, meaning your crust burns before the filling bubbles. I stick my finger in (clean hands, of course)—it should feel warm like a comfortable bath, not hot like coffee or cold like leftovers.
The same rule applies to your dough. If it's too cold, it cracks when you roll it. Too warm, and it becomes stretchy and tough. You want it cool enough that it's firm but pliable, like modeling clay that's been sitting in a cool room. If it starts getting soft while you're working with it, just pop it back in the fridge for 10 minutes. This isn't rushing—this is respecting the ingredients and getting the best possible result.
Why Your Nose Knows Best
Forget timers—your nose is the best kitchen timer you have. When your pot pie is perfectly done, your kitchen will smell like buttery pastry and savory chicken heaven. That aroma should hit you about 3-4 minutes before it's actually ready, giving you time to check the color. The crust should be deep golden-brown, not pale blonde (underdone) or dark brown (overdone). Think the color of a perfectly toasted marshmallow—golden, inviting, promising delicious things inside.
Listen for the sound, too. A perfectly baking pot pie makes this gentle bubbling sound through the steam vents—it's quiet, like a contented sigh. If it's making aggressive bubbling noises, your filling is probably boiling over and you need to reduce the temperature slightly. If it's silent, either it's not hot enough yet or something has gone terribly wrong and you should check immediately.
The 5-Minute Rest That Changes Everything
I know it's torture, but you absolutely must let your pot pie rest for at least 5 minutes after it comes out of the oven. I learned this the hard way when I burned my tongue so badly on molten filling that I couldn't taste anything for three days. During this rest, the filling sets up slightly, the crust finishes crisping as steam escapes, and everything magically comes together. Cutting into it too early results in filling that runs all over your plate like a savory waterfall, taking all your Instagram-worthy presentation with it.
Use this time wisely—set the table, pour some wine, toss a quick salad. When you finally cut into that beautiful pie, the filling should mound up slightly and hold its shape, not run all over like it's trying to escape. A friend tried skipping this step once—let's just say it didn't end well, and she ended up eating her pot pie with a spoon over the sink while crying about her life choices.
The Make-Ahead Miracle
Here's where this recipe really shines—you can assemble the entire pot pie up to 24 hours ahead and keep it refrigerated until you're ready to bake. The key is to brush it with egg wash just before baking, not ahead of time, or the wash will get sticky and weird. When you're ready to bake, add an extra 10-15 minutes to the cooking time since you're starting from cold. This makes it perfect for dinner parties or those Sundays when you want to impress without spending the entire day in the kitchen.
For longer storage, freeze the unbaked pot pie for up to 3 months. Wrap it tightly in plastic wrap and then foil. When you're ready to bake, don't thaw it—just pop it into a 400°F oven for about an hour and 15 minutes, covering the edges with foil if they brown too quickly. There's something deeply satisfying about pulling a homemade pot pie from your freezer on a busy Tuesday night and having comfort food that actually comforts instead of just disappointing you like that sad frozen one from the grocery store.
Creative Twists and Variations
This recipe is a playground. Here are some of my favorite ways to switch things up:
The Thanksgiving Leftover Champion
Got leftover turkey? Shred it up and use it instead of chicken—it's even better because it's already seasoned and perfectly cooked. Add some leftover stuffing crumbled on top before the top crust for an extra layer of herby, bready goodness. Mix in some cranberry sauce with the filling for a sweet-tart surprise that makes this taste like Thanksgiving got a gourmet makeover. I've been making this variation since 2015, and it's become such a tradition that my family secretly hopes for lots of leftovers.
The Spicy Southwest Version
Swap the thyme for cumin and oregano, add a diced jalapeño to the vegetables, and use pepper jack cheese instead of cream cheese. Add a can of diced green chiles and some corn kernels for a pot pie that tastes like New Mexico in the best possible way. Top with crushed tortilla chips mixed into the top crust for crunch. If you've ever struggled with boring pot pie, this variation will wake up your taste buds and make you question everything you thought you knew about comfort food.
The Fancy French Makeover
Use white wine instead of some of the stock, add tarragon and chervil instead of thyme, and throw in some sautéed mushrooms for an earthy depth. Replace the cream cheese with Brie (rind removed) for the most luxurious filling you've ever tasted. Top with puff pastry instead of regular pie crust for something that looks like it came from a Parisian bistro. I served this at a dinner party once and people literally applauded—it's that good.
The Veggie Powerhouse
Skip the chicken and load up on vegetables—roasted butternut squash, kale, chickpeas, and caramelized onions create a vegetarian pot pie that even meat-lovers devour. Use vegetable stock and add some white beans for protein. The key is to roast the vegetables first so they're caramelized and concentrated instead of just steamed and sad. Even my most carnivorous friends request this version when they come over, which I consider a major victory.
The Mini Individual Pies
Divide the filling among ramekins and top each with a smaller circle of crust for individual pot pies that make everyone feel special. These are perfect for parties because everyone gets their own, and there's something deeply satisfying about breaking through your own little crust. Plus, they bake faster—about 25 minutes instead of 35. Kids especially love these, and it's a great way to make them feel like they're getting their very own special dinner.
The Breakfast-for-Dinner Revolution
Add some breakfast sausage instead of chicken, throw in some hash browns, and crack an egg or two right into the filling before baking. The eggs bake into the filling creating these delicious pockets of richness that make this feel like the best parts of breakfast and dinner had a beautiful baby. Serve with hot sauce on the side for people who like to live dangerously. I invented this variation during a particularly creative late-night cooking session, and it's become a regular request in my house.
Storing and Bringing It Back to Life
Fridge Storage
Cooked pot pie keeps beautifully in the refrigerator for up to 4 days, though I doubt it'll last that long. Store it covered with foil or in an airtight container. The crust will soften slightly in the fridge, but we can fix that when we reheat it. If you've ever struggled with leftovers that taste like sadness, this pot pie will restore your faith in leftover magic.
Freezer Friendly
Both baked and unbaked pot pies freeze exceptionally well. For unbaked, wrap tightly in plastic wrap and then foil, and freeze for up to 3 months. For baked, let it cool completely, then wrap and freeze for up to 2 months. The key is to wrap it well so it doesn't get freezer burn, which is the arch-nemesis of delicious food. Label it with the date so you don't play freezer roulette six months from now.
Best Reheating Method
For the best results, reheat in a 350°F oven for about 20-25 minutes until heated through. Cover the edges with foil if they're browning too much. Add a tiny splash of water to the filling before reheating—it steams back to perfection and prevents it from drying out. The microwave works in a pinch, but the crust won't be crispy. If you must microwave, do it in short bursts and finish in a hot oven or toaster oven to crisp up the crust.