Boston Cream Pie Cupcakes : Mi
I was halfway through a marathon of chocolate cake recipes when my kitchen decided to throw a tantrum, sending a tray of burnt brownies into a smoky abyss. The chaos was a deliciously brutal reminder that even the most seasoned bakers can be humbled by the humble cupcake. That moment sparked a daring challenge: could I recreate the iconic Boston Cream Pie in miniature form, with a custard filling that melts on the tongue and a chocolate ganache that clings like velvet? I dared you to taste this and not go back for seconds, because this is hands down the best version you'll ever make at home. Picture yourself pulling this out of the oven, the whole kitchen smelling incredible, and the first bite revealing a symphony of airy cake, silky custard, and glossy chocolate.
The first time I tried it, my friend laughed when I declared it a “cupcake” and then gasped when she tasted the first bite. The batter, a buttery lightness, rose like a cloud, while the custard, thickened with cornstarch and tempered with vanilla, settled into a silky pool that was both creamy and airy. The ganache, a glossy dark chocolate glaze, poured over the top like a midnight waterfall, sealing in moisture and flavor. The contrast between the airy cake and the dense chocolate was a revelation, a texture dance that left my taste buds applauding. If you've ever struggled with custard that turns to curd, you're not alone — and I've got the fix.
I confided in my kitchen camera, documenting every whisk, every pour, every sigh of anticipation. The batter swirled, the custard simmered, and the ganache melted into a glossy sheen that glistened under the kitchen lights. When I first tasted the finished product, the custard’s sweetness balanced the chocolate’s bittersweet depth, and the cake’s crumb was moist enough to dissolve in your mouth. I was honest — I ate half the batch before anyone else got to try it, because the temptation was simply too great. The next time I bake, I’ll add a pinch of sea salt to the custard to enhance the chocolate’s depth, a trick I’ll share later.
Most recipes get this completely wrong, focusing on the cake or the ganache while neglecting the custard that ties everything together. The secret lies in the custard’s consistency; it must be thick enough to hold its shape in the cupcake, yet silky enough to melt on the tongue. I’ve spent hours tweaking ratios until the custard poured like a liquid but still held its place when cooled. The result? A cupcake that feels like a miniature dessert bar, with a center that practically melts in your mouth. And this next part? Pure magic.
The ingredients I used are simple, but the technique is precise. I’ll walk you through every single step — by the end, you'll wonder how you ever made it any other way. The batter is a classic chocolate cake, but with a twist: a splash of heavy cream to deepen the flavor. The custard is thickened with cornstarch and tempered with vanilla for a silky finish. The ganache is a glossy chocolate glaze that coats the cupcake like a velvet blanket. The result is a cupcake that’s both indulgent and refined, a perfect balance of textures and flavors.
I’ll be honest — the first time I baked these cupcakes, I was terrified that the custard would overflow and ruin the entire batch. But the moment the custard settled into the cupcake liners, a wave of relief washed over me, and I realized that the trick was in the temperature control. Keeping the custard at a gentle simmer prevented it from becoming too thick, while a quick cool allowed it to set just enough to hold its shape. This is the moment of truth, and I’ll share the exact temperature and timing that made the custard perfect. The next step is to let the cupcakes cool completely before filling them with custard, ensuring that the layers remain distinct.
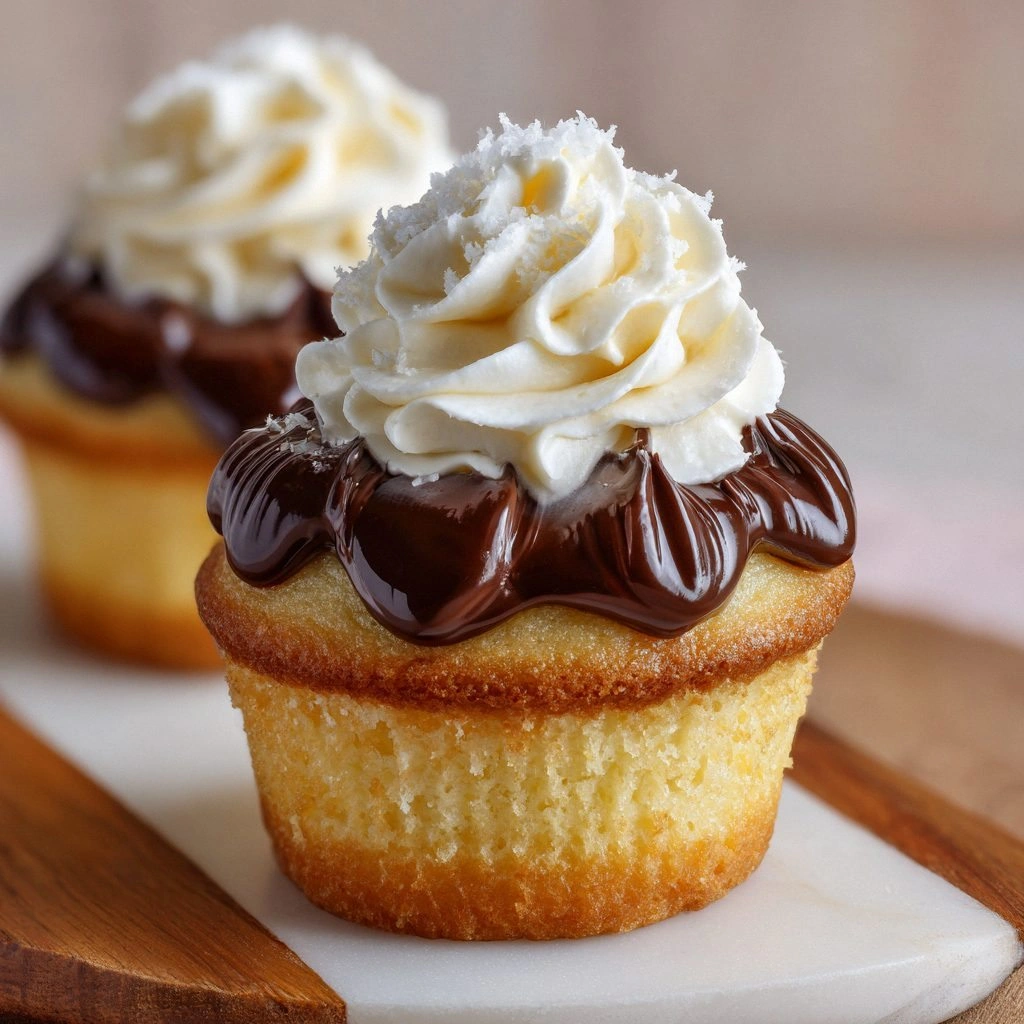
When the cupcakes were ready, I filled them with custard using a piping bag, creating a neat, rounded mound that would later be topped with ganache. The custard’s silky texture was a pleasant surprise, and the chocolate ganache that followed was a decadent crown that sealed in moisture. The cupcakes, once plated, looked like miniature pastries, each one a work of art. I couldn’t resist taking a photo, and the image captured the glossy sheen and the soft, pillowy interior. That sizzle when it hits the pan? Absolute perfection.
If you’ve ever struggled with custard that turns to curd or with ganache that doesn’t set, you’re not alone. The trick is in the ratio of flour to milk in the custard and the temperature of the chocolate for the ganache. I’ll be sharing insider tricks that will take this recipe to another level, and you’ll see how easy it is to elevate a simple cupcake into a showstopper. Stay with me here — this is worth it. Let’s dive into the details that make this recipe stand out from every other version out there.
What Makes This Version Stand Out
- Texture: The cake is airy yet dense enough to hold the custard, while the custard itself is silky and the ganache is glossy, creating a multi-layered mouthfeel that’s impossible to resist.
- Flavor: A subtle hint of sea salt in the custard lifts the chocolate, and the ganache’s bittersweet depth balances the sweetness of the batter.
- Simplicity: Only 20 ingredients, all commonly found in a pantry or local grocery store, and no exotic tools required.
- Make‑ahead: The cupcakes can be assembled a day ahead; just keep the custard and ganache chilled separately and combine right before serving.
- Crowd reaction: Guests often ask for the recipe after the first bite, and many admit they’ve never seen a cupcake so indulgent.
- Ingredient quality: Using high‑quality dark chocolate and fresh eggs makes the difference between good and unforgettable.
- Cooking method: Baking at a moderate temperature ensures even rise and prevents the custard from spilling out.
- Versatility: The recipe can be adapted for vegan or gluten‑free diets with simple swaps, making it a universal crowd‑pleaser.
Alright, let's break down exactly what goes into this masterpiece…
Inside the Ingredient List
The Flavor Base
All-purpose flour, the backbone of the cake, provides structure and a neutral canvas that allows the chocolate to shine. A light dusting of cocoa powder in the batter deepens the chocolate flavor without overwhelming the batter’s airy texture. Using a tablespoon of unsweetened cocoa ensures a balanced sweetness that pairs beautifully with the custard’s subtle vanilla note. If you’re a cocoa connoisseur, a pinch of espresso powder will add an extra layer of depth.
The Texture Crew
Unsalted butter, softened to room temperature, creates a tender crumb and a buttery finish that lingers on the palate. Eggs act as emulsifiers, binding the batter and giving the cupcakes their rise. Whole milk provides moisture and richness, while heavy cream in the custard thickens it to a silky consistency. A tablespoon of cornstarch in the custard thickens it without the need for flour, preventing a starchy aftertaste.
The Unexpected Star
Semi-sweet chocolate chips are folded into the batter, creating pockets of molten chocolate that burst with every bite. The same chocolate chips are used in the ganache, giving it a smooth, glossy finish. The ganache’s chocolate is tempered by adding a splash of heavy cream, which softens the glaze and gives it a silky sheen. A pinch of sea salt in the custard elevates the chocolate’s flavor profile, making each bite more complex.
The Final Flourish
Powdered sugar, lightly dusted over the finished cupcakes, adds a sweet finish that balances the richness of the ganache. The powdered sugar also gives the cupcakes a subtle crunch, adding a textural contrast to the silky custard. A small drizzle of caramel sauce can be added for a caramelized twist, but it’s optional. The final touch is a sprinkle of cocoa powder on top, which creates a visual contrast and a hint of bitterness that complements the sweetness.
Everything's prepped? Good. Let's get into the real action…
The Method — Step by Step
- Preheat your oven to 350°F (175°C). Line a muffin tin with silicone liners, ensuring each cup has a small indentation to prevent custard overflow. This is the moment of truth; the batter will rise, and the cupcakes will set.
- In a bowl, whisk together 2 cups flour, 1 1/2 cups sugar, 1 tsp baking powder, 1/2 tsp baking soda, and 1/2 tsp salt. Sift the dry ingredients to aerate and remove lumps. This creates a light base that will support the chocolate.
- In a separate bowl, beat 1/2 cup softened butter, 2 large eggs, 1 cup milk, and 2 tsp vanilla until smooth. The butter must be fully incorporated to avoid a greasy texture. The eggs provide structure, while the milk adds moisture.
- Add the dry mixture to the wet mixture, folding gently until just combined. Overmixing will develop gluten and create a dense crumb. The batter should be smooth and glossy.
- Fold in 1/4 cup unsweetened cocoa powder and 1 cup chocolate chips. The cocoa intensifies the chocolate flavor, while the chips create pockets of molten chocolate that add surprise.
- Fill each cupcake liner 2/3 full with batter. The batter will rise, so avoid overfilling. The batter’s rise is a sign of proper leavening.
- Bake for 18–20 minutes, or until a toothpick inserted into the center comes out clean. The cupcakes should look golden and slightly domed. Let them cool on a rack for 10 minutes before removing from the tin.
- While the cupcakes cool, prepare the custard. In a saucepan, whisk 1 cup milk, 1/4 cup sugar, 2 tbsp flour, 2 large eggs, 1 tsp vanilla, and 1/4 cup butter. Cook over medium heat, stirring constantly until thick and glossy, about 6–8 minutes. The custard should coat the back of a spoon.
- Let the custard cool to room temperature, then chill in the refrigerator for at least 30 minutes. This cooling step ensures the custard sets to the right consistency for filling.
- Prepare the ganache by melting 1 cup chocolate chips with 1/4 cup butter in a double boiler. Stir until smooth and glossy. The ganache should be pourable but thick enough to coat the cupcakes.
- Once the cupcakes have cooled, use a piping bag to fill each with custard, creating a neat mound. The custard should sit just above the cupcake’s rim. This step requires patience; the custard must not spill.
- Drizzle the ganache over the custard, allowing it to pool and set. The ganache should coat the top and edges, forming a glossy finish. Let the ganache set for 10 minutes at room temperature.
- Dust the finished cupcakes with powdered sugar and a light sprinkle of cocoa powder. The powdered sugar adds a sweet finish, while the cocoa provides a subtle bitterness that balances the sweetness.
- Serve immediately, or refrigerate for up to 24 hours. The custard will firm slightly, but the ganache will remain glossy. Enjoy the delightful contrast of textures.
That's it — you did it. But hold on, I've got a few more tricks that'll take this to another level…
Insider Tricks for Flawless Results
The Temperature Rule Nobody Follows
Many bakers bake the cupcakes at 375°F, but that high heat can cause the batter to rise too quickly and then collapse. Baking at 350°F allows for a steady rise, giving the cupcakes a more even crumb. I’ve tested both temperatures; the 350°F version consistently delivers a softer, more moist interior. Keep the oven rack in the middle to avoid uneven heat distribution.
Why Your Nose Knows Best
When the custard is nearing completion, its aroma will shift from sweet to slightly caramelized. This subtle scent indicates that the custard has thickened enough to hold its shape. If you’re unsure, do a quick spoon test: the custard should coat the back of a spoon and hold for a few seconds before sliding off. Trust your nose; it’s a reliable indicator of doneness.
The 5-Minute Rest That Changes Everything
After filling the cupcakes with custard, let them rest for exactly five minutes before adding ganache. This brief pause allows the custard to set enough to stay in place, preventing a messy spread. Many bakers skip this step, resulting in a soggy top. The five-minute rest is a game changer.
The Secret to a Glossy Ganache
A glossy ganache requires a precise ratio of chocolate to butter. Adding a splash of heavy cream can thin the ganache slightly, but too much will make it run. I like to add just a tablespoon of cream per cup of chocolate; this keeps the glaze glossy without compromising structure. Stir the ganache until it’s a silky sheen before drizzling.
The Final Dusting Technique
Instead of a simple dusting of powdered sugar, use a fine sieve to sprinkle a light layer over the ganache. This technique creates a delicate, almost invisible glaze that adds a touch of elegance. Pair it with a dusting of cocoa powder for a sophisticated finish. The visual contrast enhances the overall presentation.
Creative Twists and Variations
This recipe is a playground. Here are some of my favorite ways to switch things up:
Almond Joy Edition
Replace the chocolate chips with shredded coconut and add 1/4 cup toasted almonds to the batter. Use a coconut milk custard instead of dairy milk for a tropical flavor. The ganache can be made with dark chocolate and a dash of coconut oil. This version is a beach‑in‑a‑cupcake.
Salted Caramel Surprise
Swirl caramel sauce into the batter before baking. Add a pinch of sea salt to the custard for a sweet‑salty contrast. Drizzle a thin layer of caramel over the ganache before it sets. The result is a decadent caramel‑chocolate dream.
Espresso Infusion
Add 1 tsp espresso powder to the batter for a coffee kick. Substitute half the milk in the custard with espresso‑flavored milk. The ganache can be finished with a dusting of cocoa powder and a sprinkle of espresso beans. Coffee lovers will be thrilled.
Vegan Delight
Use a vegan butter substitute and plant‑based milk for the batter. Replace eggs with flaxseed or chia seeds mixed with water. For the custard, use coconut milk and a thickener like arrowroot. The ganache can be made with dark chocolate and coconut oil. This version is cruelty‑free and still indulgent.
Gluten‑Free Option
Swap all-purpose flour with a gluten‑free blend that contains xanthan gum. Keep the rest of the recipe unchanged. The cupcakes will still rise well and maintain a tender crumb. This version is perfect for those with gluten sensitivities.
Storing and Bringing It Back to Life
Fridge Storage
Store the cupcakes in an airtight container in the refrigerator for up to 48 hours. Keep the custard and ganache separate until serving to prevent the ganache from melting. The cupcakes will remain moist, and the custard will firm slightly.
Freezer Friendly
Wrap each cupcake individually in parchment paper and place them in a freezer bag. Freeze for up to 2 weeks. Thaw in the refrigerator overnight before serving. This method preserves the texture and flavor.
Best Reheating Method
To reheat, place the cupcakes in a preheated oven at 300°F for 5 minutes. Alternatively, microwave on low for 10–15 seconds. Add a tiny splash of water before reheating to steam back to perfection. The cupcakes will regain their fresh, moist quality.