I was standing in my kitchen, the air thick with the scent of burnt sugar from a failed attempt at homemade gummy bears, when a friend dared me to create something that would actually make people say, “I dare you to taste this and not go back for seconds.” The panic of that challenge lit a fire under me, and I found myself rummaging through the freezer for the brightest, juiciest strawberries I could locate, because nothing says “chewy” like a strawberry that’s been kissed by frost. The sound of the blender whirring was like a tiny tornado of flavor, the bright red puree splashing against the glass like a sunrise in a bowl, while the kitchen timer ticked away, reminding me that patience is a virtue only the truly sour‑loving can master. I tasted the first batch, and I’ll be honest — I ate half the batch before anyone else got to try it, and that’s exactly the kind of confession that tells you this recipe is addictive.
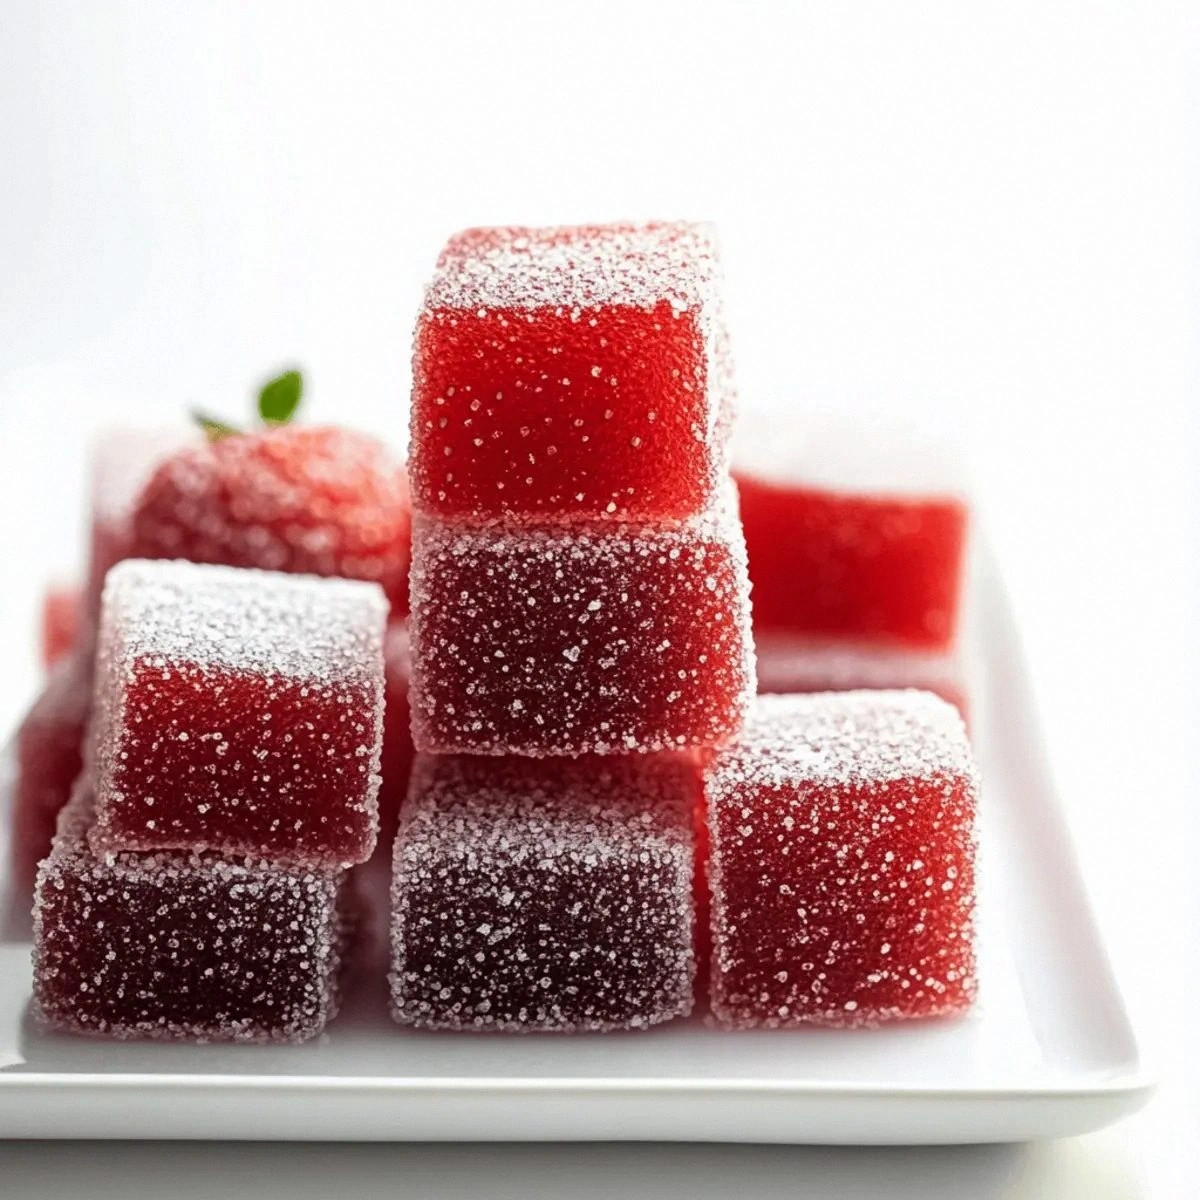
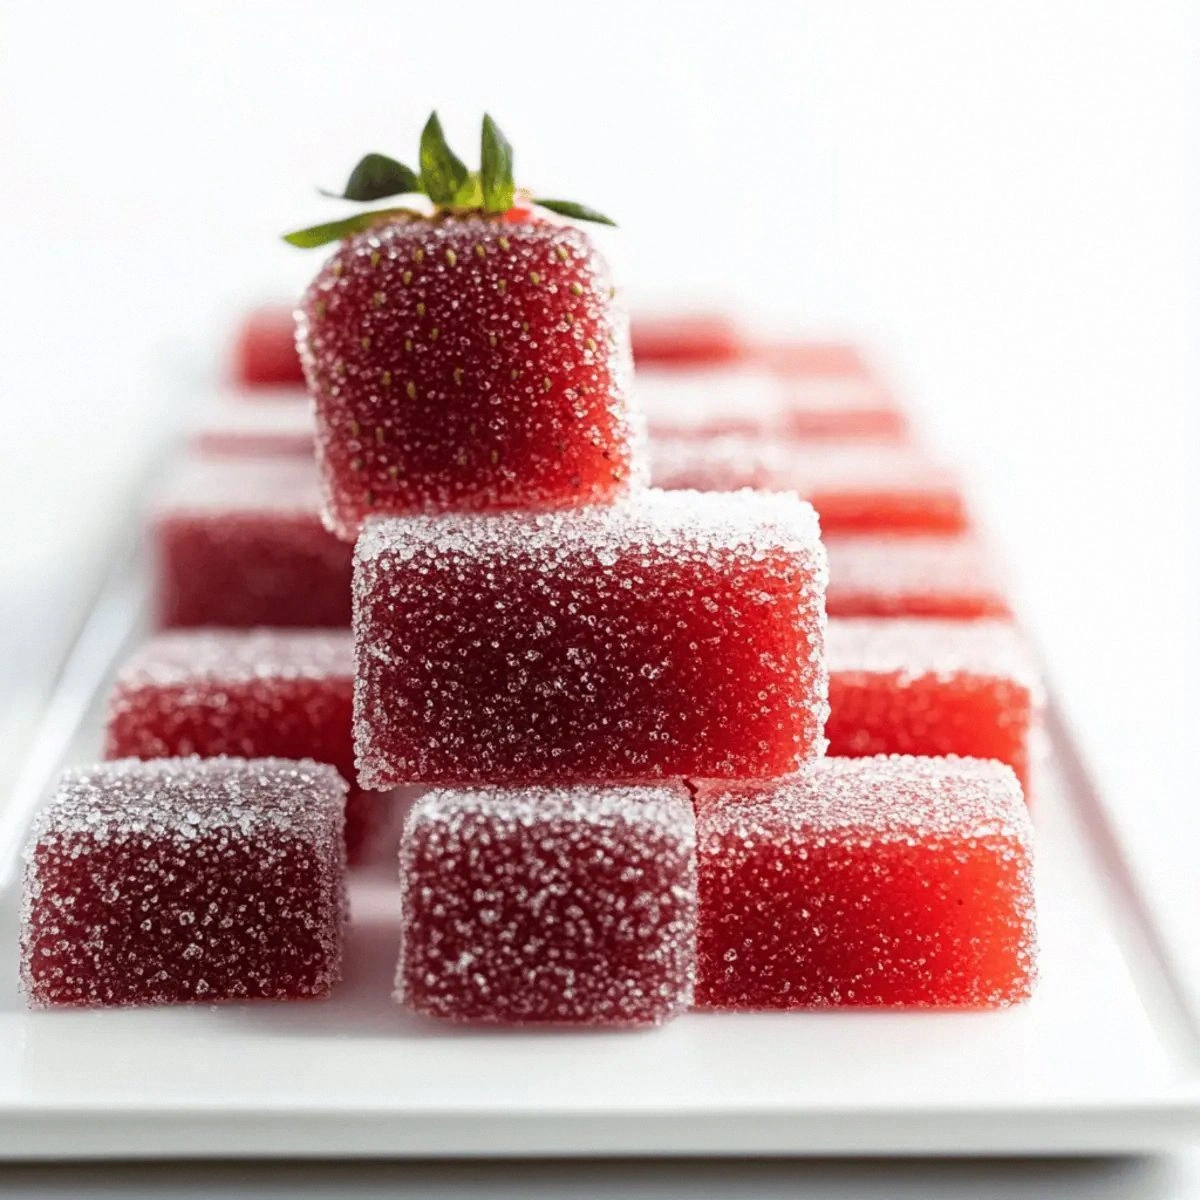
Imagine a gummy that pulls away from the pan with a gentle sigh, its surface glistening like a freshly polished ruby, and when you bite into it, the texture is chewy enough to make your teeth feel like they’re dancing, yet it snaps with a sour pop that tingles your tongue like a citrus fireworks show. The aroma is a blend of sweet strawberry perfume and a faint, electric zing from citric acid that makes the whole kitchen feel like a candy‑cane factory on a summer day. The taste? A perfect balance of sugary comfort and bright, mouth‑watering sourness that makes you want to close your eyes and let the flavor roll over your palate like a wave of ruby‑red bliss.
Most recipes for strawberry gummies get the texture wrong – they’re either rubbery like old chewing gum or too soft, melting like butter in a hot pan. This version, however, uses a precise combination of fruit pectin, a pinch of baking soda, and a double‑coating of sugar and citric acid that creates a glossy, chewy exterior while keeping the interior tender and juicy. The secret ingredient? A splash of corn syrup that acts like a tiny diplomat, smoothing out any harsh edges and ensuring every bite is uniformly perfect. And the technique? A quick burst of high heat followed by a rapid chill that locks in the flavor like a freezer‑fresh secret.
Let me walk you through every single step — by the end, you’ll wonder how you ever made gummies any other way. Okay, ready for the game‑changer? This next part? Pure magic. Picture yourself pulling these ruby delights out of the pan, the whole kitchen smelling incredible, and a line of friends forming at the counter, each daring the next to be the first to bite. Stay with me here — this is worth it.
What Makes This Version Stand Out
- Flavor Explosion: The fresh strawberry puree is intensified with a precise amount of granulated sugar, creating a sweet‑sour harmony that hits your taste buds like a perfectly timed drum solo.
- Chewy Perfection: Regular fruit pectin combined with a dash of baking soda gives the gummies that coveted chew that stretches just enough before giving way with a satisfying snap.
- Simple Ingredients: No exotic powders or hard‑to‑find gels – just strawberries, sugar, corn syrup, and a few pantry staples that you probably already have lurking behind the cereal boxes.
- Unique Coating: A dual coating of sugar and citric acid adds a tangy crunch that makes each bite feel like a tiny fireworks display on your tongue.
- Crowd‑Pleaser: Whether you’re serving kids at a birthday party or impressing adults at a cocktail hour, these gummies get the “wow” factor without the pretentiousness.
- Ingredient Quality: Using fresh or frozen strawberries ensures natural color and flavor, while filtered water keeps the texture crystal clear.
- Cooking Method: The quick boil‑then‑chill technique locks in moisture and flavor, preventing the gummy from turning gummy‑like rubber.
- Make‑Ahead Potential: Store them in an airtight container for up to two weeks and they’ll stay as fresh as the day you made them, making them perfect for meal‑prep or party planning.
Inside the Ingredient List
The Flavor Base
Fresh or frozen strawberries are the heart of this recipe. Their natural acidity and bright color set the stage for a gummy that looks as good as it tastes. If you skip the strawberries, you’ll lose that authentic fruit flavor and end up with a bland, candy‑like experience. For the best results, choose strawberries that are deep red and fragrant; they’ll give you a richer puree without needing extra coloring.
The Sweetening Squad
Granulated sugar and corn syrup work together like a sweet duet, where sugar provides structure and corn syrup adds that glossy sheen. The sugar also balances the tartness of the citric acid, while the corn syrup prevents crystallization, ensuring a smooth mouthfeel. If you’re looking to cut down on refined sugar, you can substitute half the granulated sugar with coconut sugar, but expect a slightly caramelized flavor.
The Texture Crew
Regular fruit pectin is the secret weapon that gives these gummies their signature chew. It reacts with the acid and sugar to form a gel that’s firm yet pliable. Baking soda, though used in a tiny amount, neutralizes excess acidity just enough to keep the gummy from becoming overly sour, while still preserving that zing you love. If you’re out of pectin, you can use agar‑agar, but the texture will be firmer, more like a jelly than a gummy.
The Unexpected Star
Powdered citric acid, combined with the sugar‑citric coating, creates that electrifying sour pop that makes people grin. It’s the difference between “nice” and “wow, that’s intense!” The coating of sugar and citric acid not only adds flavor but also a slight crunch that contrasts beautifully with the soft interior. If you’re sensitive to acidity, you can reduce the citric acid by a quarter and still retain a pleasant tang.
Everything's prepped? Good. Let's get into the real action…
The Method — Step by Step
First, wash the strawberries thoroughly, removing any stems or leaves, then slice them into halves. Toss the halves into a blender and puree until you have a smooth, ruby‑red liquid. If you notice any large chunks, strain the puree through a fine‑mesh sieve into a saucepan; this ensures a silky texture that won’t leave you with unwanted bits.
Kitchen Hack: Freeze the strawberry puree for 10 minutes before cooking; this reduces the water content and intensifies the flavor.Add the granulated sugar, corn syrup, and filtered water to the strawberry puree. Stir over medium heat until the sugar dissolves completely, and the mixture begins to shimmer. This is the moment when the aroma turns from fresh fruit to a sweet, caramel‑like perfume that tells you you’re on the right track.
Sprinkle the fruit pectin over the simmering mixture, whisking constantly to prevent lumps. Once the pectin is fully incorporated, increase the heat to a gentle boil. Watch closely: the mixture should bubble vigorously for about two minutes, and you’ll notice the edges start pulling away from the sides of the pan.
Now, add the baking soda and powdered citric acid. The mixture will fizz briefly, a visual cue that the chemistry is working. Stir quickly to distribute the fizz evenly; this step is crucial for achieving that signature sour kick without making the gummy overly acidic.
Remove the pan from heat and let the mixture cool for about five minutes. During this brief pause, the gummy base thickens just enough to hold its shape when poured, but remains fluid enough to spread evenly.
Prepare your silicone molds or a shallow baking dish lined with parchment. Lightly brush the molds with a tiny amount of neutral oil to ensure easy release later. Pour the gummy mixture into the molds, filling each cavity to the top for a uniform bite.
Place the filled molds in the freezer for 20‑30 minutes, or until the gummies are firm to the touch. This rapid chill locks in the chewy texture and prevents the gummies from becoming too soft.
Watch Out: Do not over‑freeze; leaving the gummies in the freezer for more than an hour can make them brittle and break when you pop them out.While the gummies are chilling, whisk together the coating mixture: combine the ¼ cup sugar, ¼ cup sugar‑citric blend, and the remaining ½ teaspoon citric acid. This creates a sparkling, sour dust that will cling to each gummy once it’s out of the mold.
Once firm, gently pop the gummies out of the molds and place them on a cooling rack. While still slightly warm, toss them in the coating mixture, ensuring every surface is lightly dusted. Let them sit at room temperature for ten minutes to allow the coating to set, then transfer to an airtight container.
Kitchen Hack: For an extra glossy finish, briefly spray the gummies with a light mist of water before coating; the sugar will crystallize into a subtle sparkle.
That's it — you did it. But hold on, I've got a few more tricks that'll take this to another level…
Insider Tricks for Flawless Results
The Temperature Rule Nobody Follows
Never let the gummy mixture sit at room temperature for more than five minutes after boiling; the gel network starts to set, and you’ll lose the smooth pourability you need for perfect molds. Keep a bowl of ice water nearby and dip the bottom of your saucepan in it for a quick chill if you sense the mixture thickening too fast. This trick saved me countless batches that would have otherwise turned into a rubbery mess.
Why Your Nose Knows Best
When the mixture reaches a faint caramel scent, you’re at the sweet spot for sugar integration. If you smell a burnt note, you’ve gone too far and the gummy will have a bitter aftertaste. Trust your nose more than the clock; it’s an ancient kitchen instinct that never fails.
The 5‑Minute Rest That Changes Everything
Allowing the mixture to rest for five minutes after removing it from heat lets tiny air bubbles rise to the surface, preventing unwanted holes in the final product. Skipping this step is a common mistake; I once poured straight into molds and ended up with a spongy texture that felt like chewing on a marshmallow.
Coating Consistency is Key
If the coating feels clumpy, sift it through a fine mesh before dusting the gummies. This ensures an even distribution of sour sugar crystals, giving each bite a consistent zing. A lumpy coating can make the gummy taste overly sour in spots, ruining the balance.
Storage Secrets for Longevity
Store gummies in a single layer inside a zip‑top bag with a paper towel to absorb excess moisture. This prevents them from becoming sticky or soggy over time. If you notice any condensation, simply pop the bag open for a minute to let the humidity escape.
Creative Twists and Variations
This recipe is a playground. Here are some of my favorite ways to switch things up:
Tropical Tango
Swap half of the strawberries for mango puree and add a dash of lime zest to the coating. The result is a bright, sun‑kissed gummy that transports you to a beachside cabana.
Chocolate‑Covered Delight
After coating, drizzle the gummies with melted dark chocolate and sprinkle a pinch of sea salt. The bitter chocolate balances the sour strawberry, creating a sophisticated flavor contrast.
Spicy Surprise
Add a pinch of cayenne pepper to the coating mix for a subtle heat that awakens the palate after the sour pop. It’s perfect for those who love a little kick with their sweet.
Herbal Harmony
Infuse the strawberry puree with fresh basil leaves during the heating stage, then strain them out. The herbaceous note adds complexity and makes the gummies a conversation starter.
Vegan Velvet
Replace the corn syrup with agave nectar and ensure the pectin is plant‑based. The texture remains chewy, and the flavor stays true to the original, but the recipe becomes fully vegan.
Storing and Bringing It Back to Life
Fridge Storage
Place the gummies in an airtight container lined with parchment and store them in the refrigerator. They’ll stay fresh for up to two weeks, retaining their chew and sour punch. If you notice any condensation, pat the gummies dry with a paper towel before resealing.
Freezer Friendly
For longer storage, spread the gummies on a baking sheet and freeze them individually before transferring to a zip‑top bag. This prevents them from sticking together. They can be frozen for up to three months without losing flavor.
Best Reheating Method
When you’re ready to enjoy frozen gummies again, let them sit at room temperature for five minutes, then give them a quick 10‑second zap in the microwave on low power. Add a tiny splash of water before microwaving; the steam revives the chewy texture like a mini‑spa for candy.