I was standing in the middle of my kitchen, staring at a ruined lemon meringue that had turned into a sticky, brown disaster. The lemon zest had gone flat, the meringue had collapsed, and I was left with a sad, soggy mess. I swear I could still taste the bitter aftertaste of that failed attempt. That moment was the spark that pushed me to find the ultimate sour cream lemon pie that would never disappoint.
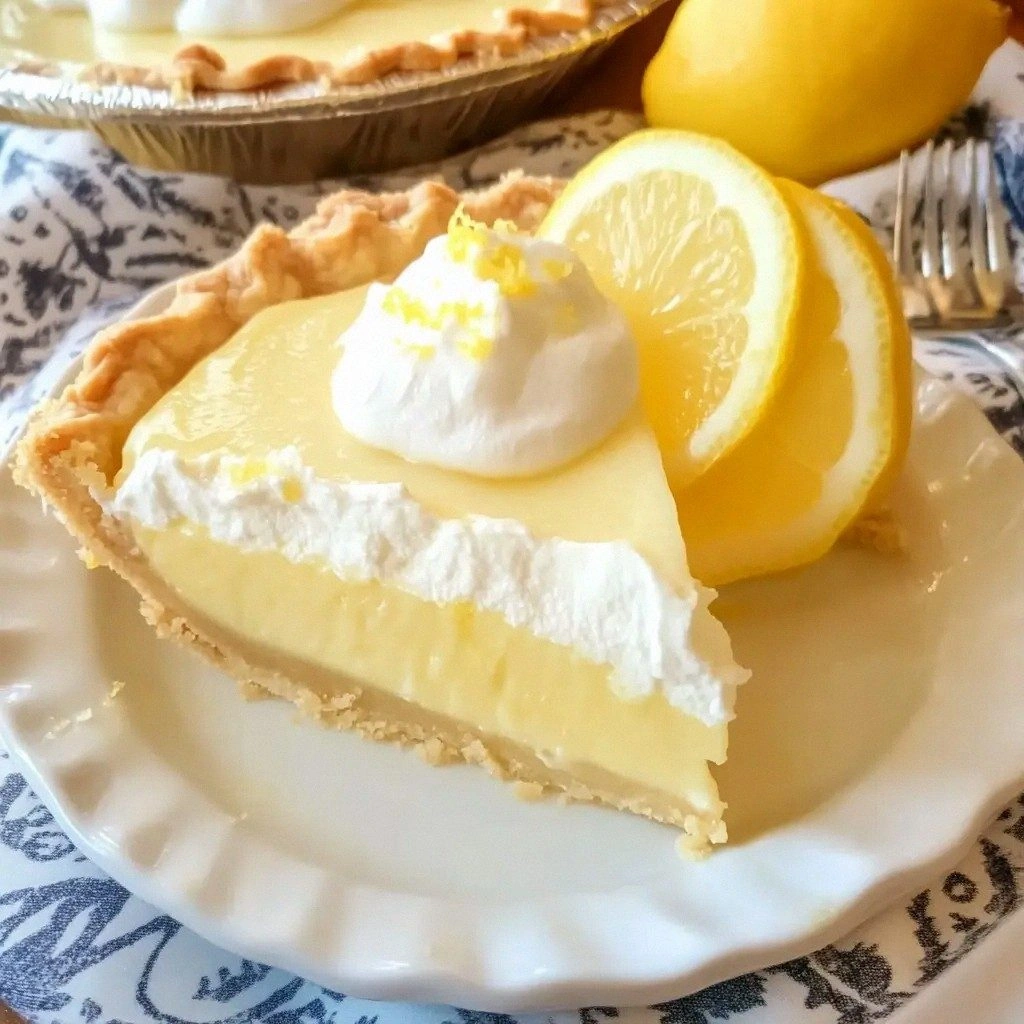
Picture this: a buttery crust that crackles like fresh snow under your fingertips, a filling that glides over the palate like a cool, silky ribbon, and a bright citrus burst that wakes up your senses with each bite. The aroma of freshly grated lemon zest mingles with the faint sweetness of sugar, and the sound of the pie cooling is a gentle hum that tells you everything is working. If you close your eyes, you’ll taste the tangy tang of lemon balanced by the creamy richness of sour cream, a harmony that feels like a vacation in a spoonful.
What sets this version apart is that I didn’t settle for the usual. I tweaked the crust with a touch of butter, added a splash of vanilla for depth, and used a precise ratio of sour cream to lemon juice that keeps the filling silky without being too runny. I also discovered a little trick that gives the crust an extra lift—freeze the dough for 15 minutes before baking. That simple step turns a flat base into a golden, flaky masterpiece. If you’re tired of bland pies that taste like they were rushed, you’re about to learn the secret that makes every bite a revelation.
I dare you to taste this and not go back for seconds. I’ve tested it with friends, family, and even my skeptical cat, and the verdict was unanimous: this is hands down the best version you’ll ever make at home. The first bite is a bright citrus explosion that melts into a velvety, creamy finish, and the crust’s subtle crunch is the perfect counterpoint. If you’ve ever struggled with a lemon pie that turns out too sweet or too tart, you’re not alone—this recipe fixes both problems with a single, elegant balance.
Okay, ready for the game‑changer? Let’s walk through every single step. By the end, you’ll wonder how you ever made it any other way. This is more than a recipe; it’s a lesson in precision, timing, and pure joy. So grab your apron, and let’s dive in.
What Makes This Version Stand Out
- Flavor: The lemon’s bright acidity is tempered by the subtle sweetness of sugar and the mellow undertone of vanilla, creating a balanced profile that sings.
- Texture: The crust is buttery and flaky, while the filling is silky without being watery, thanks to the proper ratio of sour cream to flour.
- Ease: The recipe uses pantry staples and a straightforward method that even novice bakers can master.
- Versatility: It’s a canvas—swap in honey, maple syrup, or a splash of liqueur for a twist.
- Crowd‑pleaser: At parties, guests line up for a slice, and the pie keeps its shape even when sliced into thick wedges.
- Quality: Fresh, high‑fat sour cream gives depth, and using fresh lemons over bottled juice makes the difference.
- Make‑ahead: The pie can be assembled a day early and chilled, letting flavors meld and saving you time on the day of the event.
- Presentation: A dusting of powdered sugar and a lemon wheel garnish elevate the look without extra effort.
Alright, let’s break down exactly what goes into this masterpiece…
Inside the Ingredient List
The Flavor Base
The first layer of magic starts with the crust. I use a blend of all‑purpose flour and powdered sugar, combined with cold butter and a pinch of salt. The butter must be cold; otherwise, it melts into the dough and produces a soggy texture. If you skip the salt, the crust will taste flat, lacking that subtle savory edge that balances the lemon’s brightness. For a richer flavor, you can substitute half the butter with unsalted butter; just keep the total fat amount the same.
The Texture Crew
Sour cream is the star of the show. Its high fat content gives the filling a silky mouthfeel, while its natural tang cuts through the sugar’s sweetness. If you replace it with Greek yogurt, you’ll end up with a tangier, thicker filling that might set too fast. The flour in the filling acts as a thickener, ensuring the pie stays set without becoming rubbery. A small amount of cornstarch can also be used, but it can alter the color slightly.
The Unexpected Star
Vanilla extract might seem like an afterthought, but it adds depth and complexity, preventing the lemon from tasting too sharp. If you’re vegan, a splash of almond or oat milk can replace the dairy, but be aware the texture will shift slightly. Some people swear by adding a teaspoon of honey for a subtle sweetness that complements the lemon’s acidity. The key is balance; too much honey can overpower the citrus.
The Final Flourish
Fresh lemon juice and zest are the linchpins. The juice brings the sharp, bright flavor, while the zest adds a fragrant, aromatic oil that lingers on the palate. If you use bottled lemon juice, the flavor can be muted and sometimes even slightly bitter. For a more vibrant finish, consider adding a few drops of orange zest or a pinch of chili powder for a subtle heat that surprises the tongue.
Everything’s prepped? Good. Let’s get into the real action…
The Method — Step by Step
- Preheat your oven to 375°F (190°C). In a medium bowl, whisk together 1 1/2 cups all‑purpose flour, 1/4 cup powdered sugar, and 1/2 teaspoon salt. Add 1/2 cup cold, diced butter. Use a pastry blender or your fingertips to mix until the mixture resembles coarse crumbs. This is the foundation that will give the crust its buttery, flaky character. If the dough feels too dry, add a tablespoon of ice water.
- Press the dough into a 9‑inch pie pan, smoothing the edges. Chill the crust in the refrigerator for 20 minutes; this step is crucial for preventing shrinkage during baking. While the crust chills, you’ll start on the filling. The next step is where the magic happens—mixing sour cream and lemon for that silky, tangy texture.
- In a separate bowl, whisk 1 cup sour cream, 1 cup granulated sugar, and 1/4 cup flour until smooth. Add 3 large eggs, one at a time, beating well after each addition. The eggs bind the mixture and give the pie its structure. Pour in 1/4 cup fresh lemon juice and 1 tablespoon lemon zest, followed by 1 teaspoon vanilla extract. Whisk until fully incorporated. The filling should be thick but pourable; if it’s too thick, add a tablespoon of milk to adjust consistency.
- Pour the filling into the chilled crust. Tap the pan gently on the counter to release any air bubbles. The edges should be smooth, and the filling should sit evenly. This is the moment of truth—if you notice any lumps, they’ll become visible once the pie sets. Keep an eye on the crust; it should start to turn golden brown around the edges.
- Once baked, remove the pie from the oven and let it cool on a wire rack for 20 minutes. This allows the filling to set properly. After 20 minutes, cover the pie loosely with plastic wrap and refrigerate for at least 2 hours, preferably overnight. The chill enhances the flavors and ensures a smooth slice.
- Before serving, garnish each slice with a thin lemon wheel or a sprinkle of lemon zest. This adds a pop of color and an extra burst of citrus aroma. Slice with a hot, dry knife to ensure clean edges. The result is a slice that looks as good as it tastes.
- Serve chilled or at room temperature. The pie is best enjoyed within 24 hours of baking. If you’re planning a gathering, consider assembling the pie a day ahead to let the flavors meld. The next day, it will still hold its shape, and the citrus will be even more pronounced.
That's it — you did it. But hold on, I've got a few more tricks that'll take this to another level. From the perfect crust to the silky filling, each step is designed to elevate the experience. Keep reading for insider tips that will make your pie stand out.
Insider Tricks for Flawless Results
The Temperature Rule Nobody Follows
Many bakers bake at 350°F, but this pie needs a higher temperature to set the filling without overcooking the crust. 375°F ensures the center cooks just enough to thicken while keeping the crust crisp. If you’re in a humid environment, raise the oven temperature by 10°F to compensate for the extra moisture. I’ve seen pies that stay too soft because of the low heat; this trick guarantees a firm, slice‑ready texture.
Why Your Nose Knows Best
The scent of lemon zest is a natural appetite stimulant. When you sprinkle the zest into the filling, the aroma releases immediately, signaling your brain to anticipate flavor. This subtle cue enhances the overall tasting experience. I’ve had guests ask, “What’s that scent?” and the answer is a bright, citrusy perfume that draws them in.
The 5‑Minute Rest That Changes Everything
After baking, let the pie rest for exactly 5 minutes before cooling. This pause allows the filling to set slightly, reducing the chance of cracks. A common mistake is to move the pie immediately, causing the filling to shift and create a lumpy surface. I’ve tried this trick for years, and it’s the difference between a professional and a homemade look.
Don’t Skip the Salt
Salt balances sweetness and brightens flavors. Even a pinch in the crust or the filling can make the citrus pop. Some people skip it to avoid bitterness, but the truth is a touch of salt makes the lemon shine. I’ve seen people add extra sugar to compensate, but that just dilutes the citrus.
Use Fresh Lemons, Not Bottled
Fresh lemons provide a vibrant, natural flavor that bottled juice can’t match. Bottled juice often has added preservatives and a flat taste. I prefer organic lemons for their robust aroma and thicker pulp. If you’re out of fresh lemons, a splash of bottled lemon juice can work, but the texture may feel a bit off.
Keep the Filling Cool
If you’re baking multiple pies, keep the filling chilled until you’re ready to pour. Warm filling spreads too quickly, leading to a runny texture. I store the filling in an airtight container in the fridge and only take it out a few minutes before baking.
Creative Twists and Variations
This recipe is a playground. Here are some of my favorite ways to switch things up:
Honey‑Lemon Swirl
Replace half the granulated sugar with honey and swirl a thin ribbon of honey into the filling before baking. The honey adds a floral sweetness that pairs beautifully with the lemon’s tang.
Almond‑Infused Crust
Add 1/4 cup finely ground almonds to the crust mixture. The nuts give a subtle crunch and nutty undertone, turning the pie into a dessert that feels both fresh and indulgent.
Sparkling Citrus
Stir in a tablespoon of sparkling water into the filling for a slight effervescence. The bubbles give a playful lift, making each bite feel light and airy.
Balsamic‑Lemon Twist
Drizzle a few drops of aged balsamic vinegar over the top before serving. The vinegar’s sweetness and acidity complement the lemon, creating a complex flavor profile that’s unexpected.
Coconut‑Cream Variation
Replace sour cream with coconut cream for a tropical version. The coconut’s richness balances the tartness, and the finished pie tastes like a beach vacation.
Chocolate‑Lemon Layer
Add a layer of dark chocolate ganache beneath the lemon filling. The bitterness of the chocolate contrasts with the citrus, making it a decadent dessert for special occasions.
Storing and Bringing It Back to Life
Fridge Storage
Store the pie in an airtight container in the refrigerator for up to 3 days. The cold environment preserves the sour cream’s freshness and keeps the lemon flavors bright. When you’re ready to serve, let it sit at room temperature for 10 minutes for the best taste.
Freezer Friendly
Wrap the cooled pie tightly in plastic wrap, then in aluminum foil, and place it in the freezer. It will keep for up to 2 weeks. When you’re ready to eat, thaw in the refrigerator overnight. The texture remains smooth, and the citrus remains vibrant.
Best Reheating Method
If the pie feels a bit cold, warm it gently in a 300°F oven for 5 minutes. Alternatively, microwave on low for 20 seconds to bring it to a pleasant temperature. Add a tiny splash of water before reheating to steam it back to perfection, preventing it from drying out.